Google hasn’t updated the Android version for Chromebooks for about two years but now the company has finally released an update which changes the Android version 9 to the latest Android 11.
The company has also changed the approach for running Android apps on Chrome OS. Instead of ARC++ that uses a native container, the Android 11 uses a VM approach called ARCVM, which is similar to Linux on Chrome OS.
If you want to try the Android 11 on your Chromebook, then here is a step-by-step guide for the same.

How to get Android 11 update on your Chromebook
Step 1: Open the Quick Settings panel on the bottom right corner and from the options, click on “Settings.”
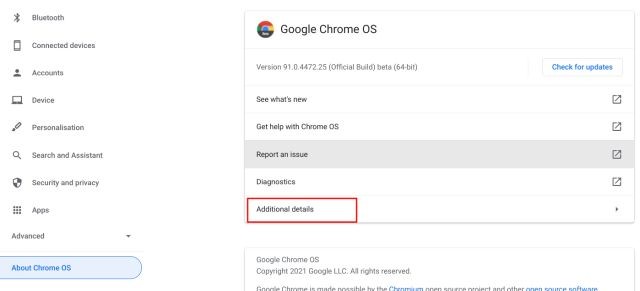
Step 2: When the Settings page opens, go to ‘About Chrome OS’ and then on the right-side pane, click on “Additional Details.”

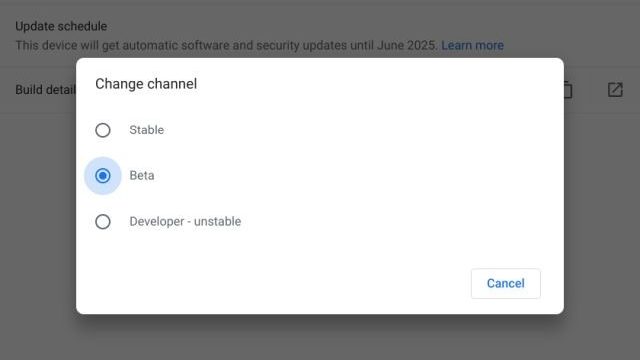
Step 3: Now, change the channel to ‘Beta’ by clicking on the ‘Change channel’ button.

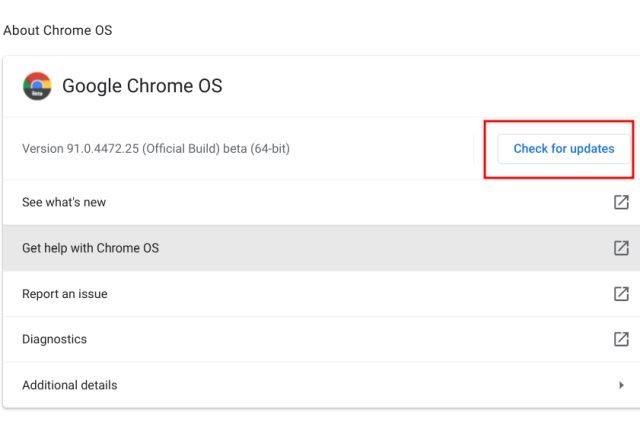
Step 4: After making the change, move back to the “About Chrome OS” page and then click on “Check for Updates.”

Now, the Chromebook will start developing the latest Chrome OS beta build. Once the update is installed, restart your device. If you are worried about your data, then there’s no need to worry as it will not delete your data.
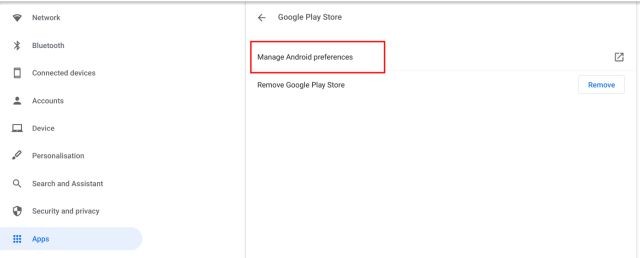
Step 5: Once your device restarts, again go to the Settings page and under the “Apps” section, click on “Manage Android preferences.”

Step 6: Now, go the System > About Devices to find the Android version.
If your Chromebook is based on the ‘Hatch’ board, you will receive the Android 11 update after moving to the Beta build. If you haven’t received the update, then try removing the existing Android setup and re-install it.

