Microsoft’s Windows operating system comes with the Wake on LAN (WoL) feature which is also available on the Windows 11 OS. It is a networking feature that has been used by IT professionals for years. As the name indicates, it allows you to remotely wake up a computer through a “magic” data packet sent from another PC on your network.
Its working is quite simple. The remote PC “listens” while in sleep or hibernation mode for the data packet and if the packet is detected, the PC wakes up. This allows easier access to other Windows machines across a network. If you want to enable Wake on LAN on Windows 11, then here is a step-by-step guide.
How to enable Wake on LAN feature in Windows 11
Step 1: Enter the BIOS Settings during the computer boot-up process.
Step 2: In the BIOS/UEFI section, go to “Power Options” or “Advanced” and then enable the “Wake on LAN” options.
Do note that the features or the sections will be different based on the computer’s manufacturer. So, you may want to check the PC maker’s support documentation for more details if you cannot find the option on your device.
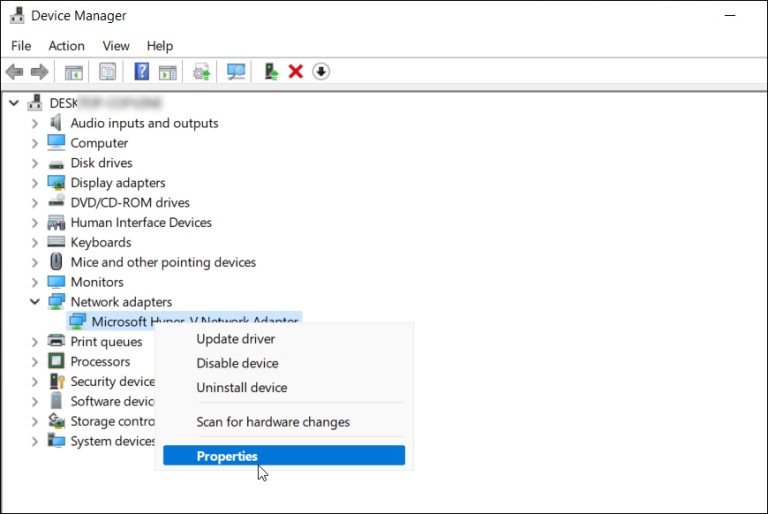
Step 3: Now, when the computer loads, open “Device Manager” by right-clicking the Start menu and selecting the option from the menu that appears.
Step 4: In the Device Manager, expand Network Adapters, right-click on the Ethernet adapter, and select Properties.

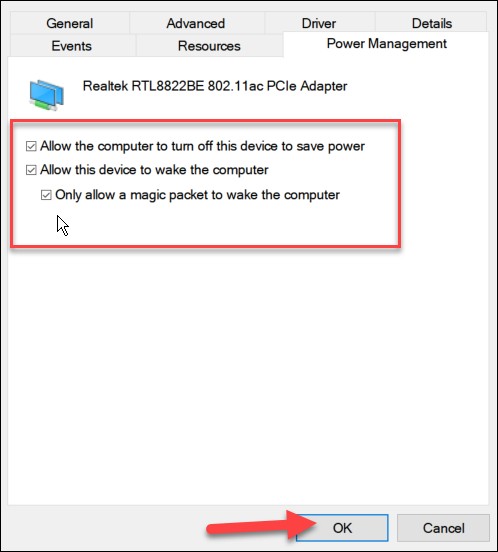
Step 5: In the Properties window that opens, go to “Power Management” and make sure to check all of the available options, including “Only allow a magic packet to wake the computer.”

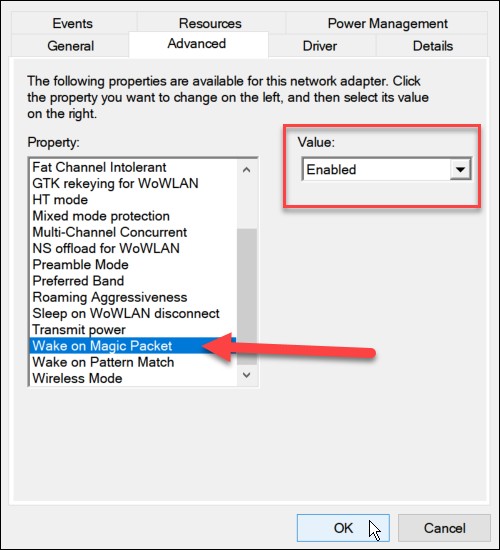
Step 6: Now, go to the “Advanced” tab and highlight the “Wake on Magic Packet” in the Property option, set the “Value” box to Enabled, and click OK.

That’s it. The Wake on LAN feature is now enabled on your Windows 11 computer and you begin using it. If it doesn’t work, you can try restarting your PC first and double-check that your PC is in sleep or hibernation mode for this to work. Also, make sure to connect your PC via Ethernet only.

