Apple iPhone models, starting from iPhone 14 lineup, come with support for the Wi-Fi Calling feature, which allows users to make or receive a phone call over Wi-Fi connections. The feature is especially useful for those who do not get good network reception and often face call drop issues.
Wi-Fi Calling, as the name indicates, uses a Wi-Fi connection for transmitting data and making or receiving calls on your iPhone, offering better call quality, but it requires the user to have a good Wi-Fi network.
When the feature is enabled and there is no Wi-Fi network, then the phone will automatically switch to the cellular network, ensuring that your phone is reachable.
In this step-by-step guide, we will show you how to quickly and easily enable the Wi-Fi Calling feature on your Apple iPhone.
How to easily enable Wi-Fi Calling on Apple iPhone
Step 1: Open the Settings application on your Apple iPhone.
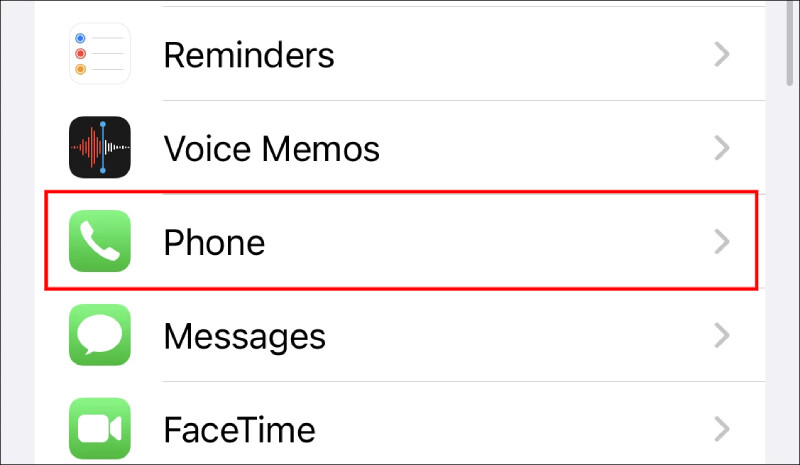
Step 2: When the app opens, tap on the “Phone” option from the list.

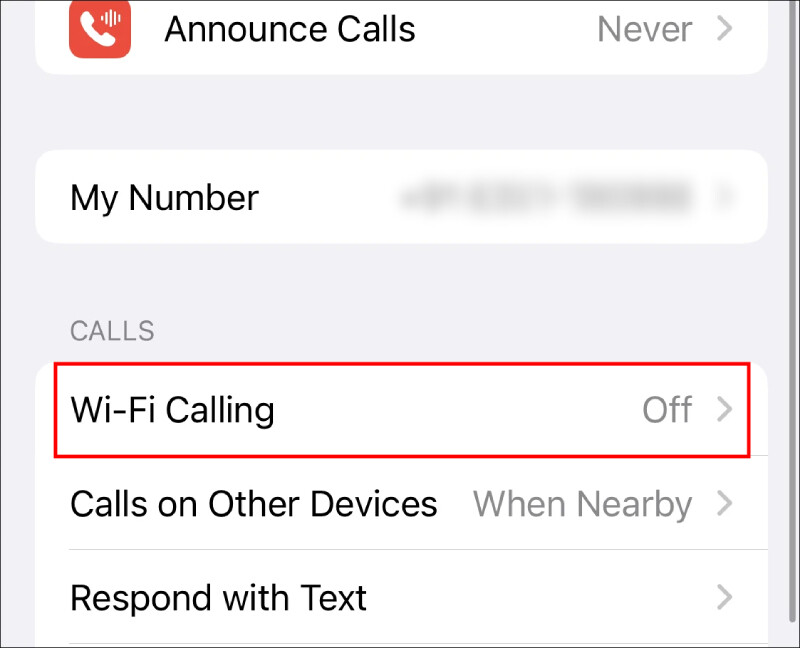
Step 3: In the Phone settings page, tap on the “Wi-Fi” calling option.

If you do not see the option, then it means that your network carrier does not support this feature.
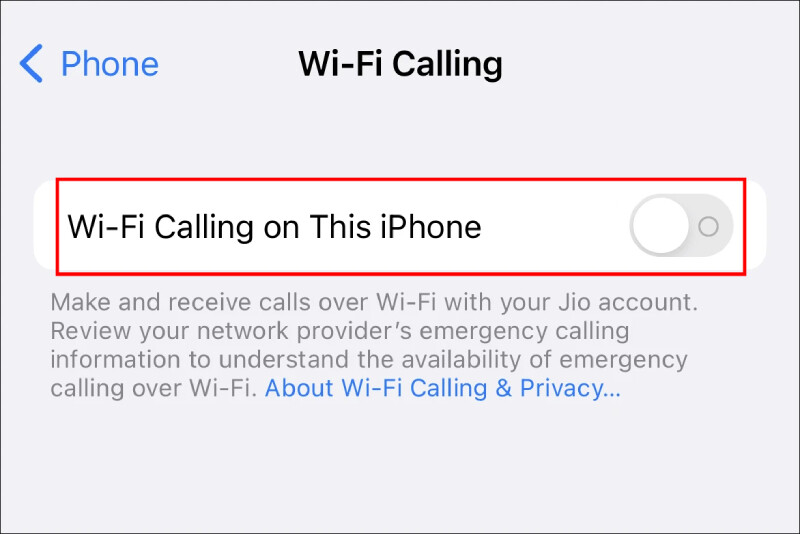
Step 4: On the Wi-Fi Calling settings page, toggle the switch On for the “Wi-Fi calling on this iPhone” option.

Step 5: When an alert box appears on the screen, tap on the “Enable” button.
That’s it. Once you have followed the above-mentioned step-by-step guide, the Wi-Fi Calling feature has enabled your Apple iPhone. Depending on your region, there may be an additional step when you will need to enter and confirm your address for the emergency services. The address or location will be shared with emergency services if needed, regardless of whether location services are enabled or not on your smartphone.

