Windows 11 operating system comes with a revamped interface compared to the Windows 10 OS but it also has some other features made especially for ease and convenience.
There’s a feature called “Voice Control” in the Windows 11 operating system that lets users have complete control over the computer hands-free through voice commands. While the feature is quite useful for visually impaired users, it is also a handy tool for normal users to just dictate commands to operate the system.
In this step-by-step guide, we will show you how to enable the Voice Access or Voice Control feature on your Windows 11 computer through the Settings app.
How to enable Voice Access feature in Windows 11
Step 1: Open the Settings app on your computer by either clicking on the app from the Start Menu or by searching for it.
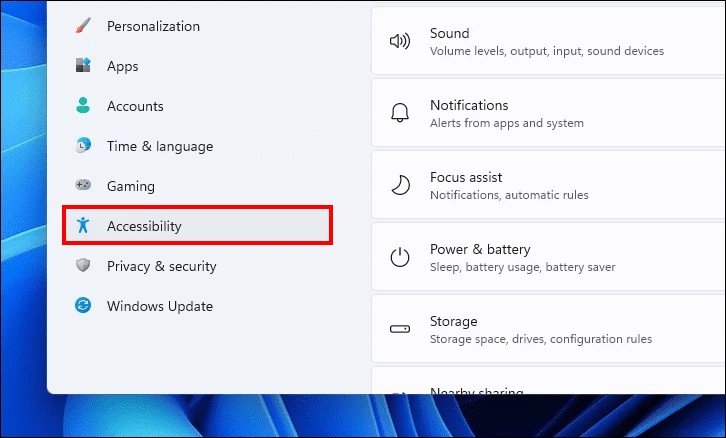
Step 2: When the app opens, click on the “Accessibility” tab present on the left sidebar.

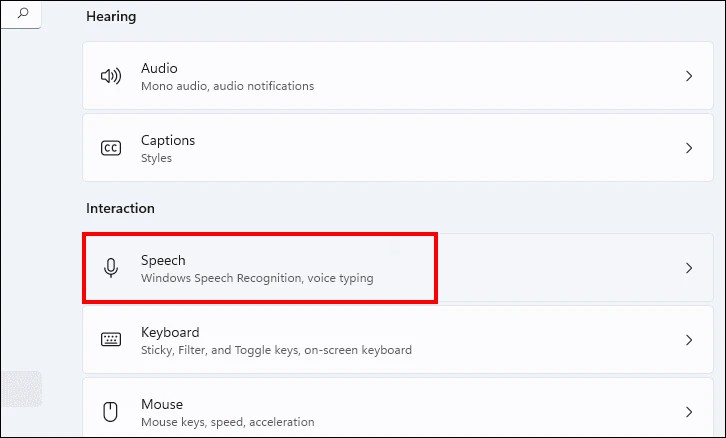
Step 3: On the right side, scroll down and locate the “interaction” section and then click on the “Speech” tile to continue.

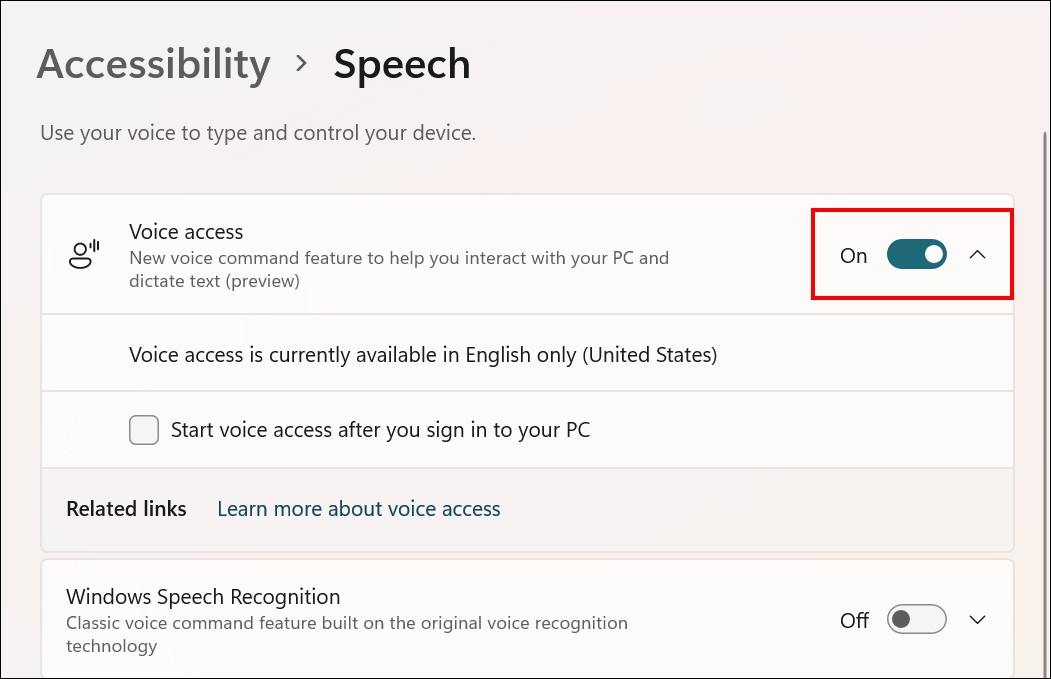
Step 4: After that, locate the “Voice access” tile and turn the toggle switch ON to enable the feature.

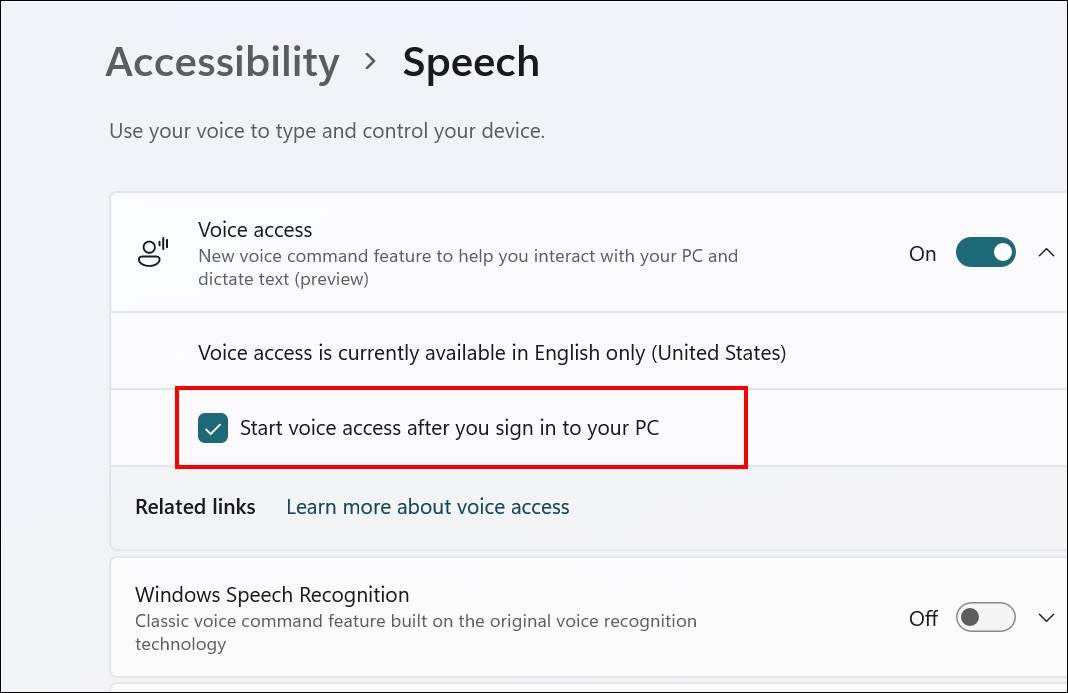
Step 5: Then, click on the downside arrow at the far right of the card and then select the checkbox for the “Start voice access after you sign in to your PC” option.

That’s it. Once you have followed this guide, then the Voice Access feature will be enabled on your Windows 11 computer, and the Voice control feature will always be enabled after signing in on your computer.
Do note that if you are enabling the feature for the first time, then you may be asked to download a speech model. Once the download is finished, you will see a “Voice access guide” on your screen and follow it to learn more about the feature.
