Microsoft recently announced its latest operating system — Windows 11. One of the requirements for installing this newer version is to enable a TPM chip or Trusted Platform Module on your device.
While your device may include a TPM chip, there’s a possibility that it isn’t enabled by default and you may need to enable it manually for using features like BitLocker on Windows 10 or upgrade the system to Windows 11.
TPM is basically a tamper-proof chip that is designed to generate, store, and protect encryption keys and is usually embedded on the motherboard.
For installing Windows 11 and to check the compatibility with the system Microsoft has offered the Windows PC Health Check app. If the test fails because of TPM and you are not sure how to enable it, then here is a step-by-step guide for the same.

How to enable TPM chip in Windows 10
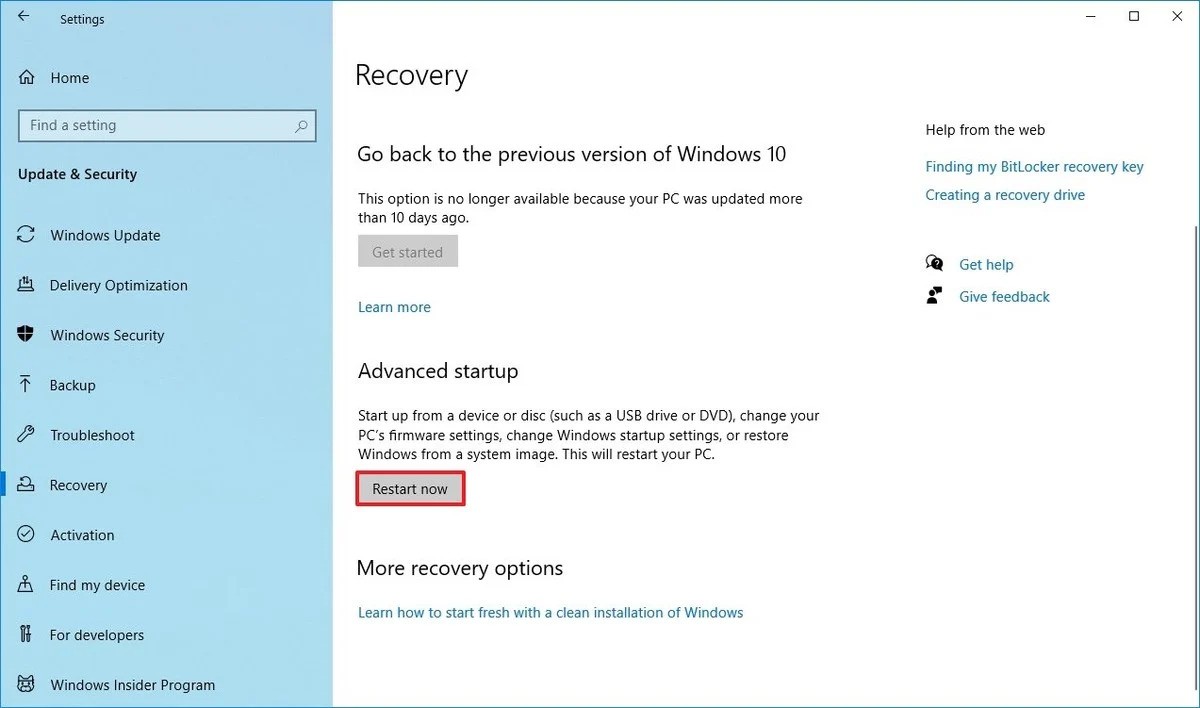
Step 1: Open Settings on your computer and go to “Update & Security.”
Step 2: Now, click on “Recovery” and under the “Advanced startup” section, click the Restart now button.

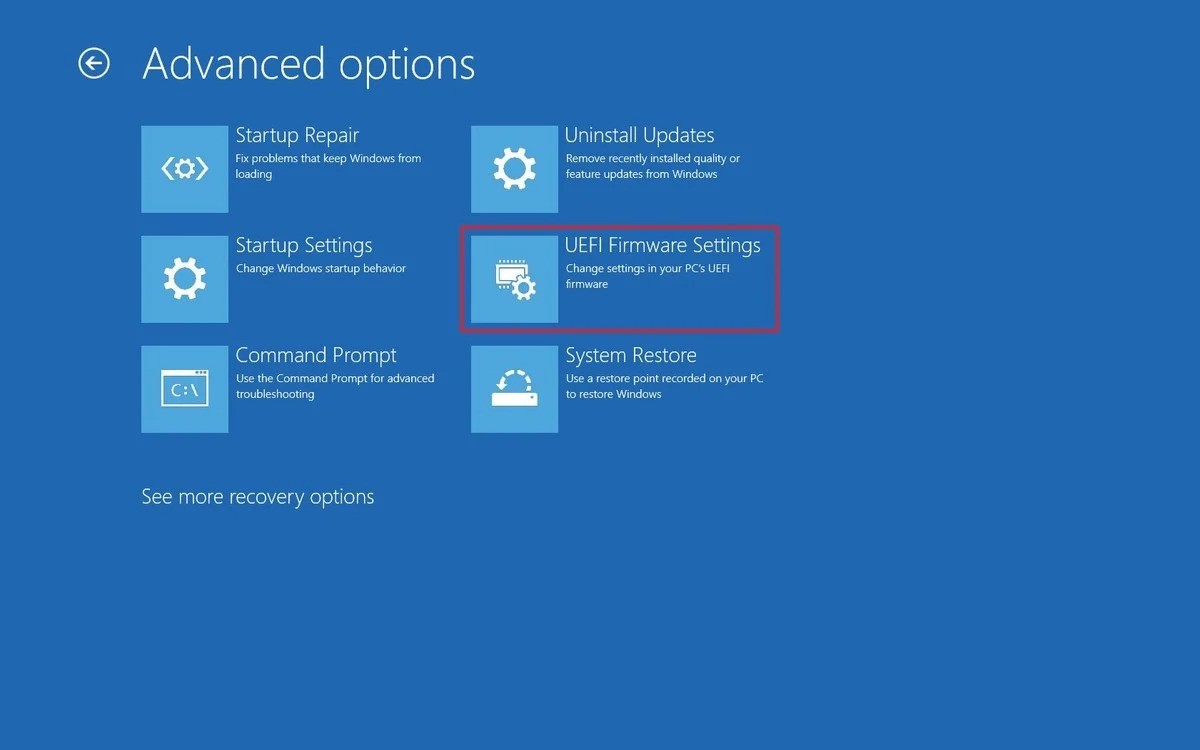
Step 3: From the options, click on “Troubleshoot” and then “Advanced Option” to select the “UEFI Firmware settings” option.
Step 4: After completing the above steps, click on “Restart” and then open the security settings page on your device.

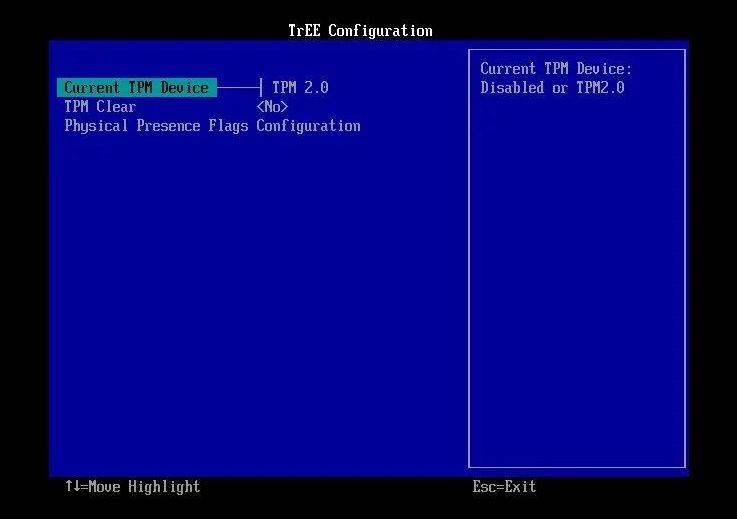
Step 5: Now, select the Trusted Platform Module (TPM) option and press Enter.
Step 6: After that, select the “Enabled” option and press Enter.

Step 7: You can now exit the UEFI settings and then confirm the changes to restart your Windows 10 computer.
Once you have completed the above-mentioned steps, the security module will enable to allow you to configure and use features like BitLocker or pass the compatibility check to install the latest Windows 11 operating system.
