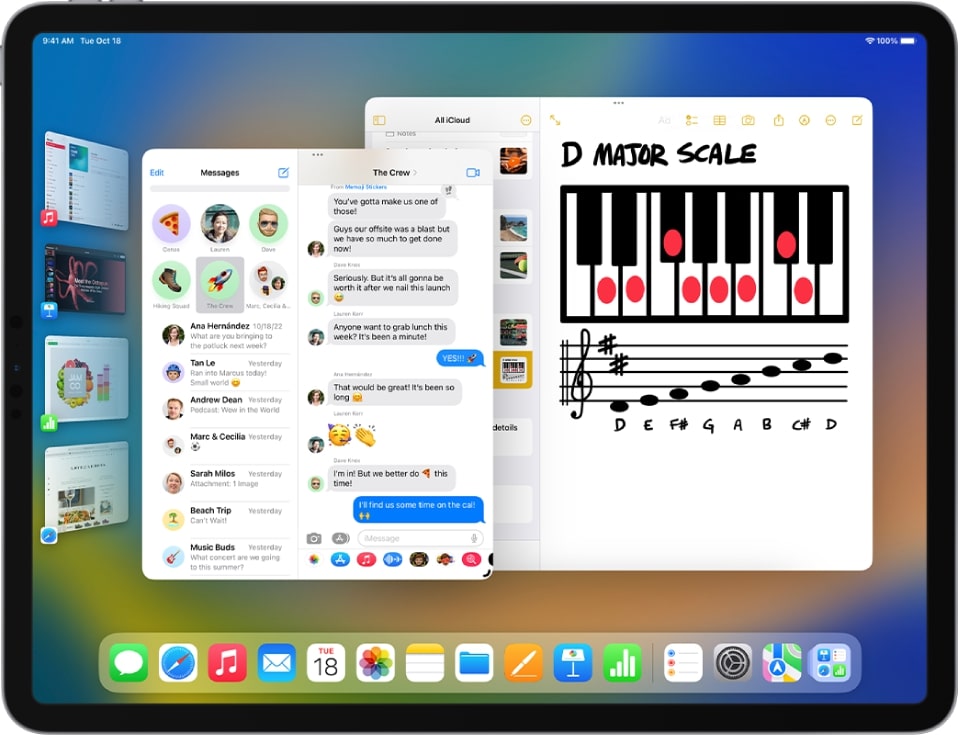
A few months ago, when Apple announced the new iPadOS 16 for its iPad tablets, the company introduced several new features and functionalities and one of the new additions is Stage Manager.
Stage Manager is a new productivity tool from Apple which can be accessed from the control centre on both Mac and iPad. It lets user automatically organize up to eight open windows on the left side of your screen while keeping an active app front and center.
In this step-by-step guide, we will show you how to quickly and easily enable the Stage Manager feature on your Apple iPad if you are running the iPadOS 16.1 or later version.

How to enable Stage Manager feature on iPad
Step 1: Open the Settings application on your iPad.
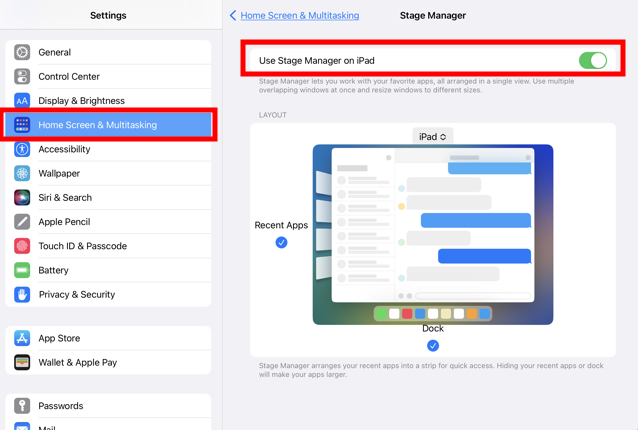
Step 2: When the app opens, choose the “Home Screen & Multitasking” option.
Step 3: After that, tap on the “Stage Manager” from the bottom of the screen.
Step 4: In there, enable the toggle switch for the “Use Stage Manager on iPad” option.

That’s it. Once you have followed this step-by-step guide on your Apple iPad, then the Stage Manager feature has been enabled on your tablet.
When the feature is active, it allows users to arrange active apps into a strip on the left side of the display for quick access. When the Recent Apps or the Dock is hidden, the apps appear larger on the tablet’s display and the settings can be easily enabled or disabled on the iPad.
The Stage Manager feature is only available for select iPads, which is a limited list. The devices supported for the feature are listed below:
- iPad Air (5th generation)
- iPad Pro 12.9-inch (3rd generation and later)
- iPad Pro 11-inch (1st generation and later)

