Apple Watch is one of the most popular wearable devices available in the market, thanks to its wide range of applications and features. Among several features available on the smartwatch, one of them is taking screenshots, which can come in handy when you want to take a screenshot of something important on your device or want to share it with your friends or family members.
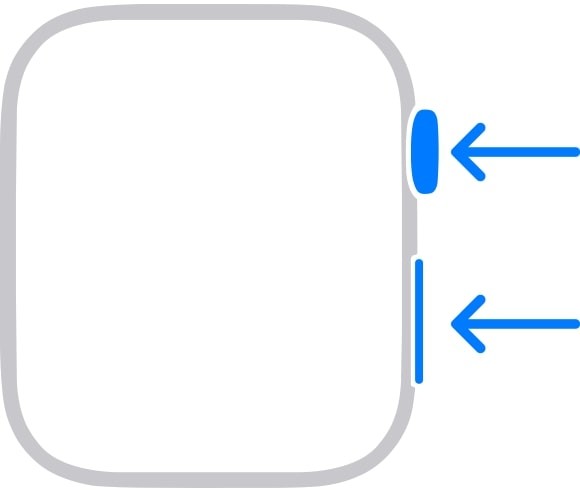
When a user takes a screenshot on the Apple Watch, it gets stored or saved in the Photos app on the connected iPhone, enabling users to quickly share it with others, if they need to or want to. Taking screenshots is also quite simple as all the user needs to do is press the power button and the home button together.
In this step-by-step guide, we will show you how to quickly enable the screenshots functionality on the Apple Watch as well as using the Apple iPhone.

How to enable screenshots functionality on Apple Watch
Step 1: Open the App Screen on your Apple Watch. To do this, press the Crown or Home Button on the smartwatch.
Step 2: When the app screen opens up, tap on the “Settings” app or the gear icon from the list or grid.
Step 3: On the Settings page, scroll down and tap on the “General” option.
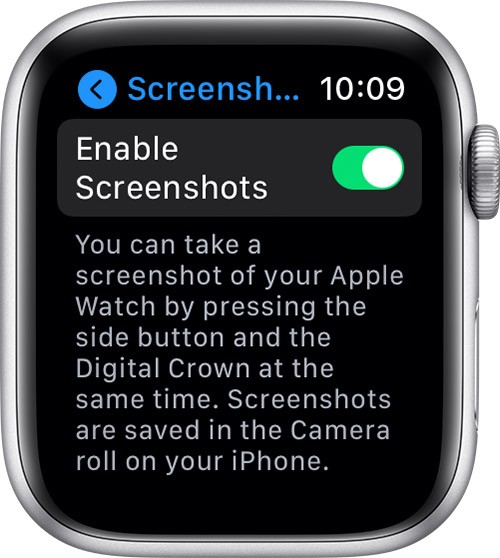
Step 4: When the General settings page loads, scroll down and tap on the “Screenshots” option.

Step 5: After that, just toggle ON the switch for the “Enable Screenshots” option.
That’s it. Once you have successfully completed all the steps mentioned above in this guide, the screenshots functionality gets enabled on your Apple Watch. You will now be able to take screenshots on your Apple Watch just by pressing the Crowne or Home Button and the Power Button together.

While the above-mentioned guide is for enabling screenshots on Apple Watch from the smartwatch itself, the same can be done through the connected Apple iPhone also. For that, you just need to open the Watch application on your iPhone and follow the same process as mentioned above in this guide.

