Microsoft’s Windows operating system comes with support for remote desktop features that enable users to access files and apps remotely using the Remote Desktop Protocol. This can be used to access someone else’s computer without being physically present at that location.
In this step-by-step guide, we will show you how to enable the Remote Desktop connection feature on your Windows 11 computer. While there are several ways to enable this RDP feature, we will be using the Command Prompt in this guide.

Enable Remote Desktop in Windows 11 via CMD
Step 1: Open the Command Prompt on your Windows 11 computer in Administrative mode. For this, click on the Start menu and search for “cmd” and from the search results click on the “Run as Administrator” option for the Command Prompt.
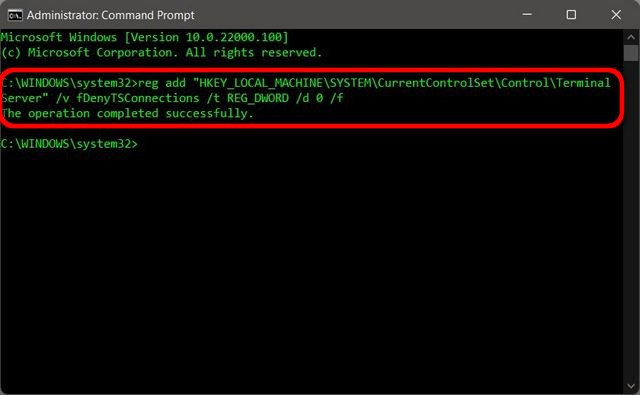
Step 2: When the Command Prompt opens on your device, type in the following:
reg add "HKEY_LOCAL_MACHINE\SYSTEM\CurrentControlSet\Control\Terminal Server" /v fDenyTSConnections /t REG_DWORD /d 0 /f
Once you hit enter after typing the above command, the remote desktop feature will be enabled on your Windows 11 computer.
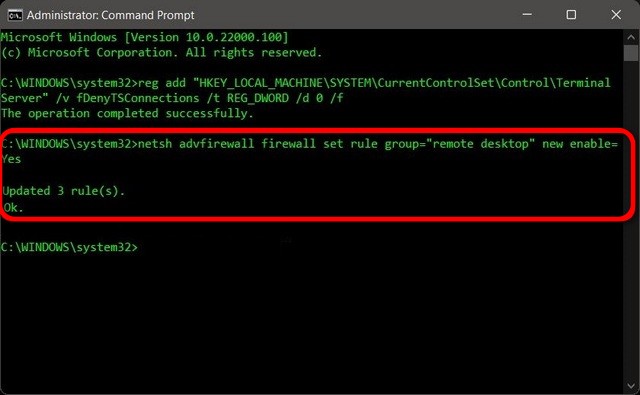
Step 3: Now, to allow remote desktop through the Windows Firewall, enter the following command in the command prompt:
netsh advfirewall firewall set rule group="remote desktop" new enable=Yes


That’s it. If you have executed the above-mentioned commands without any error messages, then you will be able to use Remote Desktop to access other devices remotely.

