Windows operating systems come with a built-in feature named Remote Desktop. It was introduced in Windows XP and is still a part of the latest Windows 11 operating system. It allows remote access or control over another system from anywhere through Windows Remote Desktop Protocol (RDP).
By default, Remote Desktop access is disabled on Windows 11. To use the remote connection feature, you must first enable Remote Desktop Protocol (RDP). In this step-by-step guide, we’ll guide you through the process of enabling the Remote Desktop feature on your Windows 11 computer.

Enable Remote Desktop Connection in Windows 11
Step 1: For remote connection, you need to enable Remote Desktop settings. For this, press the Windows + I keys on your keyboard to open the Settings application. You can also open the Settings app through the Start menu.
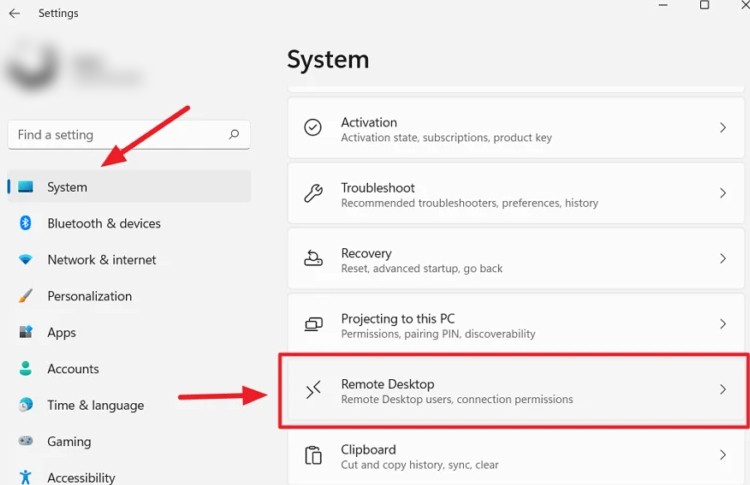
Step 2: In the Settings app, click on the “System” in the left-hand section, and from the right side, select the “Remote Desktop” option.

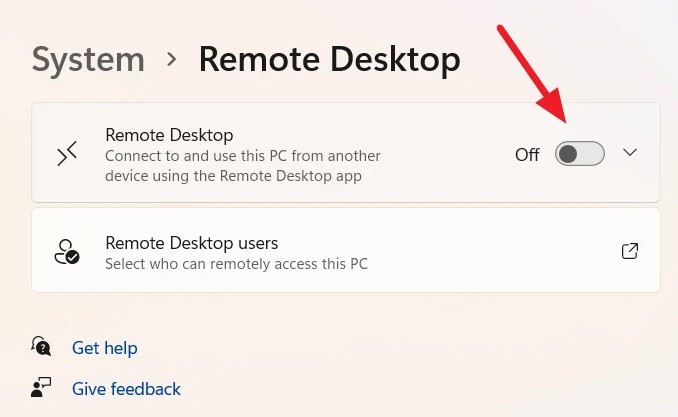
Step 3: After that, click on the toggle switch to turn it ‘ON’ which will enable the Remote Desktop feature.

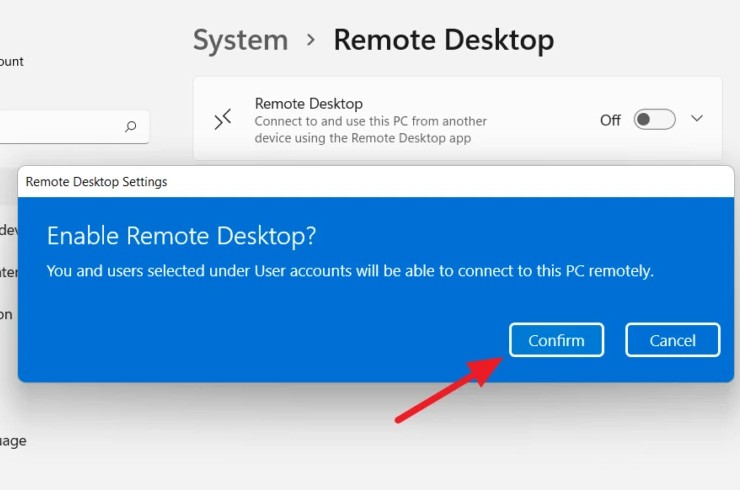
Step 4: Once you do that, you will receive a confirmation pop-up. Click “Confirm” to proceed with enabling the feature.

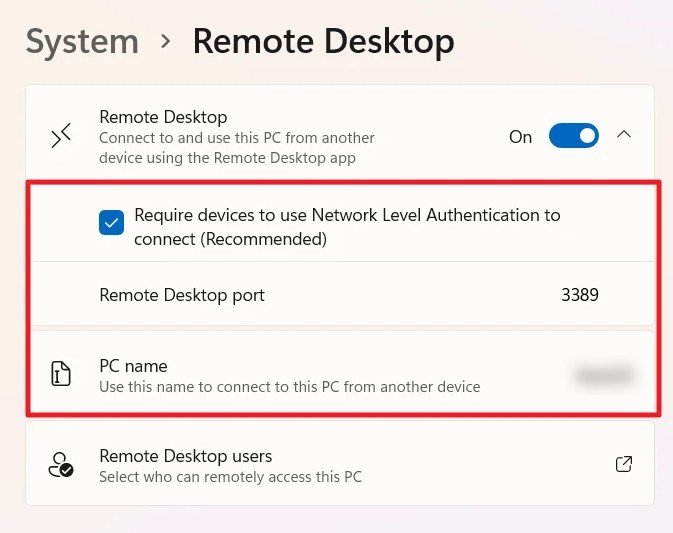
Step 5: You will now get an option to “Require computers to use Network Level Authentication (NLA) to connect.” It adds security to remote connections by imposing authentications for each connecting user, before PC access.

Once the Remote Desktop feature is enabled, users can easily connect their PC to other computers to troubleshoot, access files, apps, network resources, and so much more without physical presence.
Do note that the Remote Desktop is only available in Windows 11 Pro, Educational, or Enterprise SKU, and full access to RDP is denied if you have a Windows 11 Home edition. But Windows 11 Home can still be used as a client to connect to other PCs, but not the other way around.

