Apple introduced its new Translate app with the latest iOS 14 update. As the name itself suggests, the app allows quick translations between different languages and competes with the likes of Google Translate.
In the default settings, the app users cloud services for the translations. However, you can change it to make the app work locally, without the need for an internet connection. Apart from working offline without a network connection, the offline feature is also good for those who want to protect privacy as it doesn’t send data to cloud service.
Do note that Apple says that the result of the Translate app in the offline mode might not be as accurate as online-powered translations. If you want to enable the offline line, follow this step-by-step guide.
Enable Offline Mode for Translate app on iPhone
Step 1: Open the Settings app on your iPhone.
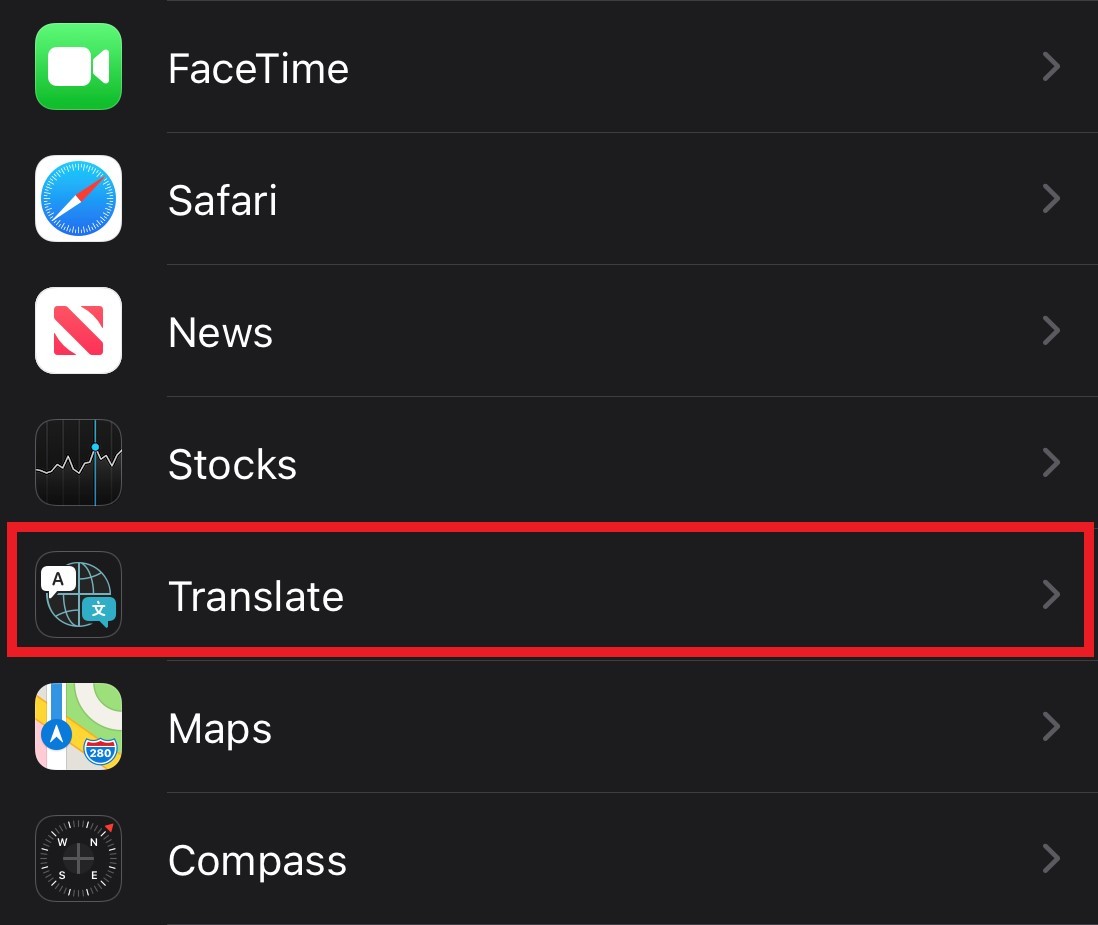
Step 2: Scroll down and tap on the Translate option.

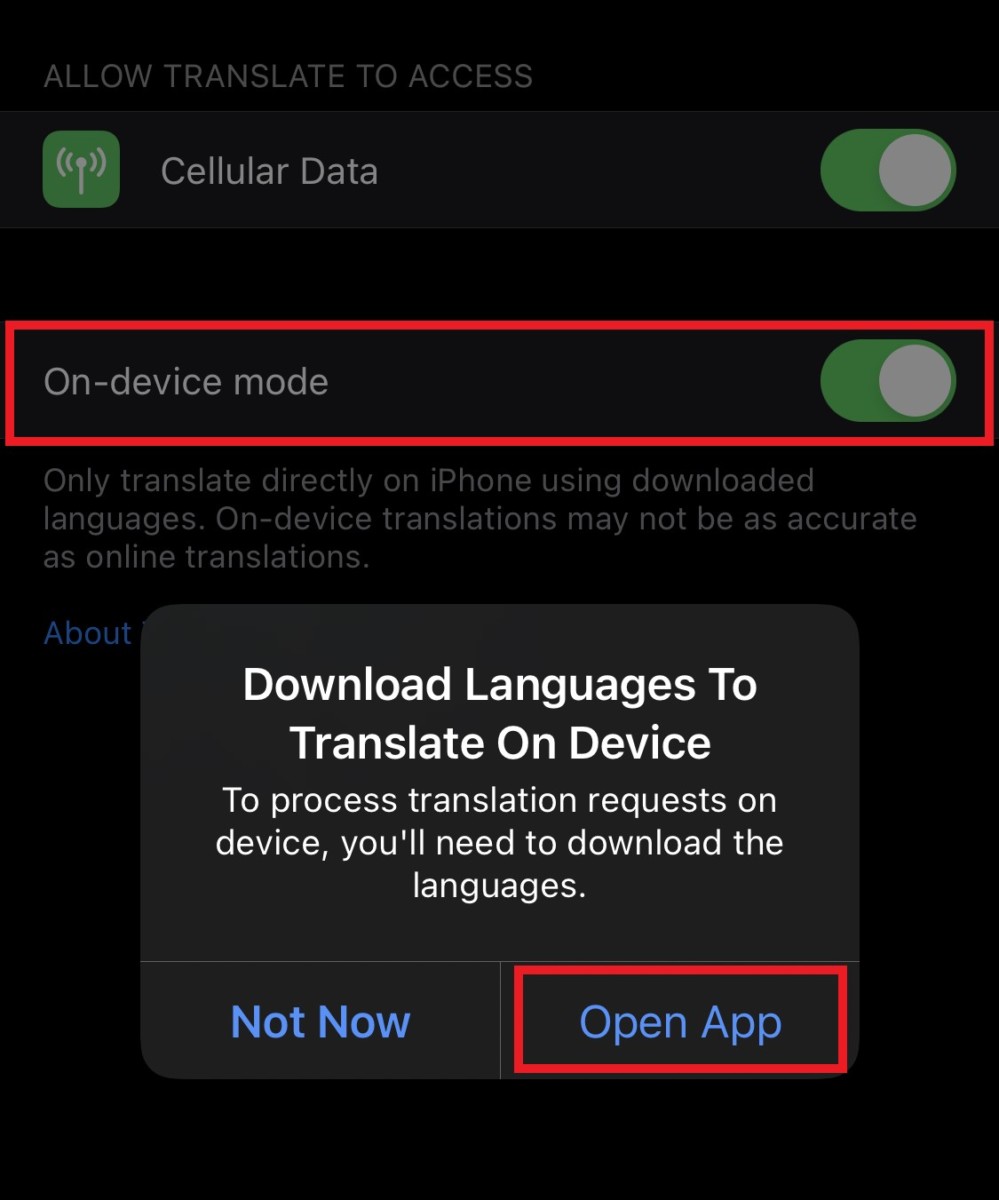
Step 3: In the Translate settings page, enable the toggle option for On-device mode.
Step 4: You will now see an alert box on the screen asking you to download the languages for the app to work in offline mode. Click on the Open app option.

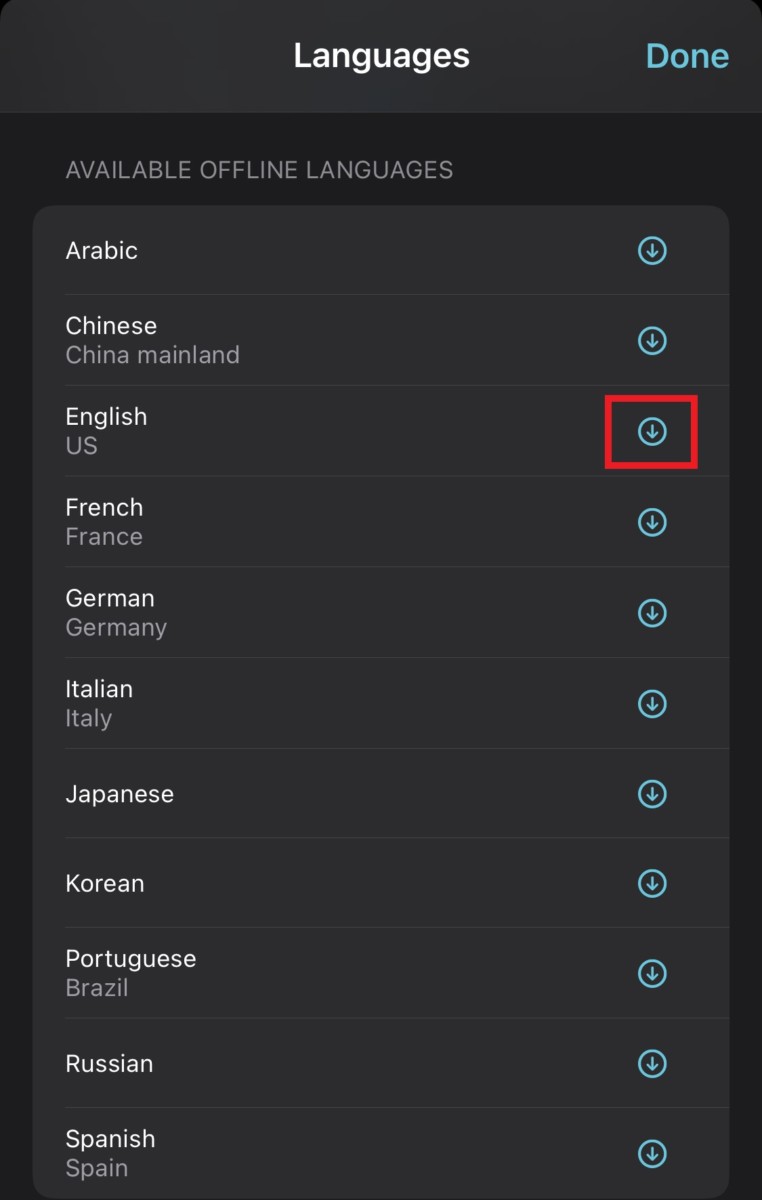
Step 5: Now, click on either of the two languages that you see on the screen. Once you tap on it, scroll down and you will see a list of available languages under the Available Offline Languages section.
Step 6: Besides the name of the language, you will see a download icon. Click on the download option for the languages that you need to work offline. Once the languages are downloaded, you will see a checkmark instead of the download icon.

Step 7: After you are done downloading languages, tap on Done in the top-right corner.
Now, the Translate application will work as usual on your iPhone, even when you are not connected to the internet and all the translations will stay on your device.
