The usage of Microsoft Teams has surged since the pandemic and has become one of the heavily used platforms for several organizations. And since its popularity is rising, the company has been introducing many new features.
One of the interesting features of Microsoft Teams is Noise Suppression. As the name itself indicates, it suppresses the noise during a call or meeting, eliminating the noise of the vacuum, a/c compressor, fans, etc.
In this step-by-step guide, we will show you how to enable this Noise Suppression feature in Microsoft Teams.
Enable Noise Suppression in Microsoft Teams
Step 1: First of all, open the Microsoft Teams application installed on your computer.
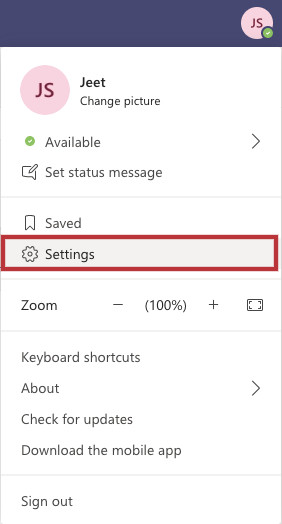
Step 2: Now, in Microsoft Teams, click on your profile at the top-right corner.

Step 3: From the drop-down menu that appears, select the “Settings” option.
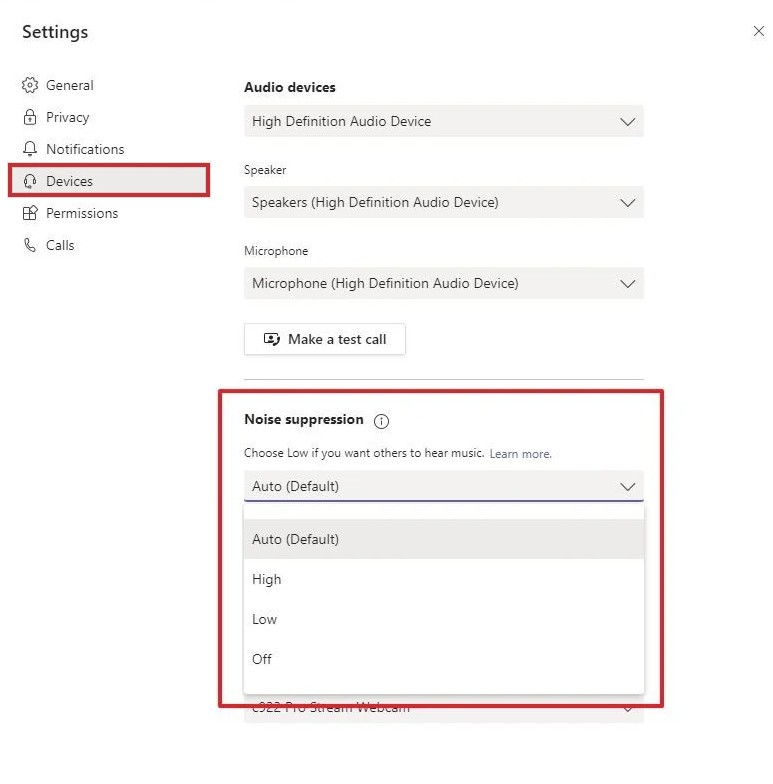
Step 4: In the Settings menu, select “Devices” from the left-side pane.

Step 5: Under the Noise Suppression level section, select the level that you want to have for the feature. There are three options to choose from:
- Auto – The program analyzes and determines the suppression automatically.
- High – Suppresses all background noise except speech. But it only works on processors with Advanced Vector Extensions 2 (AVX2) support and uses more system resources.
- Low – It eliminates specific background noises like air conditioners, computer fans, vacuums, etc.
That’s it. Once you complete these steps, calls should not have loud background noise. To disable the feature, you can follow the same steps as mentioned above, and in step 5, select the “Off” option.
If you do not see the feature available on your account, make sure that you are running the latest version of Microsoft Teams and if not, then update it to the latest version.
