Nowadays, most of the work is done through computers and laptops and people are staring at the computer screens all day long. With the increased usage of computers, it leads to an adverse impact on the person’s health.
The major reason behind that is the Blue light from VDUs. However, the Windows 10 operating system comes with a built-in feature called Night Light. When the feature is enabled, it reduces the Blue light on the screen and gives a warmer tint.
In this step-by-step guide, we will show you how to enable the Night Light feature and schedule it to trigger automatically to reduce blue light and protect your eyes.
Enable Night Light in Windows 10
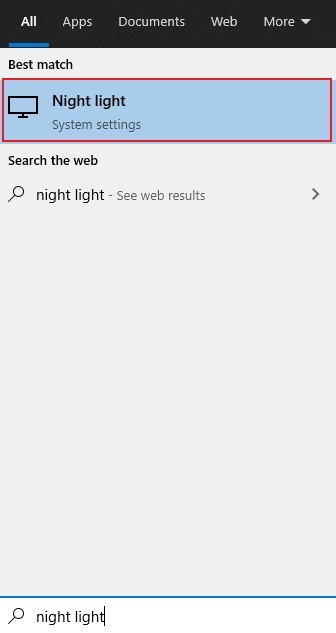
Step 1: Open the Start Menu on your computer and type “night light”.

Step 2: From the search results, click on the Night Light. This will directly open the Night Light section in the Settings app.
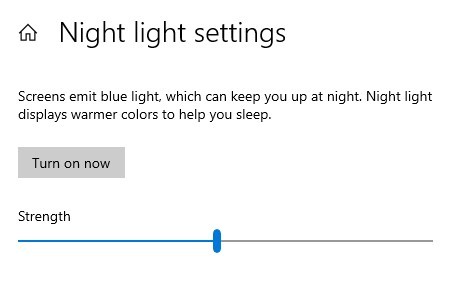
Step 3: Now, click on the button “Tun on now” to enable the Night Light feature.

Step 4: To adjust the tint on the screen, drag the slider to the left and light. Changing the position of the slider will adjust the blue light on the screen.
Step 5: Once you have found the appropriate warmer screen tint, stop adjusting the slider. That’s it.
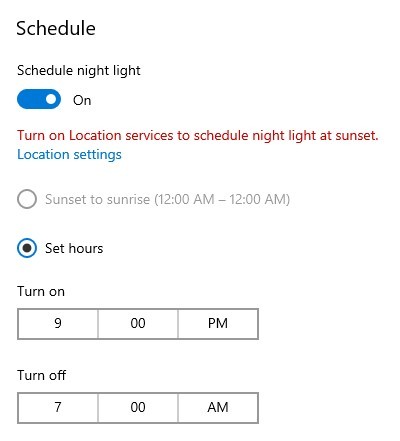
Step 6: If you don’t want to have the warmer tint or the Night Light enabled all the time and want to schedule the timing for the same, you can do so.

Step 7: In the Schedule section right below it, enable the toggle to schedule it. You can then set hours and time to turn the feature on. You can also set it to run automatically at sunset and close disable at sunset, but you need to give it location permission.
You can also check out our other Windows guide to make your experience even better by customizing the operating system as per your needs. We have also covered quite a few guides related to macOS and Chromebook as well.

