Apple MacBook series laptops come running the macOS operating system and the company has a separate OS for the smartphones, which is called iOS. Although both these systems are drastically different, the company is trying to introduce features that bridge the gap between the two.
One of the features that the macOS is getting from the iOS is battery charging optimization. With the latest macOS Monterey, the Cupertino-based technology giant is offering a Low Power Mode as well as the High Power Mode for charging the battery of the MacBook in a bid to expand the battery life and improve the performance.
When the Low Power Mode is enabled in Apple MacBook, it reduces energy usage and operates more quietly. It can be enabled if the device is running out of juice and you want to use it for less resource-intensive tasks.
In this step-by-step guide, we will show you how to quickly enable the Low Power Mode for extending the battery life on Apple MacBook laptops.
How to enable Low Power Mode in Apple MacBook
Step 1: Open the System Preferences application on your Mac device by clicking on the Apple icon from the top-left corner of the screen and then selecting the “System Preferences” option from the list.
Step 2: When the System Preferences application opens, click on the “Battery” option.
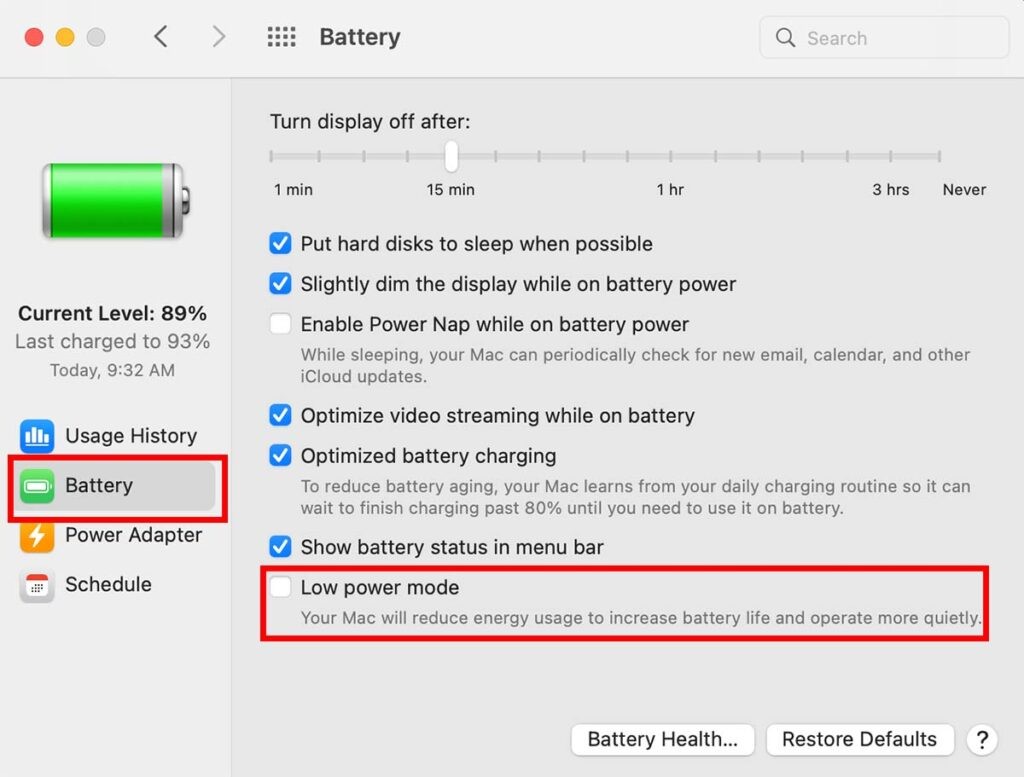
Step 3: Select the “Battery” option from the sidebar and enable the “Low Power Mode” option.

That’s it. Once you have followed the above-mentioned steps on the MacBook, the Low Power Mode will be enabled on the laptop. There’s also another way to enable the Low Power Mode by clicking the Power Adapter and then checking the box for the Low Power Mode when the laptop is plugged in for charging.

