Windows 10 operating system comes with support for Hibernation which is a power-saving feature. It basically allows users to shut down or turn off the system but the system state is saved and resumes when the system is turned on again.
The feature is quite similar to Sleep mode but while sleep mode saves the progress in RAM, the Hibernate feature saves the progress in the hard drive, enabling users to completely shut-off the system.
If your Windows 10 computer doesn’t have the Hibernate option, you can enable it on your system. While there a few methods to do so, here is a guide explaining how to enable hibernate mode in Windows 10 using Registry Editor.
How to Enable Hibernation in Windows 10
Step 1: First of all, open the Windows Registry Editor on your computer. For this, click the Start menu and search for “Regedit” and select the first option from the results.

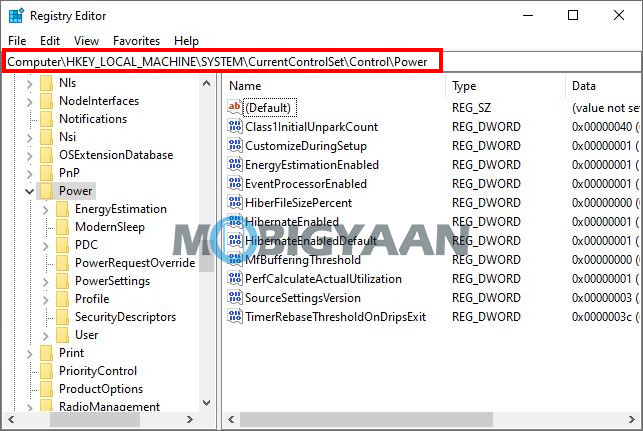
Step 2: Now, in the Registry Editor, navigate to the following location:
HKEY_LOCAL_MACHINE\SYSTEM\CurrentControlSet\Control\Power

Step 3: On the right-side panel, double-click on the key named “HibernateEnabled”.
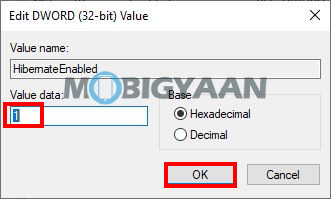
Step 4: Change the value data from ‘0’ to ‘1’ if you want to enable the Hibernate option on your computer. To disable, change the value from 1 to 0.

Step 5: Once done, click on the OK button and then restart your computer for the changes to take effect.
Now, when the computer starts, you will have the option to put your system into hibernation when clicking the power button. Do note that enabling this option will take up some space on your system drive.

