The Windows 11 operating system from Microsoft comes with support for several biometric-based devices unlocking features, including facial recognition through Windows Hello.
The feature has been around for many years and is being offered as a way to ditch passwords and PINs in favor of a more secure authentication method such as fingerprint and face. However, those features require hardware like a fingerprint reader and an infrared or Intel RealSense camera.
In this step-by-step guide, we will show you how to enable the facial recognition feature through Windows Hello on Windows 11 computer.
How to enable facial recognition on Windows 11
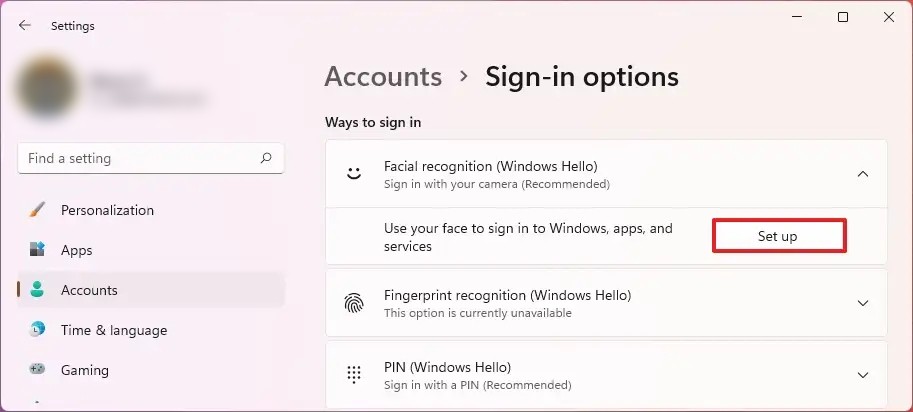
Step 1: Open the Settings application on Windows 11 computer. For this, open the Start Menu and click on the Settings app or search for the application and select it from the search results.
Step 2: When the Settings app opens, click on the “Accounts” option from the left sidebar.
Step 3: After that, click on the “Sign-in options” from the right side of the window.

Step 4: Under the “Ways to sign in” section, select the “Facial recognition (Windows Hello)” setting.
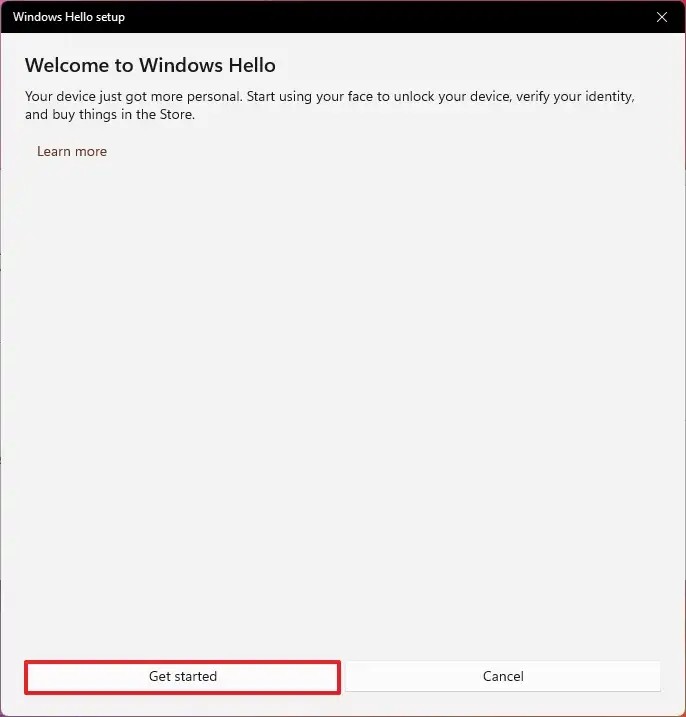
Step 5: Once that is done, click on the “Set up” button and then click on the “Get started” button.
Step 6: You will now be asked to confirm your password or PIN. Do that.

Step 7: After that, look directly into the camera to create a facial recognition profile.
Step 8: When the process gets completed, click on the “Close” button.
That’s it. Once you have completed all the above-mentioned steps, you can lock the device by pressing the Windows + L keys and then use facial recognition to unlock the system by looking into the camera to sign in.
While the feature is quite useful, there may be some issues every now and then. If that is the case and the sign-in experience isn’t as good as you expected, then you can click on the “Improve recognition” option under the “Facing recognition (Windows Hello)” settings to keep training and improving the system.

