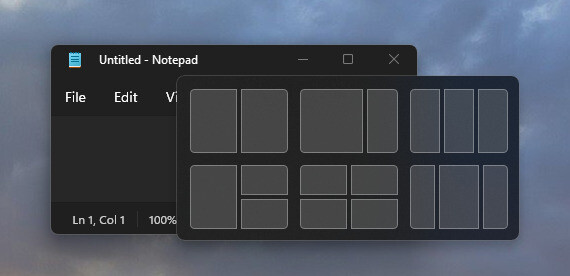
The Windows 11 operating system from Microsoft comes with a new snap layouts feature which enables users to use use snap windows in different styles on the desktop. The snap layouts feature can be accessed by hovering the mouse over a window’s maximize button or by simply pressing the Windows + Z keys on the keyboard.
When the Snap layouts feature is invoked, it shows the available layouts from which the user can click on a zone in a layout to snap the window in that particular zone and then use the Snap Assist feature to finish building the entire layout of windows. Also, the snap layouts are tailored to the current screen size and orientation, including support for three side-by-side windows on large landscape screens and top/bottom stacked windows on portrait screens.
If a user hovers the mouse over the window’s maximize button, the system will show the layouts grid, allowing users to select where they want to position the window. The feature is enabled by default, but can disable it or if it’s already disabled, then you can enable it.
In this step-by-step guide, we will show you how you can easily and quickly enable or disable the Show Snap Layouts with Hover on Maximize button in the Widows 11-powered computer using the System Settings application.

How to enable or disable Show Snap Layouts with Hover on Maximize button in Windows 11
Step 1: Open the Settings application on your computer. To do this, you can select the app from the Start Menu or press the Windows + I keys on your keyboard.
Step 2: When the app opens, select the “System” option from the left sidebar.
Step 3: On the System Settings page, select the “Multitasking” option to expand the tile.
Step 4: In there, click on the down-caret button to expand the “Snap windows” section.
Step 5: After that, check the box next to “Show snap layouts when I hover over a windows’ maximize button” to enable the feature or uncheck it to disable.

