In Windows 10 operating system, Microsoft is offering a feature named “Aero Shake” that allows users to declutter the desktop by grabbing and shaking a window to minimize all other open windows in the background.
Shaking the open window again restores the minimized windows as they were earlier. Now, with build 21364, the company is disabling the feature by default in Windows 10 but there’s an option to enable it.
In this step-by-step guide, we will show you how you can enable or disable the Aero Shake feature on your Windows 10 computer using the Settings app.

Enable/Disable Aero Shake on Windows 10
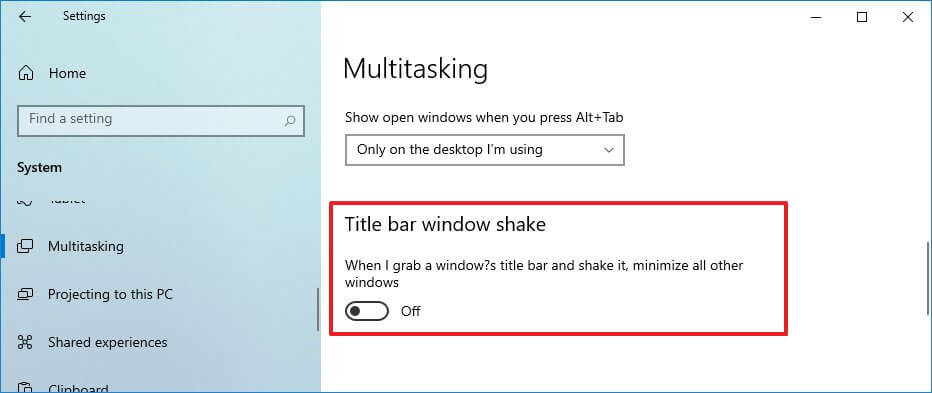
Step 1: Open the Settings application on your Windows 10 operating system. For this, you can open the Start Menu and search for Settings. Now, click on the Settings app from the search results.
Step 2: When Settings opens, click on the “System” from multiple options.
Step 3: From the left-hand pane, select the “Multitasking” option.
Step 4: Now, on the right-side pane, turn on the option for the “Title bar window shake” option to enable Aero Shake.

If you want to disable the feature when it is already enabled, you can turn the toggle off to disable the feature.
That’s it. Once you have followed the steps, you will be able to minimize all the other windows on your system just by grabbing and shaking one open window if you have chosen to enable the Aero Shake feature.
Do note that if you are not seeing this option on your computer, then the version of Windows 10 you are running doesn’t support it. As mentioned, the option to enable or disable this feature through a toggle is available on build 21364 or higher.
