Usually, whenever you or an application turns the web camera on your computer, you will see an LED indicator to let you know that the camera is on. But what if your system doesn’t have an LED indicator or it just isn’t working?
Well, in that case, you should enable the on-screen display notification for the camera on your system. In this step-by-step guide, we will show you how you can enable the on-screen display notification for the camera status on your Windows 10 computer.
How to enable Camera notifications in Windows
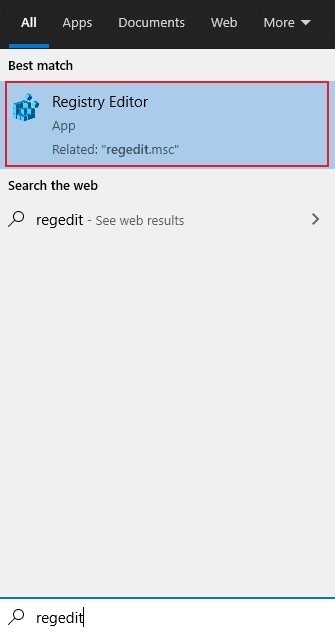
Step 1: First of all, open the Registry Editor on your computer. For this, open the Start menu and type “Regedit”. Now, from the search results, click on the Registry Editor to open the application.

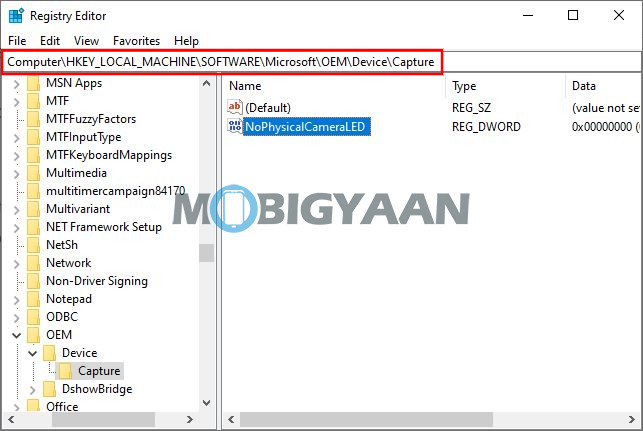
Step 2: In the Registry Editor, go to the following location:
HKEY_LOCAL_MACHINE\SOFTWARE\Microsoft\OEM\Device\Capture

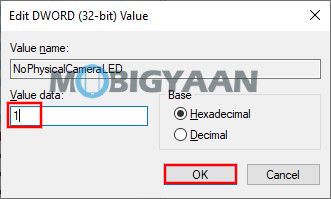
Step 3: On the right-side pane, double-click on the “NoPhysicalCameraLED” to open it and then change the value from ‘0’ to ‘1’ if you want to enable the camera notification on your computer.

Step 4: If the “NoPhysicalCameraLED” value is not there, you will need to create it. For that, right-click anywhere in the blank area, and from the context menu, click on New > Dword value (32-bit). Name the newly created value as “NoPhysicalCameraLED”. After that, follow the instruction of Step 3.
Once the changes are done, restart your computer for them to take effect. After restarting your Windows 10 computer, you will start seeing notifications whenever the camera is turned on or off.
