Microsoft’s Windows 11 operating system comes with a feature called Swift Pair which allows users to quickly connect the computer to a Bluetooth device.
When the feature is enabled, the system will show a pop-up notification message on the screen when it detected a new peripheral nearby that is in pairing mode. Simply clicking the notification will connect the Bluetooth device to the computer, eliminating the whole process or pairing the device and manually connecting.
However, the feature isn’t enabled by default. In this step-by-step guide, we will show you how you can easily enable the Bluetooth Swift Pair feature through the Settings app on your Windows 11 computer.
How to enable Bluetooth Swift Pair in Windows 11
Step 1: Open the Settings app on your computer. For this, press the Windows + I keys on your keyboard or open the Start Menu and select the app from there.
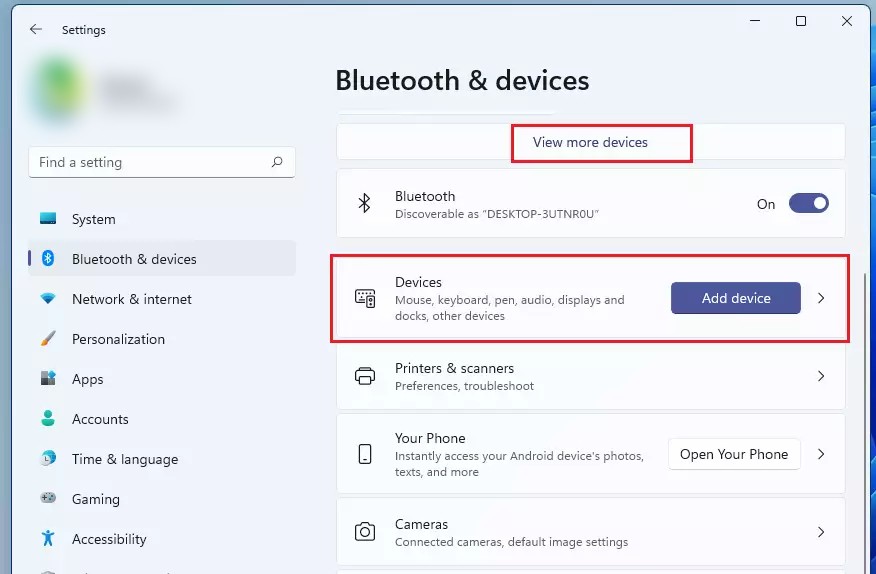
Step 2: When the Settings window opens on your system, click on the “Bluetooth & Devices” from the left pane.
Step 3: After that, on the right-side pane, click on “View more devices” or click on the “Devices” tile to expand the list of Bluetooth devices.

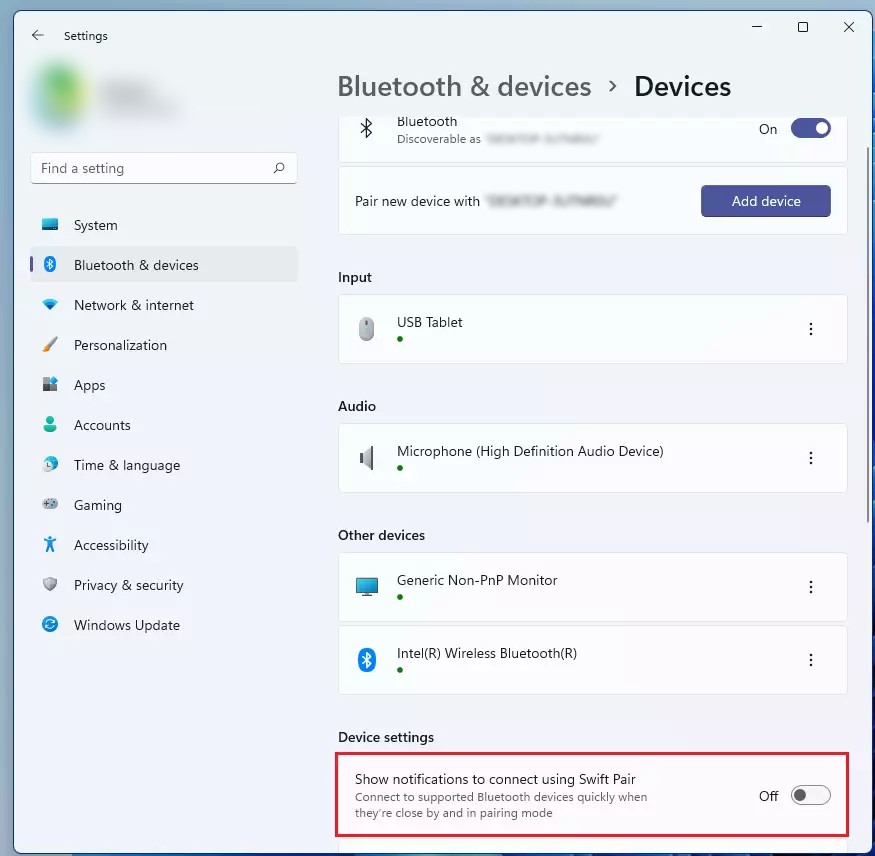
Step 4: On the Devices settings, click on the tile at the bottom that reads “Show notifications to connect using Swift Pair: and toggle the switch ON.

That’s it. After following the above-mentioned process, the Bluetooth Swift Pair feature has been enabled on your Windows 11 computer.
