The Windows 11 operating system comes with several features that help the users in varying scenarios. For the users running Windows operating system on a battery-powered device, such as laptops, there’s a feature named Battery Saver, which as the name indicates, helps in saving the battery as much as possible.
When the Battery Saver feature is enabled on your device, power consumption will be reduced by disabling some features, such as sync for emails, OneDrive, and other features, and certain apps won’t work in the background. The screen brightness will go lower, and the power will be managed differently to increase the battery life instead of performance.
The feature automatically gets enabled when the laptop’s battery life reaches 20 percent or lower and when the device gets connected to the power outlet, the feature gets automatically disabled. But users can manually enable the Battery Saver feature in Windows 11 system.
In this step-by-step guide, we will show you how to manually enable the Battery Saver mode on your laptop tunning the Windows 11 operating system through Settings.
How to enable Battery Saver mode in Windows 11
Step 1: Open the Settings application on your computer. For this, you can search for the app in the Start Menu or press the Windows + I keys on the keyboard.
Step 2: When the Settings app window opens, click on the “System” from the left sidebar.
Step 3: On the right side of the window, click on the “Power & battery” option.
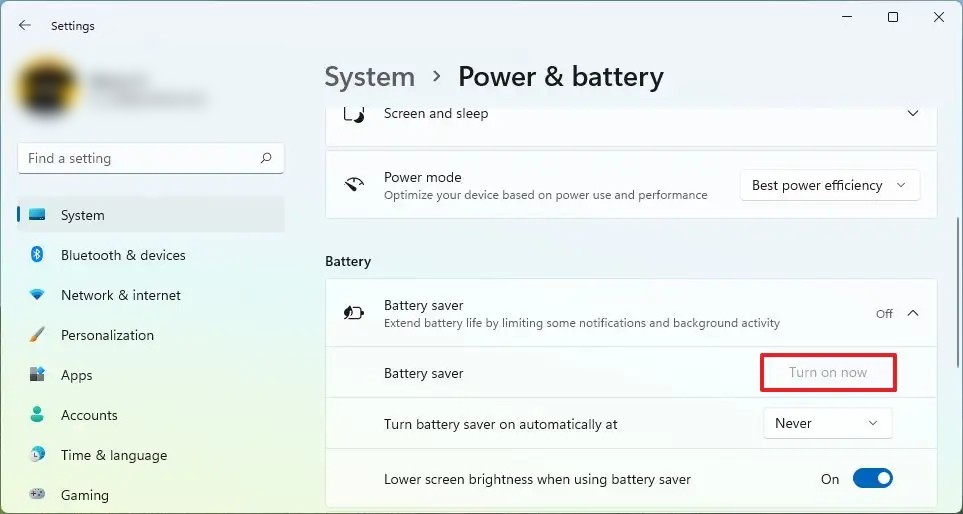
Step 4: Under the “Battery” section, go to the “Battery Saver” settings and click the “Turn on now” button.

That’s it. Going through all the above-mentioned steps, the Battery Saver mode will be enabled on your Windows 11 laptop. You can also enable the option to “Lower screen brightness when using the battery saver” by toggling the switch on to get even more battery life.
