Windows 10 operating system has been quite a user friendly but at the same time, it comes with some advanced settings for the pro users to tweak it as per their liking. But, some of the features and options are hidden or restricted to be used or enabled by the Administrator account only.
It is also required for troubleshooting. However, it doesn’t come activated out-of-the-box and needs to be activated manually. If you don’t see an active Administrator account on your Windows 10 computer but you want to enable it, then here is a step-by-step guide on how you can do that.

Enable Administrator Account in Windows 10
Step 1: First of all, open the Command Prompt in administrator mode on your computer. For this, search for Command Prompt in the start menu and then right-click on the icon, and then click on the “Run as Administrator” option.
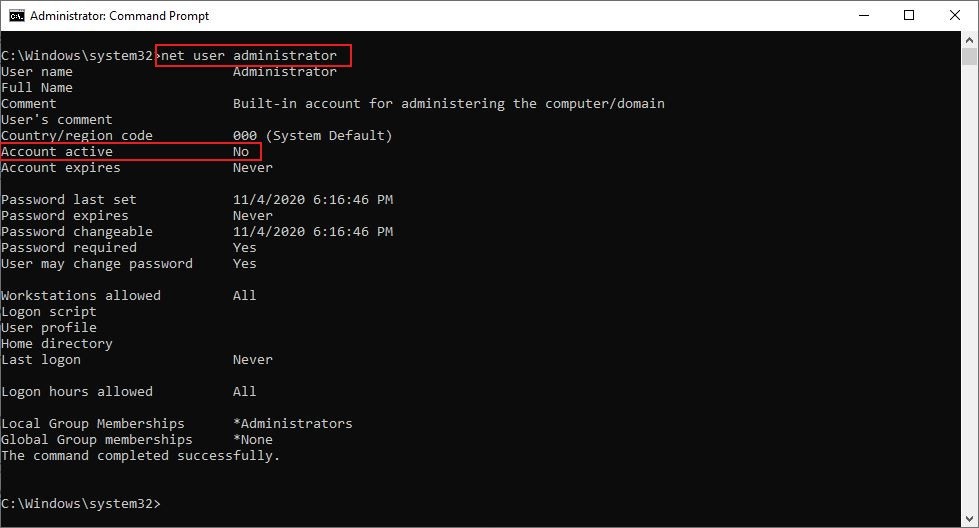
Step 2: In the command prompt, type the “net user administrator” command and then hit enter. It will show if the Account Active Status is Yes or No. If the status is No, then continue to the next step.

Step 3: To enable the Administrator account, type the “net user administrator /active:yes” command in the command prompt and hit enter.

Step 4: Now, check if the Administrator account has been enabled or not. For this, follow the same process mentioned in Step 2.
That’s it. You have successfully managed to enable the Administrator account on your Windows 10 system. You will now notice that the Administrator account has is visible under the users’ list.

