Windows operating system comes pre-installed with the Microsoft Defender antivirus that protects the computer from known and unknown threats. But there are many users who rely on third-party tools or software for the protection of the system.
If you are among those, then it makes the sense to disable the Microsoft Defender or the Real-Time Protection feature that is enabled by default. The feature basically monitors events such as file processes, file/registry changes, and other events on the device for suspicious and known malicious activity. It also scans downloaded files and attachments automatically.
There are several different ways to disable the Windows Defender Real-Time Protection feature in Windows 11 operating system but in this step-by-step guide, we will show how this can be done through the Local Group Policy Editor.

How to disable Windows Defender Real-Time Protection through Policy Editor
Step 1: Open the Local Group Policy Editor on your computer.
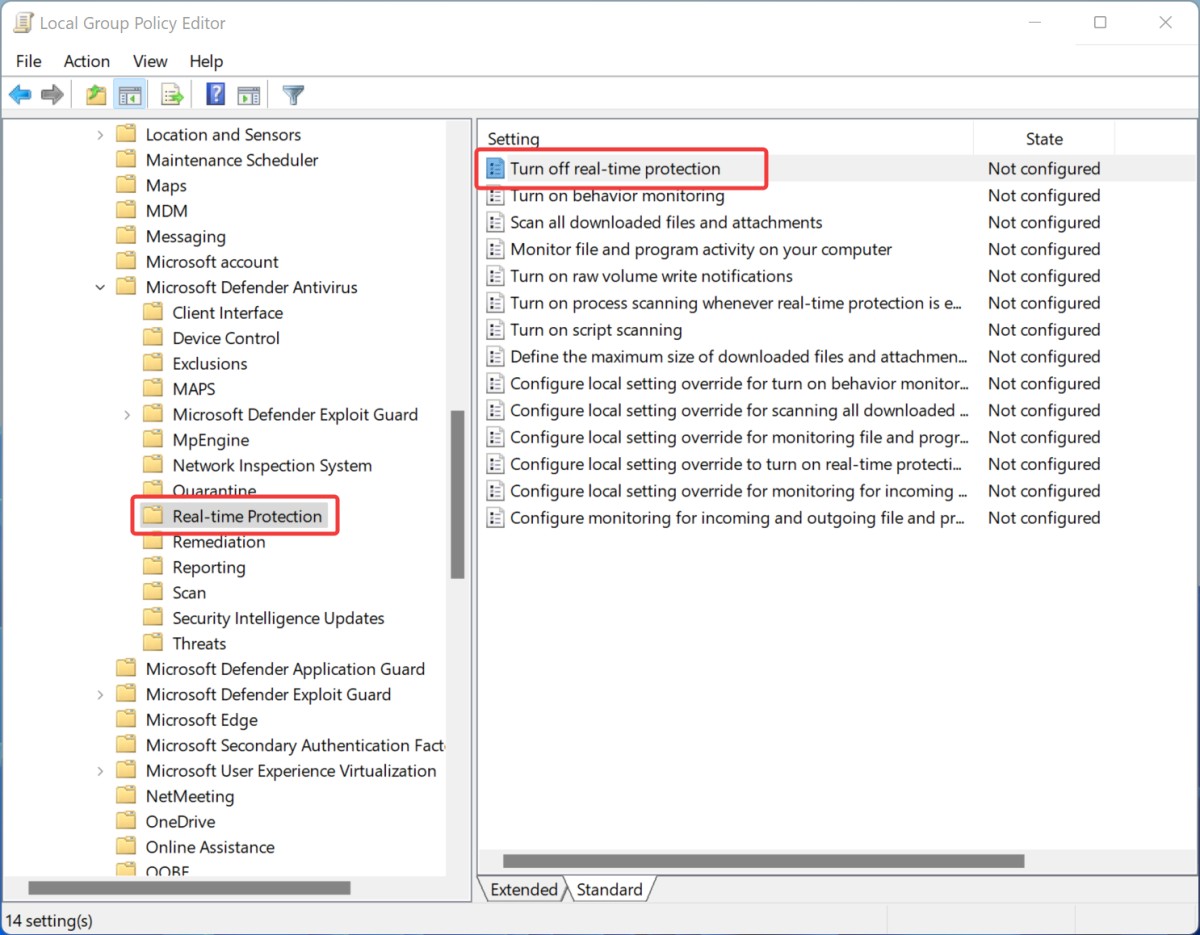
Step 2: When the Group Policy Editor window opens, navigate to the following path:
Computer Configuration > Administrative Templates > Windows Components > Microsoft Defender Antivirus > Real-time Protection

Step 3: On the right side of the window, double-click on the “Turn off real-time protection” option.
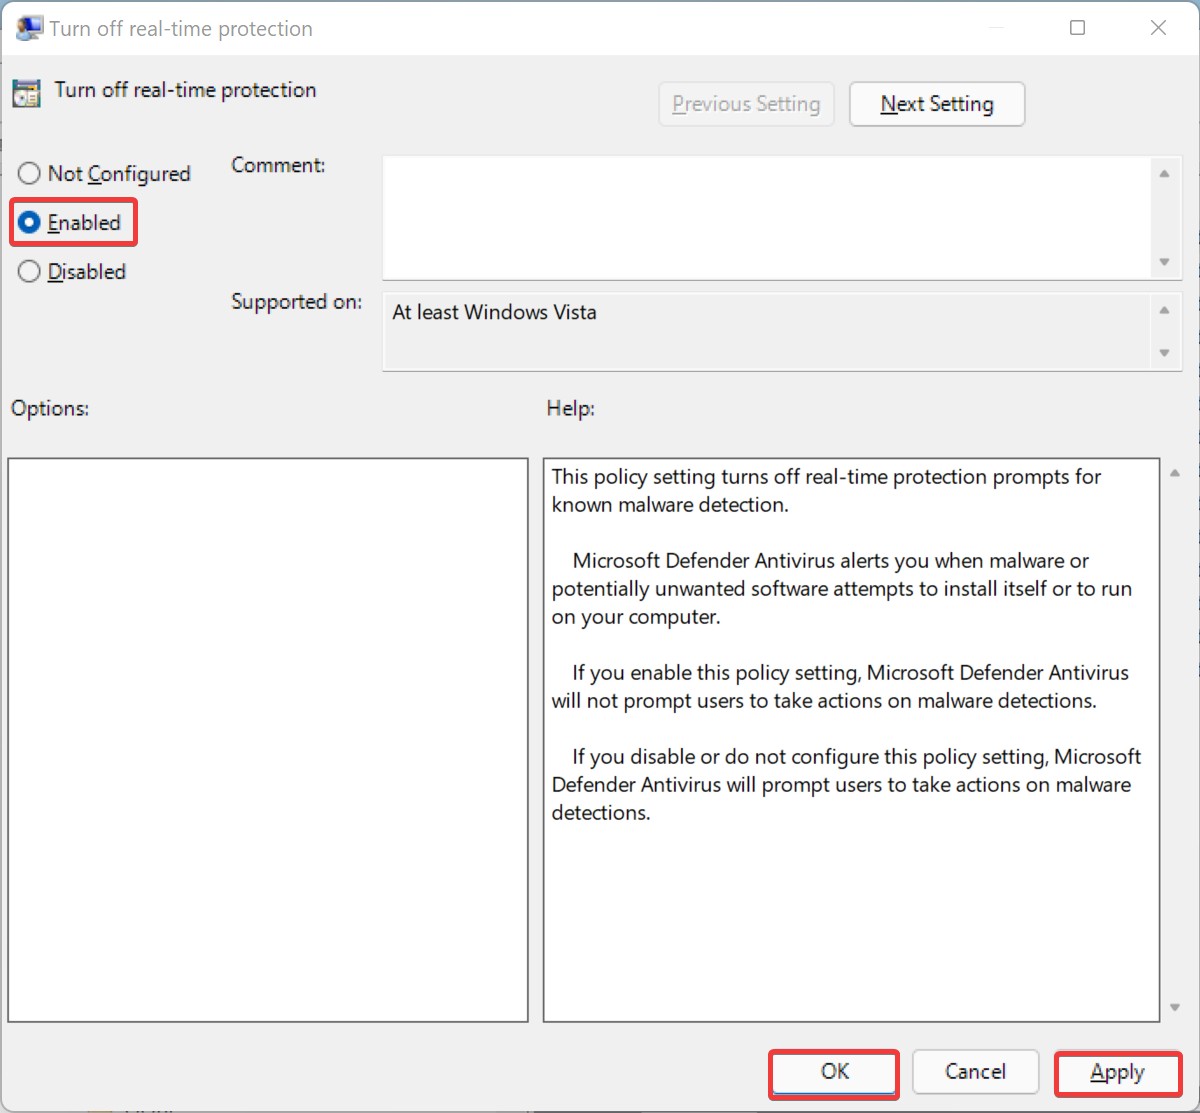
Step 4: Now, select the “Enabled” option to turn off the Real-time Protection on your device.

That’s it. After you have followed all the above-mentioned steps, then the real-time protection for the Microsoft Defender has been disabled on your Windows computer. If you want to reenable the feature, then follow the same steps as above but just change the option in step 4 to Not Configured or Disabled and the feature will be enabled.

