Windows 11 operating system comes with several features and some of them are targeted towards a targeted group of people one of such features is Game Mode, which as the name indicates, it intended for those who play a lot of games on their computer.
The Game Mode is enabled by default in the Windows 11 operating system. It automatically optimizes the system for better gaming performance, but as with most things that get done automatically, it may sometimes cause issues.
If you are not satisfied with the Game Mode on your computer or simply want to disable the feature, then here is a step-by-step guide that will disable the feature in Windows 11-powered computers.
How to disable Game Mode in Windows 11
Step-1: Open the Settings app on your Windows 11 computer. For this, click on the Settings (cog) icon in the Start menu or search for the application. Alternatively, pressing the Windows + I keys on the keyboard will also open the Settings app on your device.
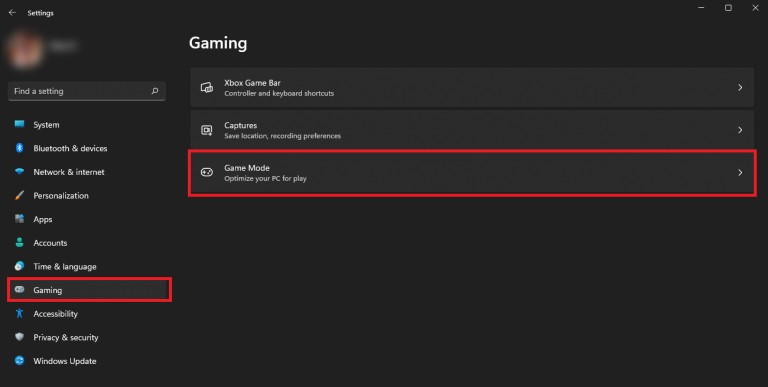
Step 2: When the Settings application opens, select the “Gaming” option from the left sidebar.

Step 3: After that, select the “Game” option from the right-side pane of the window.
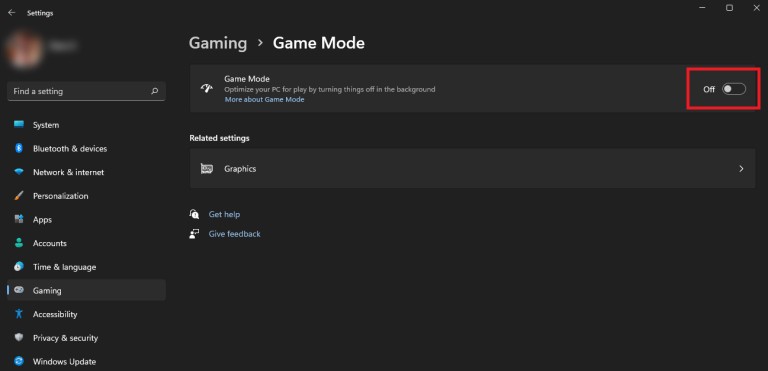
Step 4: Toggle the switch off for the “Game Mode” option.

That’s it. Following the above-mentioned steps successfully disables the Game Mode on your Windows 11 computer. If you want to enable the Game Mode feature, then follow the same steps as above just toggle the switch On and the feature will be enabled.

