In Windows 10, the default settings make the user navigate through two screens after logging into the computer — lock screen and login screen. For most users, there’s no need for the local screen.
So, if you are looking to disable or get rid of the lock screen on your Windows 10 computer, then you have come to the right place. In this guide, we will show you a step-by-step process on how you can easily disable the lock screen on your Windows computer using the Group Policy Editor.
How to disable Lock Screen in Windows 10
Step 1: Open the Local Group Policy Editor app on your system. For this, press the Windows key + R key on your keyboard, and in the Run dialog box that opens, type in “gpedit.msc” and hit Enter.
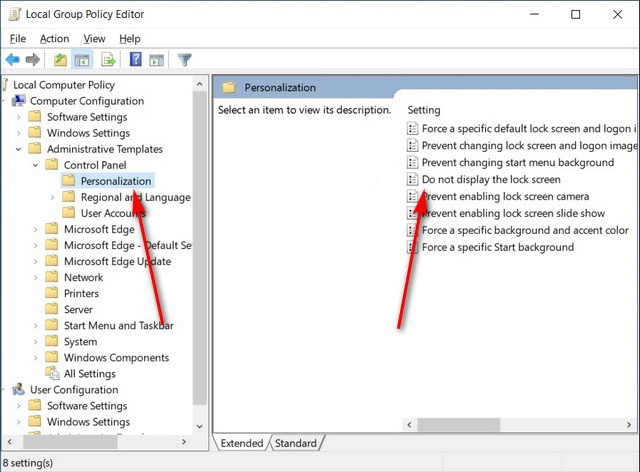
Step 2: In the Group Policy Editor, navigate to the following location:
Computer Configuration -> Administrative Templates -> Control Panel -> Personalization

Step 3: Now, on the right-side pane, double-click on the entry that reads “Do not display the lock screen.”
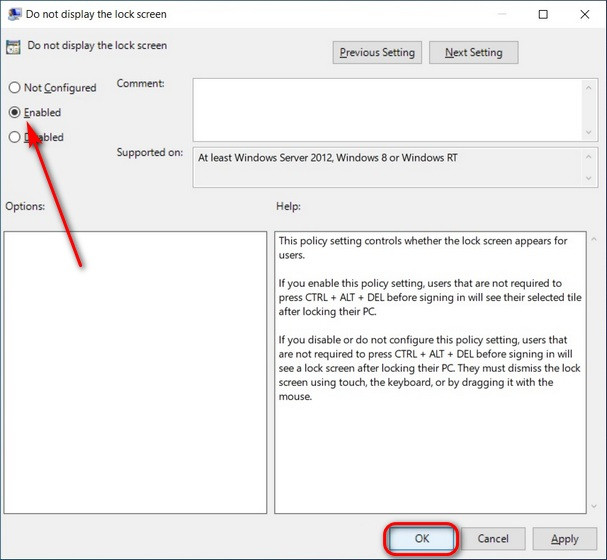
Step 4: In the pop-up window that opens, select ‘Enabled’ and click on the “Ok” button.

Once you restart your computer, you will no longer get the Windows 10 lock screen. You just have to enter your password and get to work right away.
You can also check out our other Windows guide to make your experience even better by customizing the operating system as per your needs. We have also covered quite a few guides related to macOS and Chromebook as well.

