Windows 11 operating system comes with support for multi-point gestures that allow users to have quick access to several different functions, menus, or certain actions. This comes in really handy and can help improve the overall user experience for using the system.
However, many users face the issue of triggering something mistakenly. If you are one of those, then you can disable the three-finger gesture feature on your Windows 11 computer.
In this step-by-step guide, we will show you how you can disable the three-finger gesture on your computer running Windows 11 operating system through the Settings application.
How to disable Three-Finger Gestures in Windows 11
Step 1: Open the Settings application on your Windows 11 computer. For this, you can select the Settings app from the Start Menu or search it and select the app from the search results.
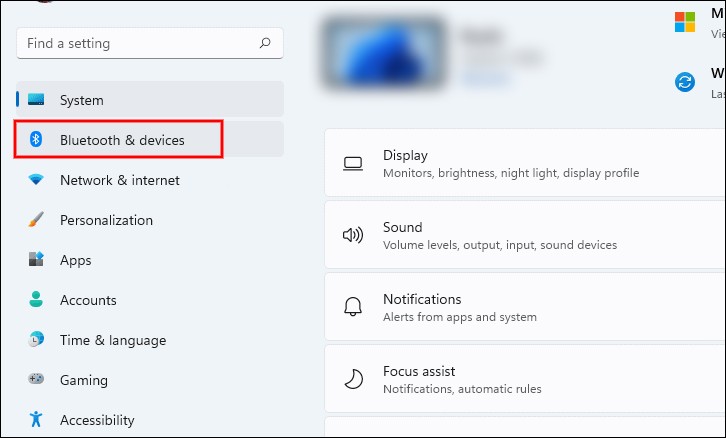
Step 2: When the Settings app opens, click on the “Bluetooth & devices” tab on the left sidebar.

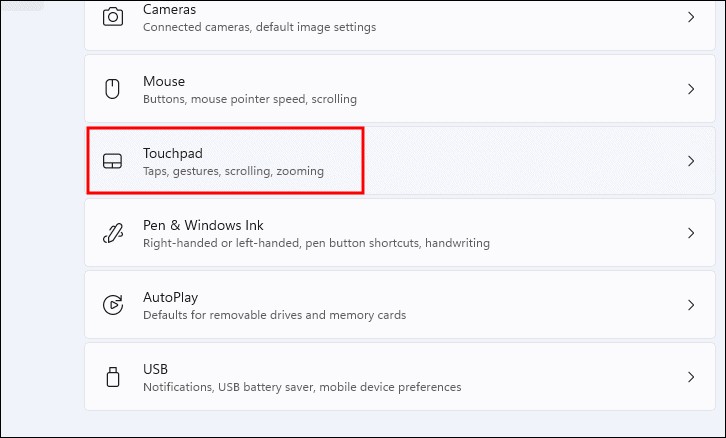
Step 3: Now, on the right side, locate the “Touchpad” tile and click on it.

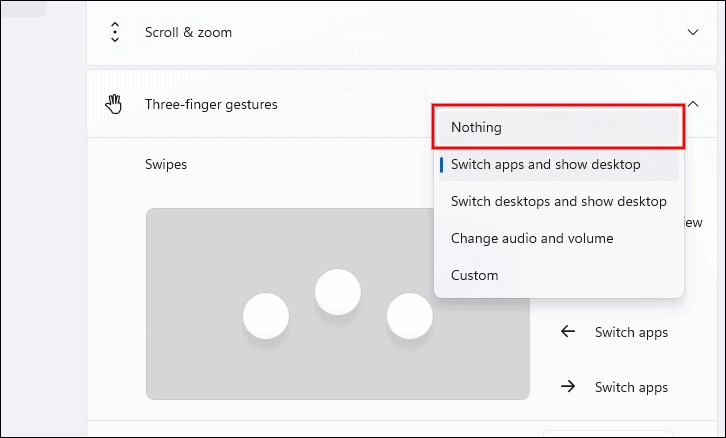
Step 4: Locate the “Three-finger gestures” tile and then click on the drop-down menu beside the “Swipes” option.
Step 5: From the context menu that appears, choose the “Nothing’” option.

That’s it. After you have followed the above-mentioned steps, the three-finger gestures on your Windows 11 computer will be disabled.

