Task Manager is one of the advanced tools offered by Microsft in the Windows operating system. It enables users to start and stop applications, monitor the system performance as well as running apps and services.
If you are not sure all the users on your device should have access to the Task Manager application, then the best course of action is to disable the tool. There are two ways to disable Task Manager.
In this step-by-step guide, we will show you how to disable the Task Manager using the Local Group Policy Editor on your Windows 10 computer.
How to disable Task Manager in Windows 10
Step 1: Open the Local Group Policy Editor on your computer. For this, search for “gpedit.msc” in the Start menu and click on the app to open it.
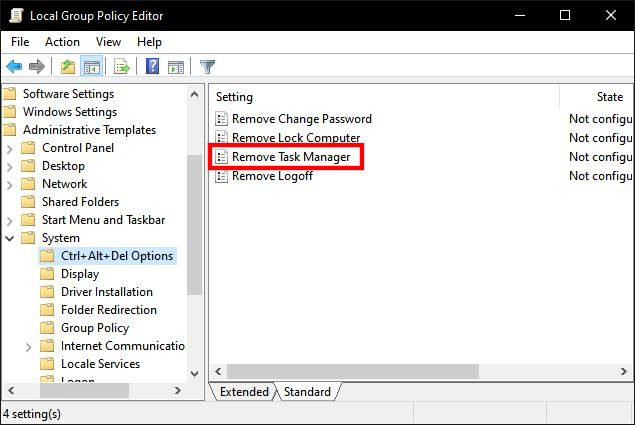
Step 2: In the Local Group Policy Editor, go to the following location:
User Configuration > Administrative Templates > System > Ctrl + Alt + Del Options

Step 3: On the right side, you will see a policy named “Remove Task Manager”.
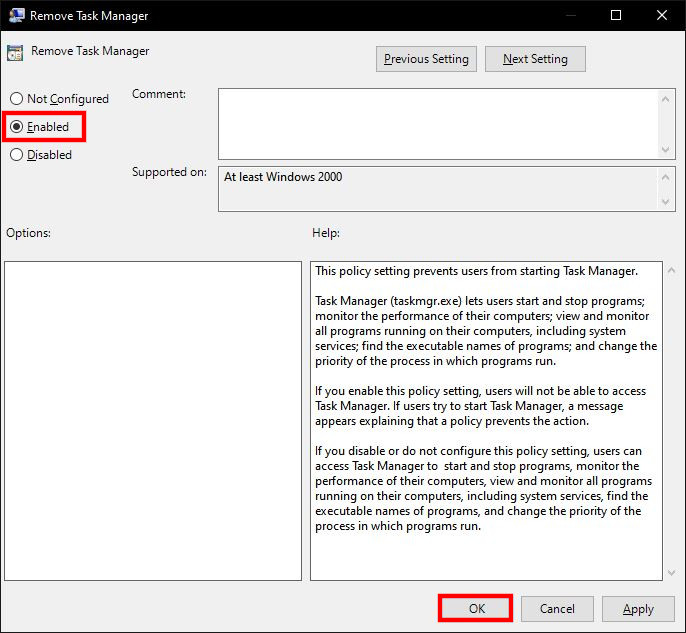
Step 4: Double-click on the “Remove Task Manager” and in the window that appears, click the “Enabled” option and save the settings by clicking the “Ok” button.

Once you have followed these steps, the Task Manager application will no longer be available. The shortcuts for opening the app, including Ctrl + Shift + Esc keys. The option in the context menu of the taskbar will also be disabled. Trying to opening the app through other means will throw an error message saying “Task Manager has been disabled by your administrator.”
