Windows 11 operating system from Microsoft comes with several new features, and one of them is Superfetch, which is also known as SysMain. It is a built-in service that preloads frequently used applications in the RAM, allowing quicker access to the applications.
Sometimes, the Superfetch feature may take more system resources, and in that case, the user might start experiencing issues when doing some heavy or RAM-intensive tasks. However, the good thing is that there are multiple ways to disable the feature if it is not working as intended for you.
In this step-by-step guide, we will show you how to disable the Superfetch of SysMain feature on your Windows 11 computer and also to stop it from automatically running when the Windows computer boots.
How to disable Superfetch or SysMain feature in Windows 11
Step 1: Open the Services tool on your Windows 11 computer. To do this, press the Windows + R keys on the keyboard and type “services.msc” in the Run dialog box, and press Enter to open the Services tool.
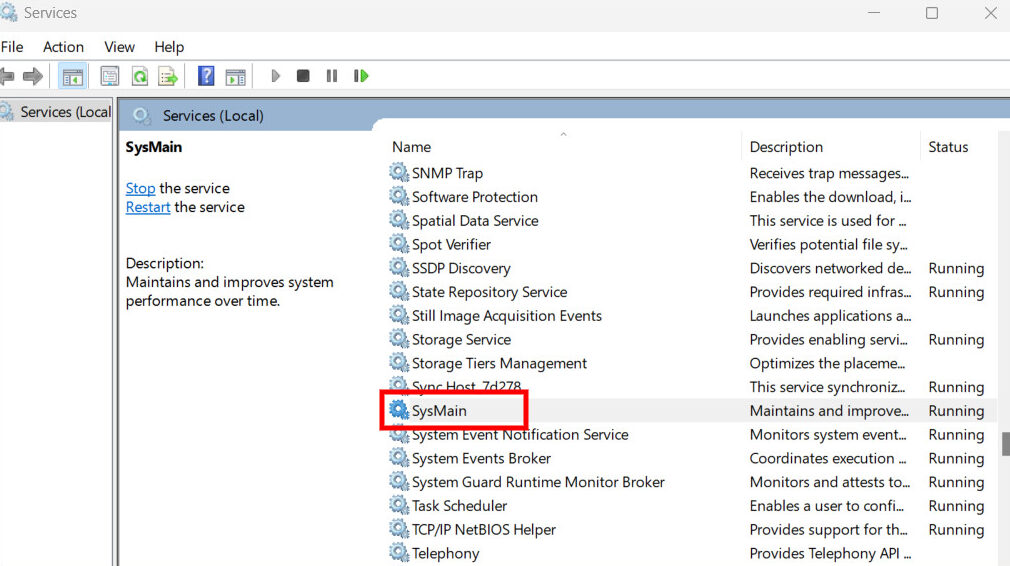
Step 2: When it opens, look for the service named “SysMain” from the list of services that are listed alphabetically.

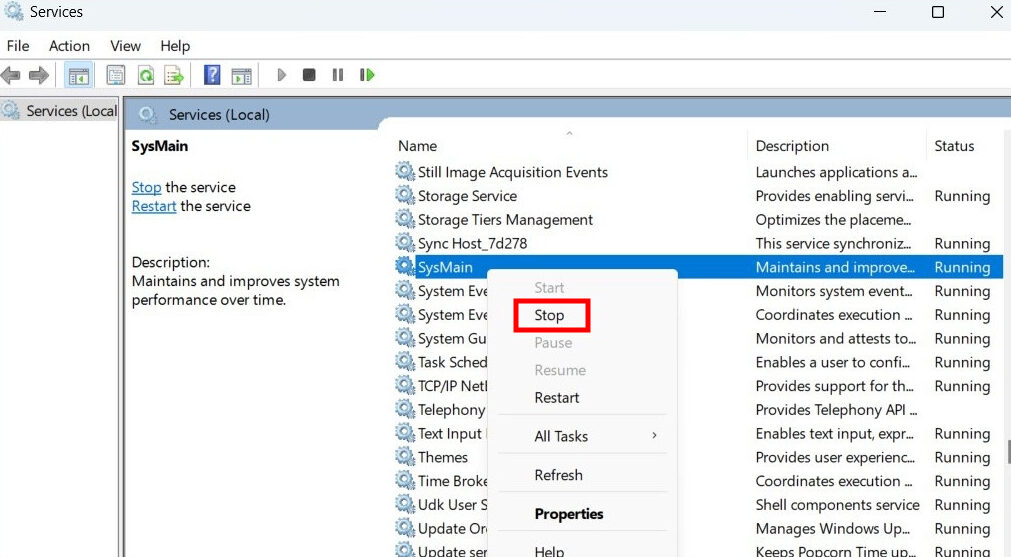
Step 3: After locating SysMain, right-click on it and select “Stop” from the context menu.
Step 4: Double-click on the SysMain, and when the properties window opens, select “Disabled” for the Status Type option and then hit the Apply or Ok button.

That’s it. Once you have followed this step-by-step guide on your Windows 11 computer, then the Superfetch or SysMain service will be instantly disabled on your system. When you click on the Stop option for SysMain, it disables the service for the current session, while changing the Status type to Disabled prevents the service from starting automatically when the computer boots.

