Microsoft is offering a tool named Snipping Tool in Windows operating system for a long time now which is the default application in the system to capture screenshots. It comes in handy when capturing screenshots on the computer and offers five different modes, including Rectangular Snip, Window Snip, and more.
However, if you are using another or third-party tool for capturing screenshots for better features, then you do not need the Snipping Tool on your device. In such a case, if you are looking to disable it, then here is a step-by-step guide for the same.
How to disable Snipping Tool in Windows 11 using Registry Editor
Step 1: Open the Registry Editor tool on your Windows 11 computer. For this, first press Windows+r keys on your keyboard, and in the Run window, type “regedit” inside the command line and press Enter on your keyboard to open the tool.
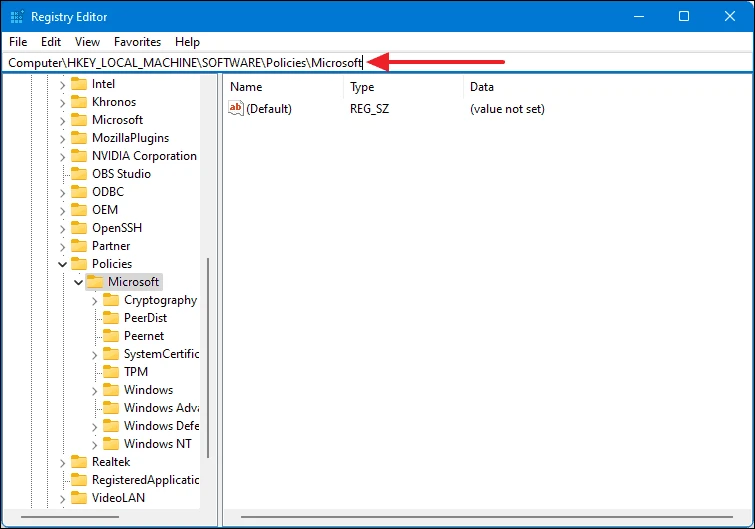
Step 2: Now, in the Registry Editor window, copy and paste the following text inside the address bar and press Enter.
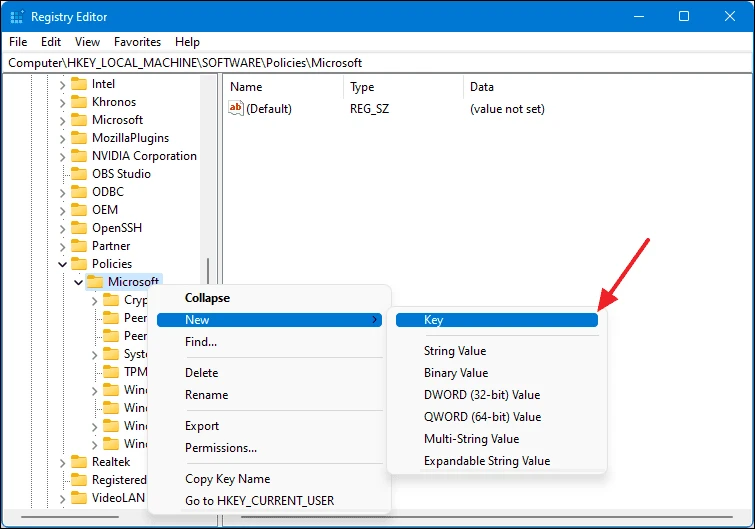
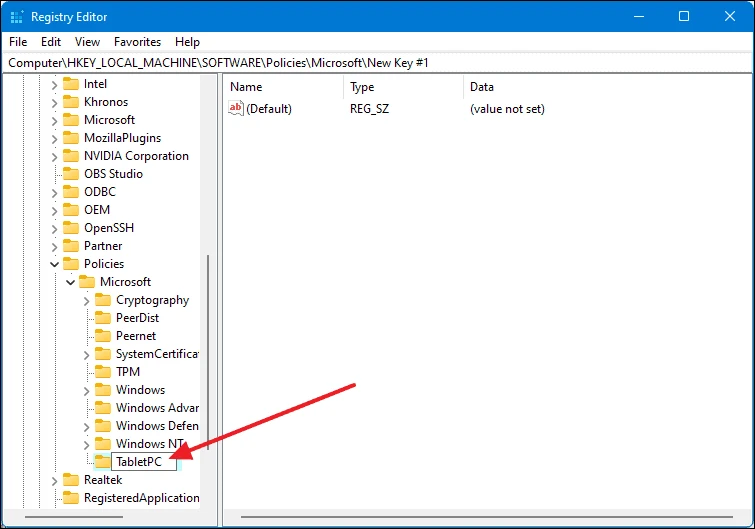
HKEY_LOCAL_MACHINE\SOFTWARE\Policies\MicrosoftStep 3: Find a key named “TabletPC” in the dropdown list under the “Microsoft” folder. If there is no such key, then right-click on “Microsoft” and select “New” > “Key.” Name the new key to ‘TabletPC’ and press Enter on your keyboard.
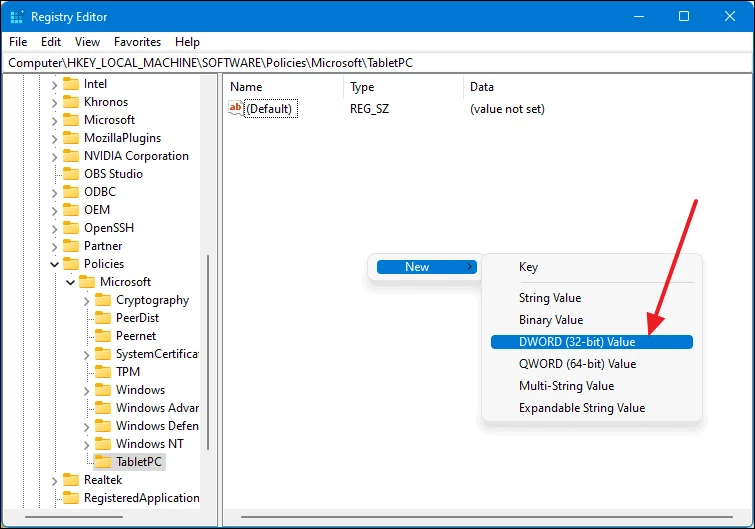
Step 4: Select the newly created ‘TabletPC’ key from the left panel and then on the right panel, right-click on the blank space, select “New” > “DWORD (32-bit) Value.”
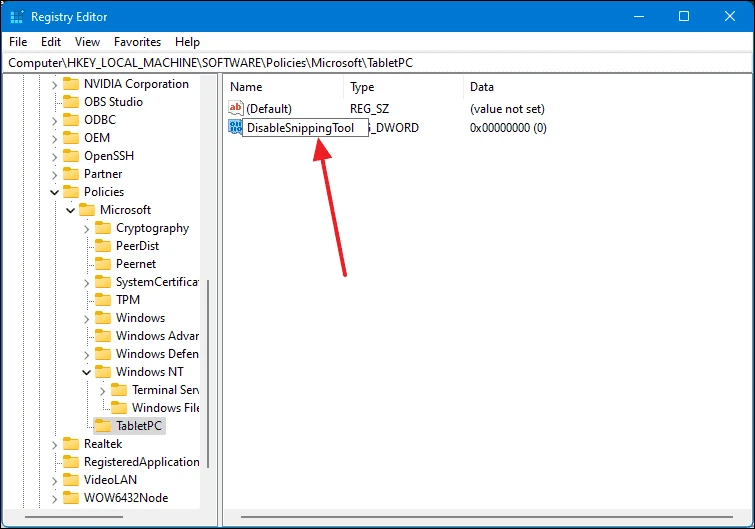
Step 5: Rename the newly created value to “DisableSnippingTool” and press Enter to save.
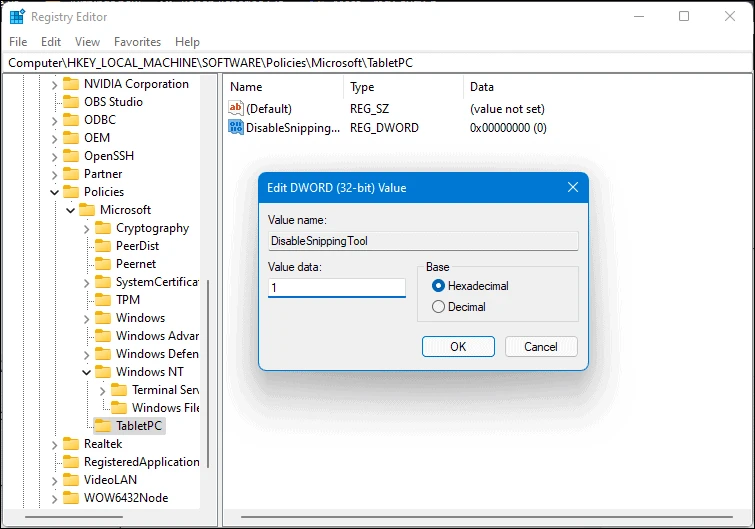
Step 6: Now, double-click on the DisableSnippingTool value, and in the dialog box, set the “Value data” to 1 and click on “OK.”
That’s it. Once you have followed all the steps mentioned above, restart your computer. When the device boots again, the Snipping Tool will be disabled. If you want to enable the Snipping Tool, you can simply undo this change by deleting the DisableSnippingTool value and restarting your computer.

