Apple has a Photos application on its devices that helps users better organize pictures on the smartphone. It also comes with a feature called Shared Albums and, as the name indicates, allows users to share images or albums with friends or family members.
The Shared Albums feature is useful if you are one of those people who share a lot of media content with others. But if you are using the feature or don’t find it useful, then there’s a way to disable it.
In this step-by-step guide, we will show you how to quickly and easily disable the Shared Albums feature on your Apple iPhone using the Settings application.
How to quickly and easily disable Shared Albums on Apple iPhone
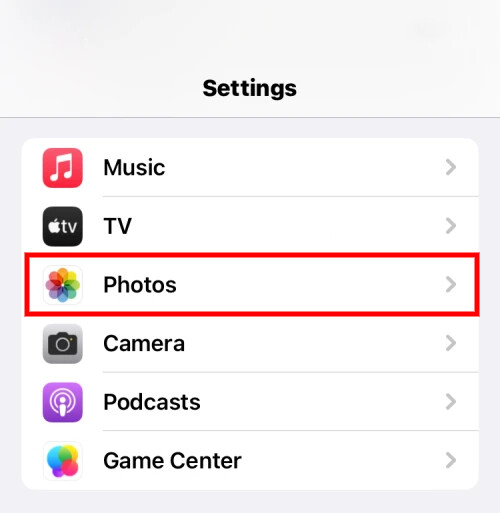
Step 1: Open the Settings application on your Apple iPhone.
Step 2: When the app opens, select the “Photos” option from the list.

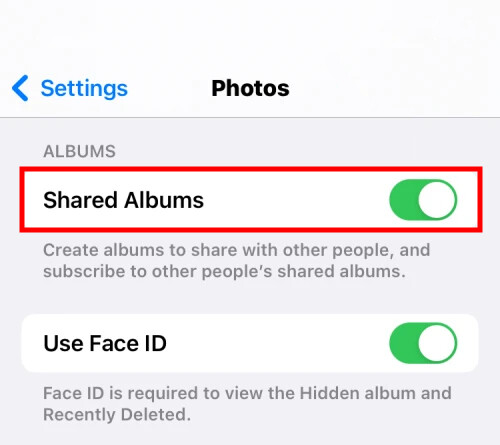
Step 3: On the Photos settings page, turn off the toggle switch for the “Shared Album” option.

Step 4: When a prompt message appears warning that shared photos will be deleted, tap the “Ok” button to confirm.
That’s it. Once you have followed this step-by-step guide on your Apple iPhone, then the Shared Albums feature will be disabled on your smartphone. The section for this feature will disappear from the Photos application under the Albums tab. You will also lose access to the shared albums that you created and shared as well as albums that others created and shared with you.
All the photos in the shared album will be removed, but given that the feature is device-specific, the shared photos will still appear if you use your Apple ID on another device.

