The new Windows 11 operating system from Microsoft comes with a feature called Protected Password Sharing that enables users to have access to shared folders, public folders, and attached printers on the computer or the connected network using a local username and password.
This means that it is limited to the users having a user account and password and others won’t have access to such items on the device. To give access to others who don’t have a local account and password in the system, the password-protected sharing feature needs to be disabled on the Windows 11 computer, which is enabled by default.
In this step-by-step guide, we will show you how to quickly and easily disable password-protected sharing on your Windows 11 computer through Settings.
How to disable Password Protected Sharing feature in Windows 11
Step 1: Open the Settings app on your computer. For this, press the Settings icon in the Start menu or search for it. Alternatively, you can press the Windows + I keys on your keyboard to open the Windows Settings application.
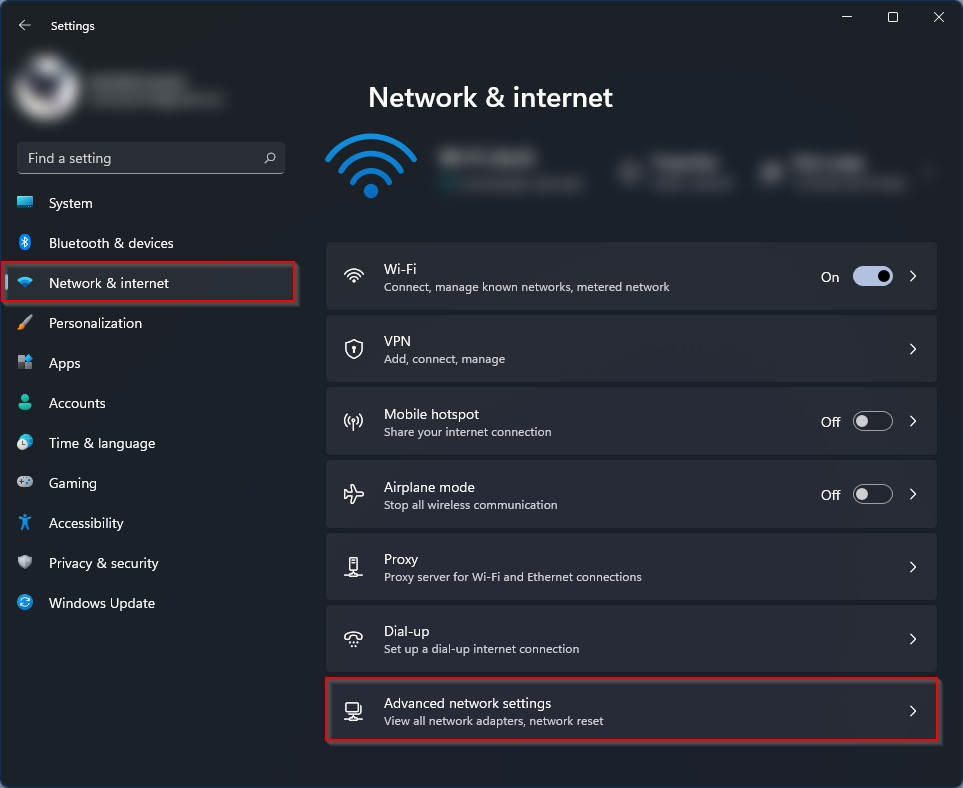
Step 2: When the Settings app opens, click on the “Network & Internet” option from the left sidebar.
Step 3: On the right side section, select the “Advanced network settings” option.

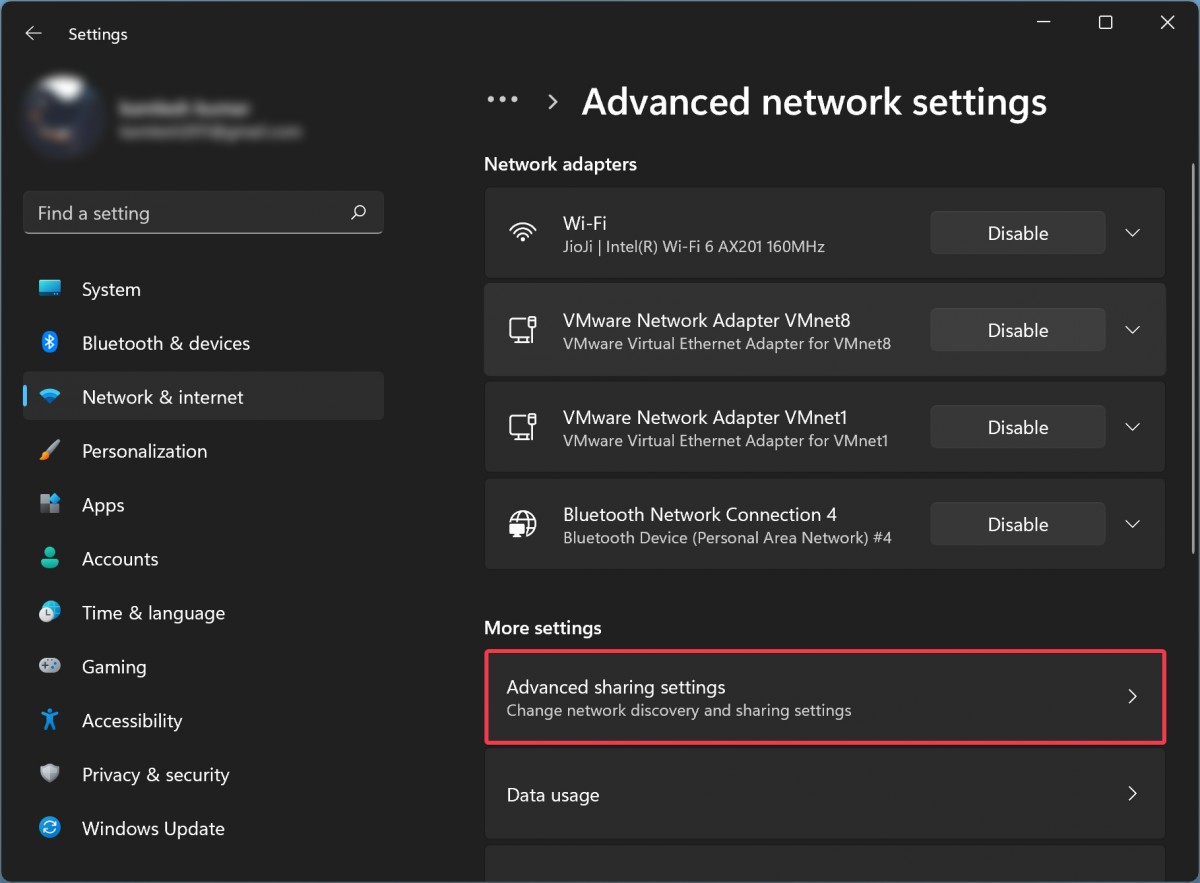
Step 4: In the Advanced Network Settings option, scroll down and select the “More settings” option and then click on the “Advanced sharing settings” option.

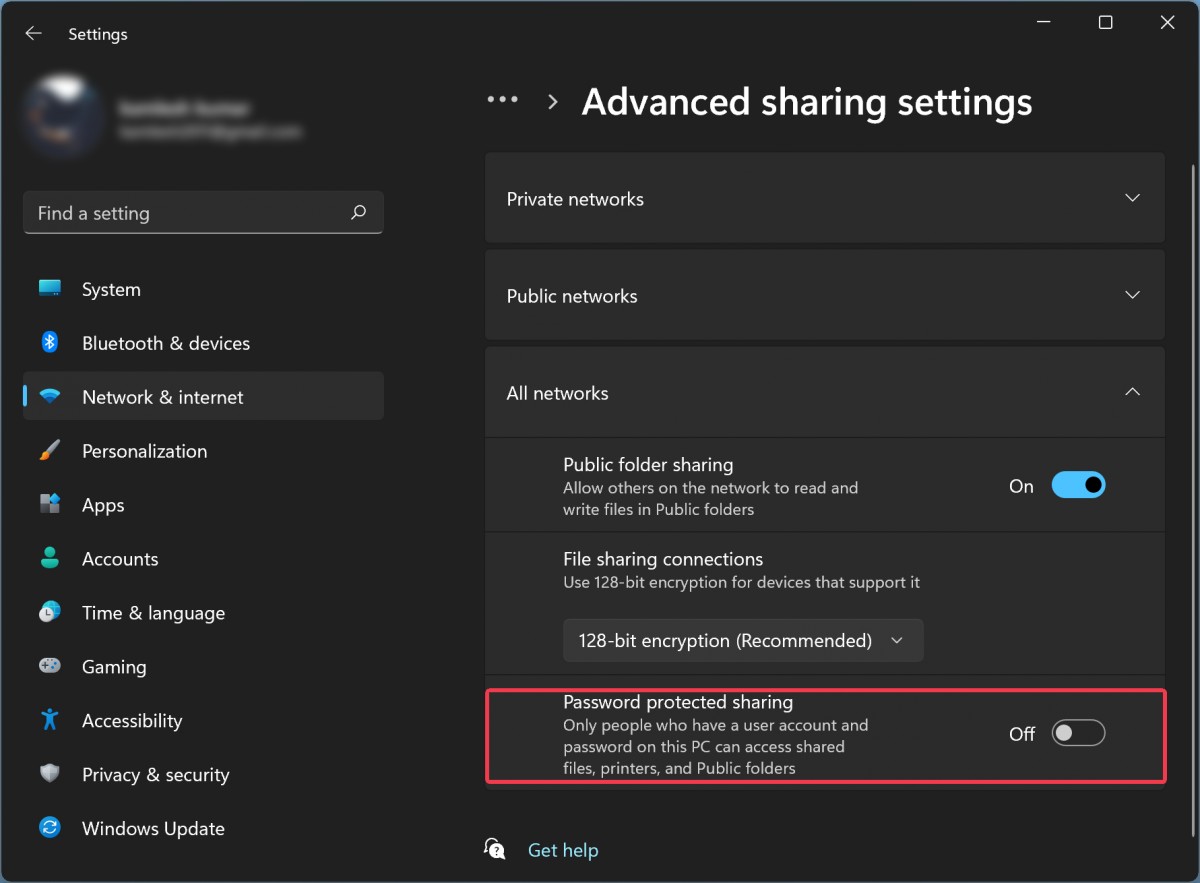
Step 5: Turn the toggle switch off for the “Password protected sharing” option located under the “All networks” section.

That’s it. After following all the above-mentioned steps, the Password Protected Sharing feature gets disabled on your Windows 11 computer.

