In Windows 11 operating system, the company is offering a free built-in anti-malware program named Microsoft Defender Antivirus that aims to protect your computer from viruses and malware.
Apart from protection from viruses and malware, the program also offers some other security services, including account protection, online security, device performance, health monitoring, parental controls, and firewall and network security.
If you are using third-party antivirus software, then there’s no need to keep the Microsoft Defender active on your system. Or if you are being blocked from installing a new program that you are sure is safe, then you can temporarily disable the security service to continue with the installing.
In this step-by-step guide, we will show you how you can disable the Microsoft Defender program on your Windows 11 computer.
How to disable Microsoft Defender in Windows 11
Step 1: Open the Settings app on your computer. For this, right-click the Start icon on the taskbar and select the “Settings” option from the context menu. Alternatively, you can simply press the Windows+I keyboard to launch Windows Settings app.
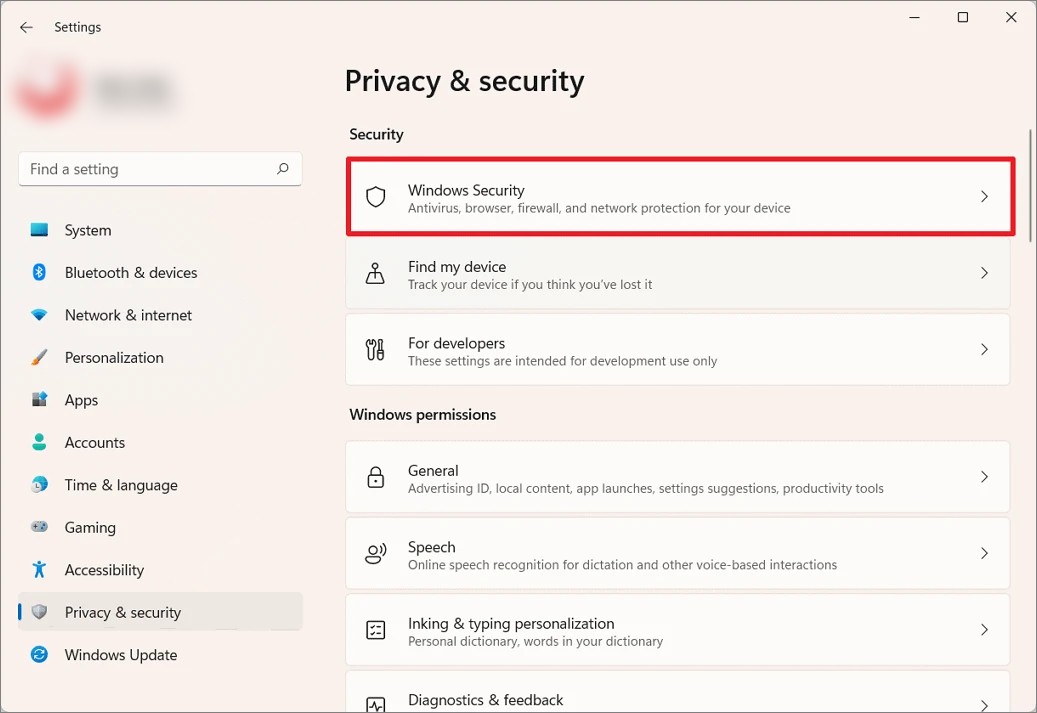
Step 2: In Settings, click on the “Privacy & Security” section in the left-side pane and select “Windows Security” on the right.

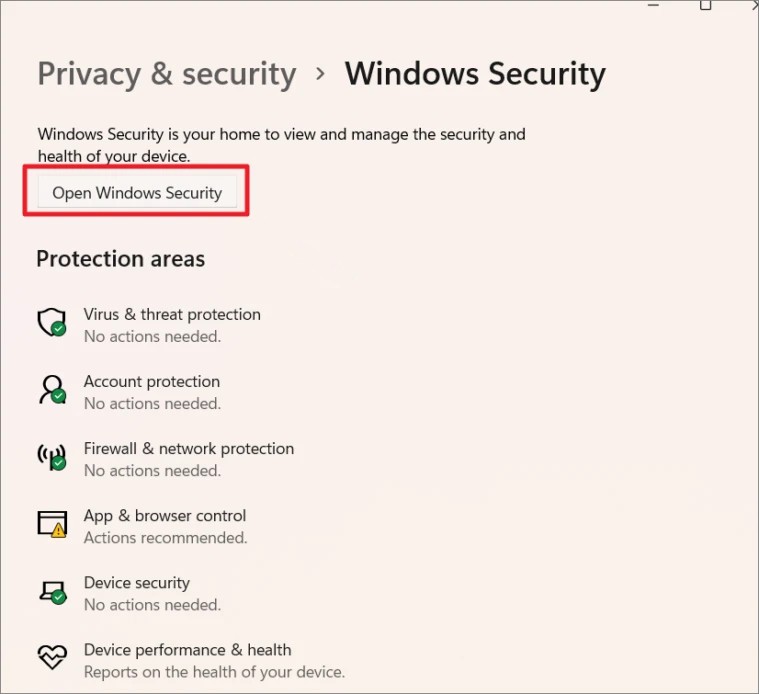
Step 3: Now, on the page that appears, click on the “Open Windows Security” button.

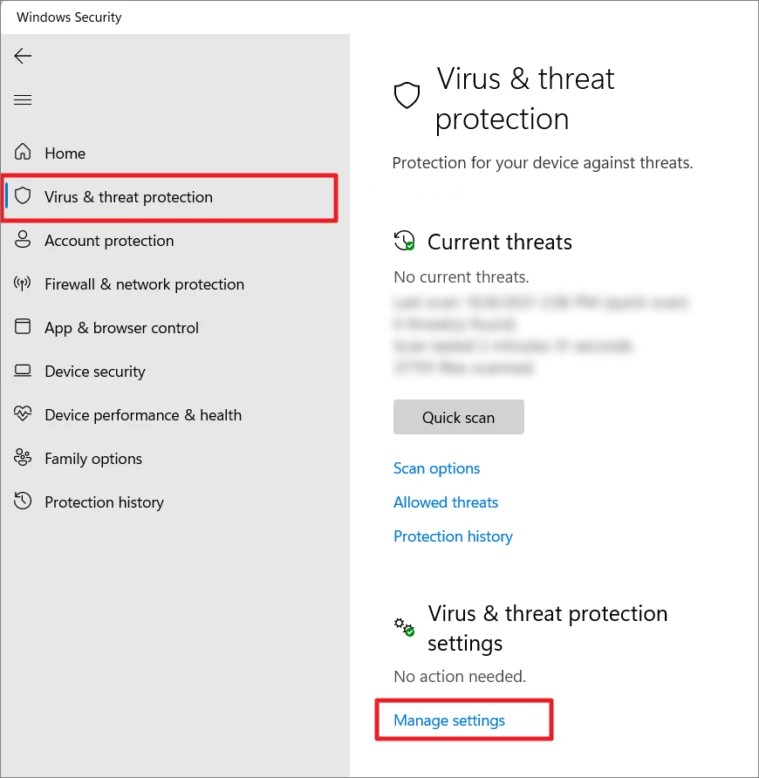
Step 4: In the Windows Security app, select the “Virus & threat protection” tab from the left menu. After that, click the “Manage settings” link under the “Virus & threat protection settings” section.

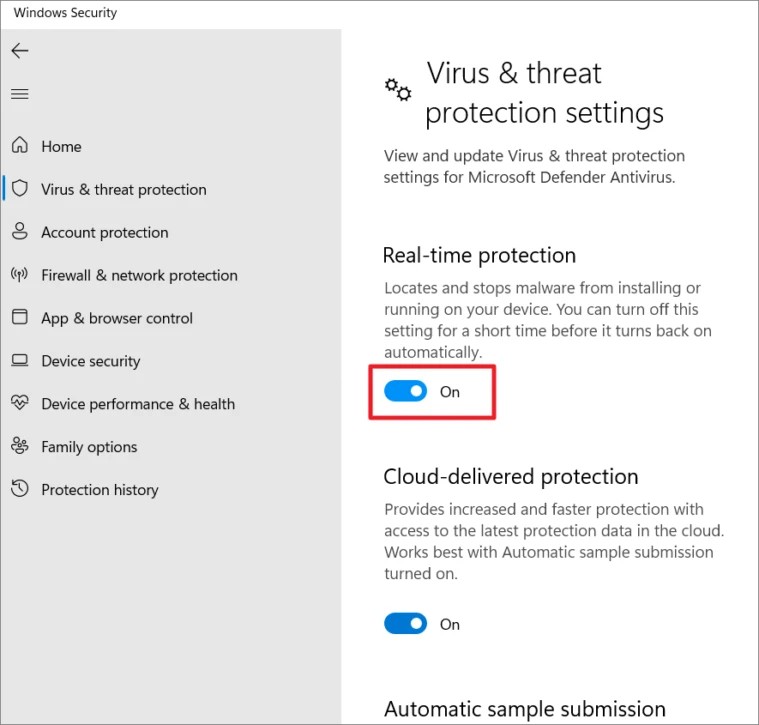
Step 5: Now, toggle the switch OFF under “Real-time protection” to disable the Microsoft Defender on your computer. When you see the User Access Control prompt, click “Yes” and the Microsoft Defender will be temporarily disabled.

Do note that when you restart your computer, the Microsoft Defender will be turned ON automatically. If you don’t want to restart your PC but want to reenable the security service, simply follow the same steps but toggle the switch in step 5 from OFF to ON.

