The Windows 11 operating system from Microsoft comes with several security-related features and one of them is the Lock Screen which is the first screen that the user sees when the Windows 11 OS starts. It shows date and time, apps status, and a custom background image, depending on your configuration.
But the problem is that it adds an extra layer that the user needs to navigate before starting the sign-in process. If you are looking to disable the feature, then there’s a workaround.
In this step-by-step guide, we will show you how to disable the Lock Screen on the Windows 11 operating system using the Local Group Policy Editor.
How to disable Lock Screen on Windows 11 using Group Policy Editor
Step 1: Open the Group Policy Editor tool on your computer. For this, click on the Start Menu to search for “gpedit” and from the search results, click on the application.
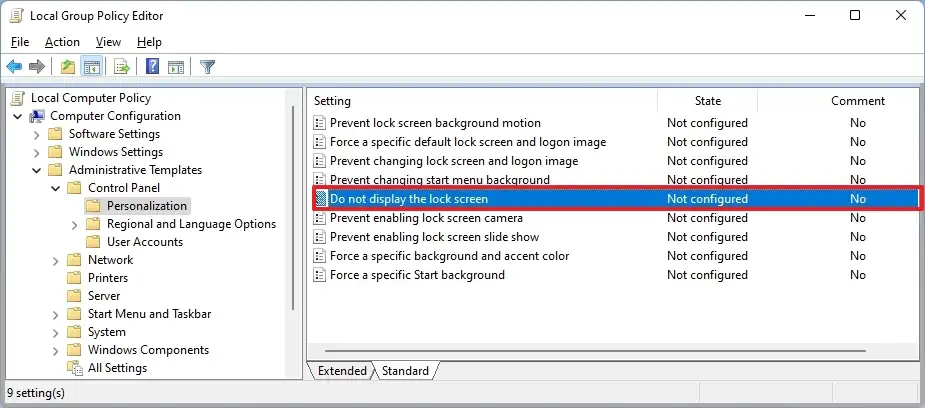
Step 2: When the Local Group Policy Editor opens, browse to the following location:
Computer Configuration > Administrative Templates > Control Panel > Personalization

Step 3: Double-click the “Do not display the lock screen” policy.
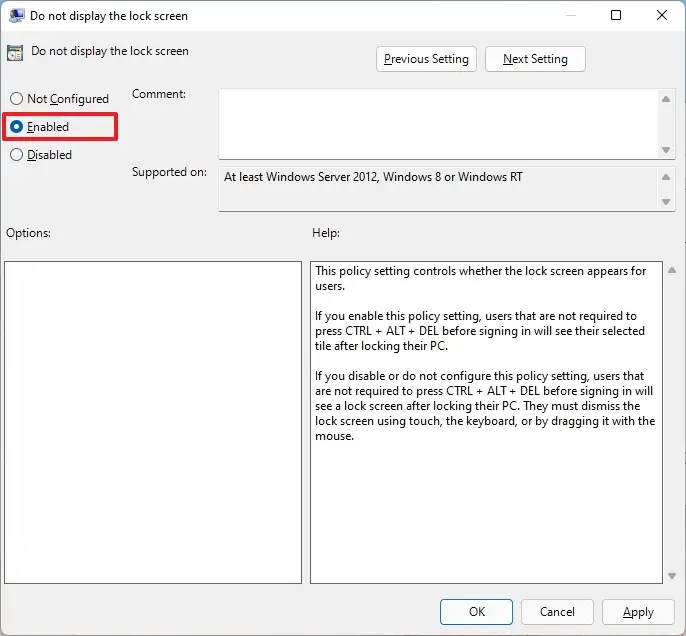
Step 4: In the window that opens up, select the “Enabled” option and then click on the “Ok” button.

That’s it. You will need to restart your Windows 11 computer for the changes to take effect. After making the changes, whenever the computer starts, it will show the sign-in screen instead of the lock screen.

