With regular updates being rolled out to your computer, the hardware, as well as software, remains up to date. It’s a good thing given that the update includes security patches, bug fixes, and sometimes performance improvements.
However, they may be a situation when updating the driver on your computer breaks things down, especially when you are using an older system. In such a case, it’s a good idea to disable automatic driver update on your computer.
There are a few different ways to do that but for this guide, we will be using the Local Group Policy Editior. Here is a step-by-step guide on how you can easily disable automatic driver updates on your computer.
How to disable driver updates in Windows 10
Step 1: Open the Local Group Policy Editor on your Windows 10 computer. For this, press the Windows + R keys on your keyboard, and when the Run window opens, type and enter “gpedit.msc”
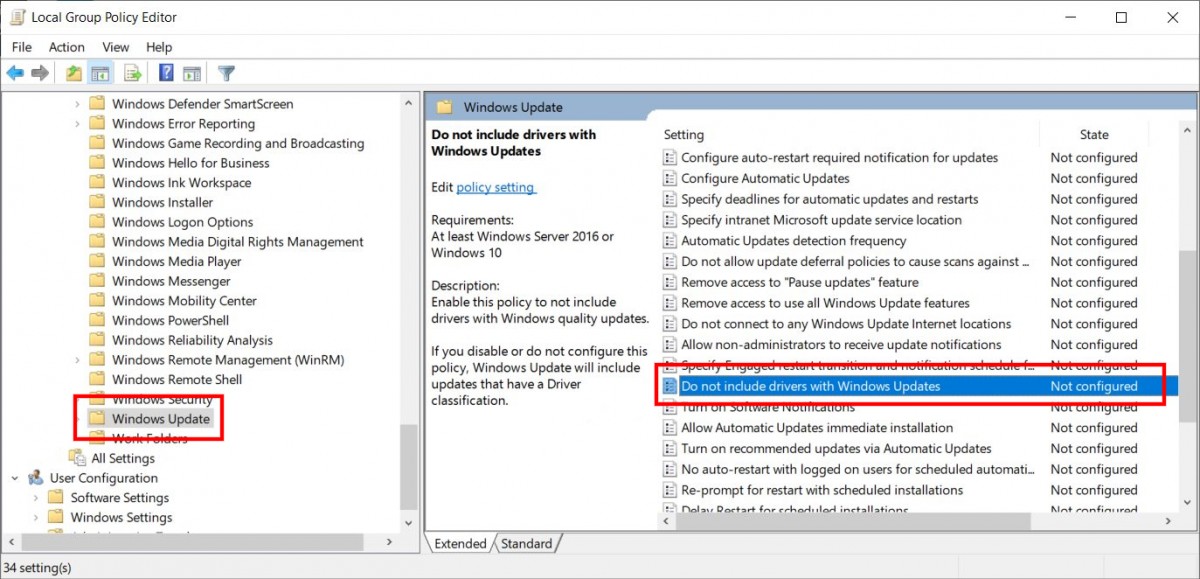
Step 2: In the Local Group Policy Editor window, navigate to the following location:
Computer Configuration/Administrative Templates/Windows Components/Windows Update

Step 3: On the right side pane, double click on the setting named “Do not include drivers with Windows Updates.”
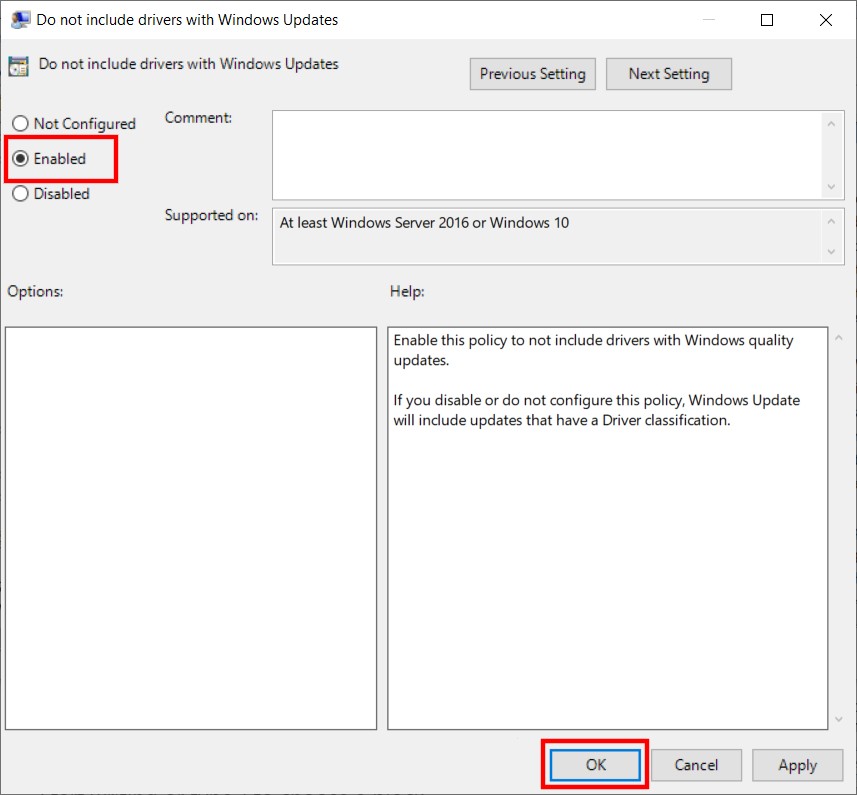
Step 4: In the window that opens, select the “Enable” radio button and then click on “Ok” to apply the changes.

Once you have followed every step mentioned above, restart your computer and the policy will be in effect. Now, drivers for your PC’s hardware won’t be updated automatically with new updates.
