In Windows operating system, Microsoft offers System Restore Point which comes in handy when you want to revert your system to an earlier state in case you are facing any issues with the working of the OS. This tool can quickly roll back the operating system to a previous functional state.
A single restore point can take around 0.6GB of space on your hard disk and the system can have multiple restore points. If your computer is in a good state and you’re running low on disk space, you can delete old Windows restore points to free up some disk space. In this step-by-step guide, we will help you delete System Restore Points on your Windows 11 computer.

How to delete System Restore Points in Windows 11
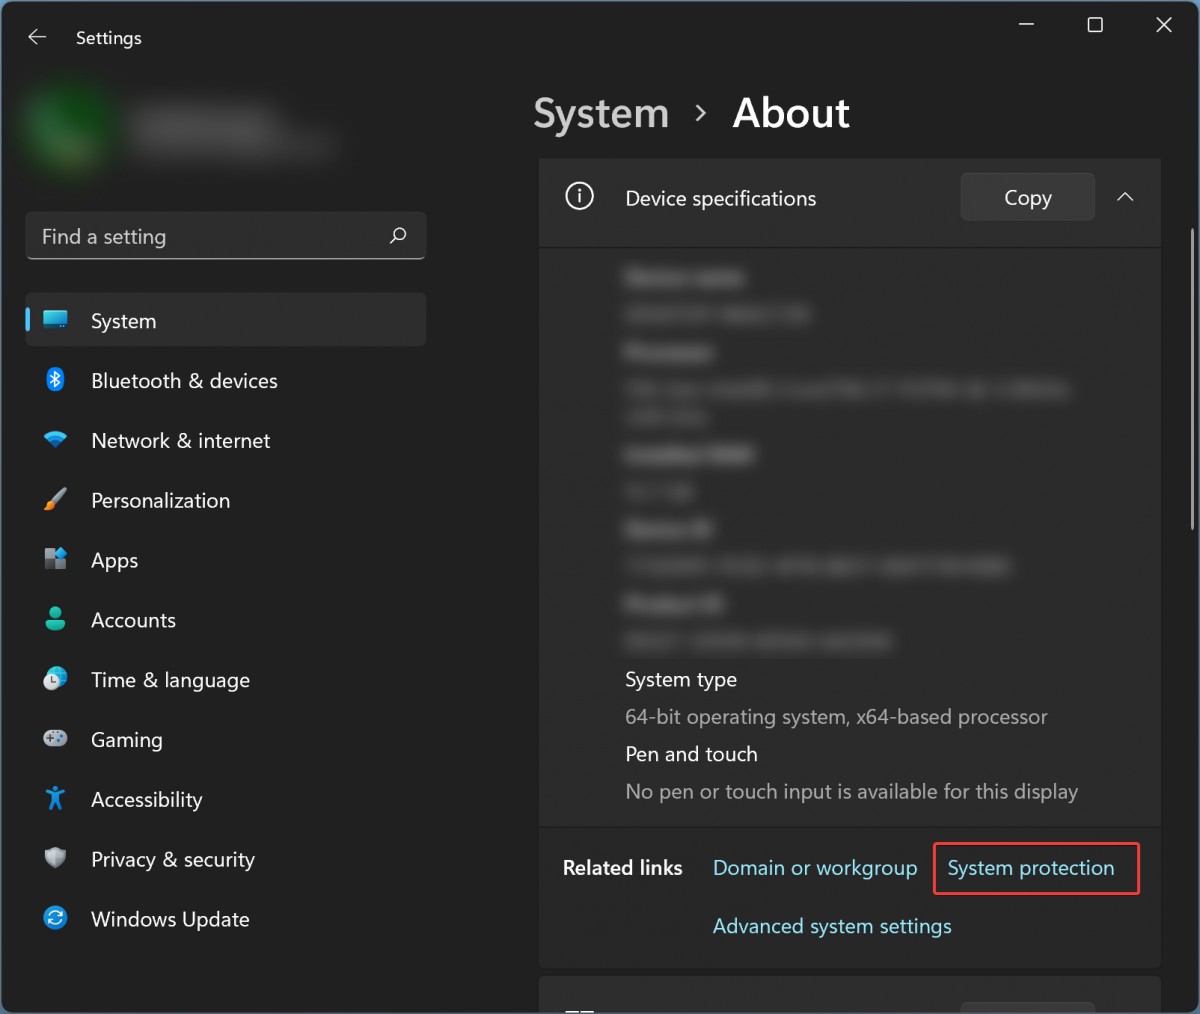
Step 1: Open the Settings app on your Windows 11 computer by pressing Windows + I keys on the keyboard.
Step 2: When the Settings opens, click the “System” category in the left side pane.
Step 3: Now, select the “About” tile on the right pane of the System app.
Step 4: In the “About settings” page, click on the link “System protection” which will open the System Properties window.

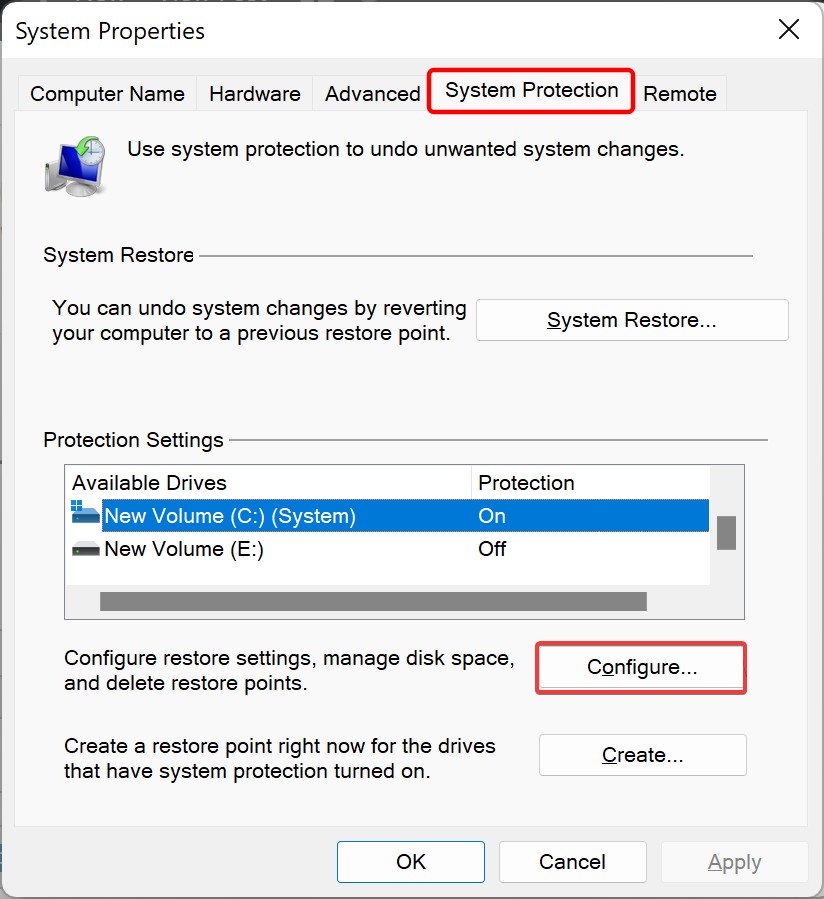
Step 5: When the “System Properties” window opens, select the “System Protection” tab.
Step 6: Now, select the drive from which you want to delete the system restore point and click the “Configure” button.

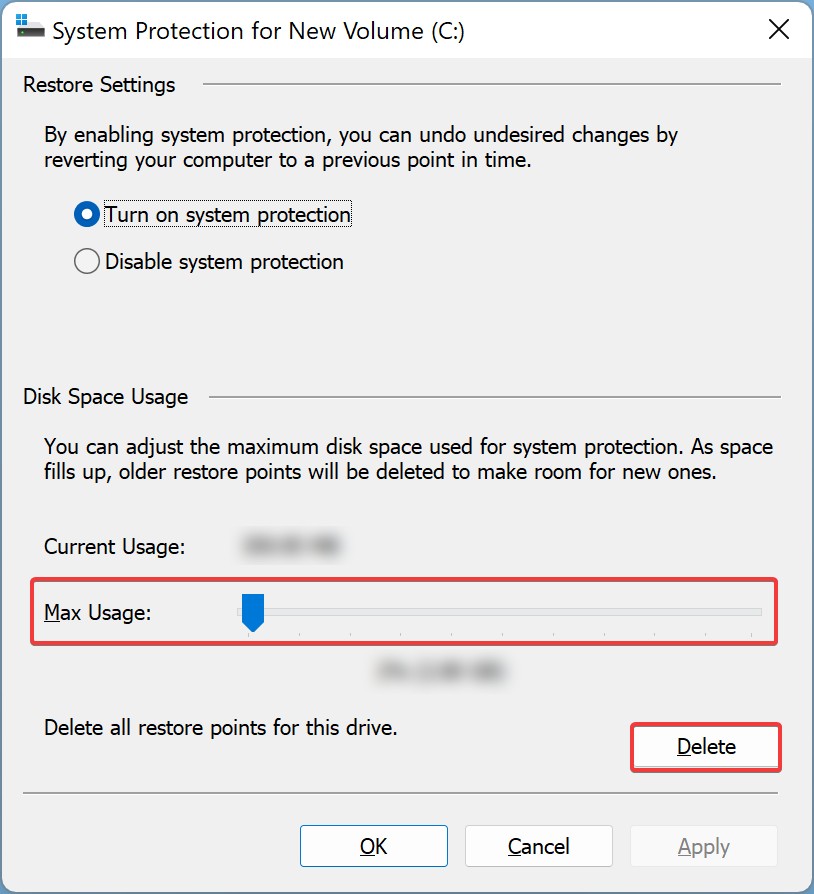
Step 7: If you want to free up the whole storage, click the “Delete” button.

That’s it. Once you follow the above steps, all the system restore points for that particular drive will be deleted.
If you are deleting system restore points to free up storage space, then you can also limit the storage space occupied by the system restore points by adjusting the “Max Usage” value in the System Protection tab in the System Properties window. In such a case, older system restore points will be deleted first when the Max Usage limit hits.

