Windows 10 operating system comes with a built-in Disk Management tool that comes in handy for several things, such as physical allocation of the disk partitions and defining the file system, among others.
It can be used to make several different partitions of the drive to properly organize the data. Further, the same tool can also be used to clear out space or partition or allocate them or alter the configuration.
In this step-by-step guide, we will show you how to delete an existing disk partition on your Windows 10 computer.
How to delete disk partition in Windows 10
Step 1: First of all, open the Disk Management tool on your Windows 10 computer. For this, click the start button and search for “Disk Management” and from the search results, select the app to open.
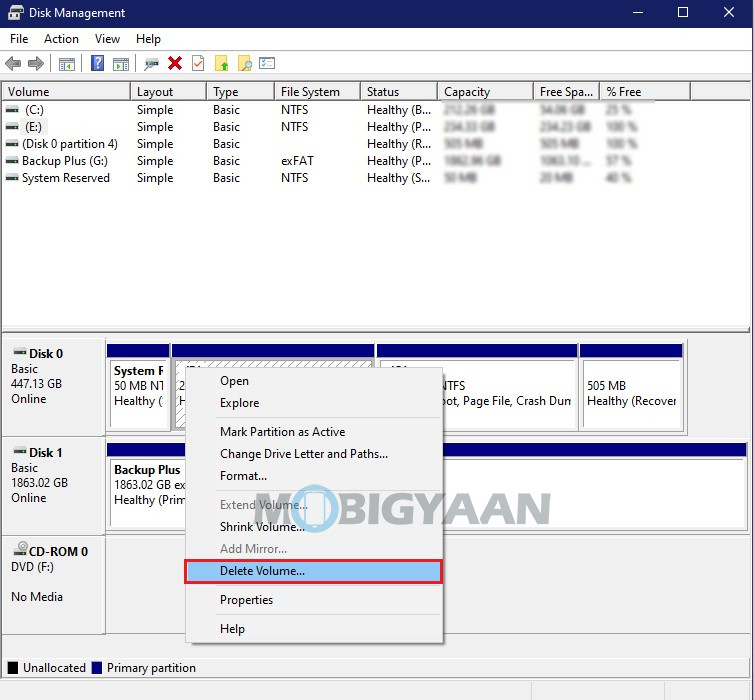
Step 2: Now, the Disk Management tool will show the list of disk partitions available o your computer. Select the one you want to remove.
Step 3: Right-click on the partition that you want to remove and from the context menu, select the “Delete Volume” option.

Step 4: In the dialog box that opens, select the “Yes” option to delete the partition, which will also erase all the data of that particular partition.
Once you follow this procedure, the partition will be removed from the computer and will no longer be available. Now, you can use the newly generated free space to expand an existing partition or create a new one, or split the space.

