You may have noticed that computers, especially those running Windows 10 operating system, usually slow down in performance after a long time of usage. To fix this, you may need to defragment your hard drive, which is also being referred to as ‘defrag’.
This is because over a long time of usage, files on the hard drive get fragmented and the system gets slowed down as it then needs to check multiple places on the hard drive to access those pieces.
Thankfully, the Windows operating system comes with a built-in tool that allows users to easily defragment files on the hard drive. In this step-by-step guide, we will show you how you can do it on devices running Windows 10 operating system.

What is defragment and how it works?
With the disk defragmentation process, the system moves chunks or pieces of information on a disk around in a way that the related data are physically closer to each other on the hard disk.
This helps in improving the speed on the disk as more data can be read without the need to move around the drive to look for the data. As with the faster read rate, the same is also applicable for the write speed, and thus, it offers better performance.
But Solid State Drives or SSDs don’t use the read/write head around a spinning disk for reading or writing data on the drive. So, there is no need to perform defrag on an SSD and even the built-in tool doesn’t allow defrag for SSDs.
It is also said that performing defragmentation on SSD can be detrimental to the longevity of the drive. Most modern computers come packed with SSDs so make sure the type of drive on your computer before moving ahead.
How to defrag drives in Windows 10
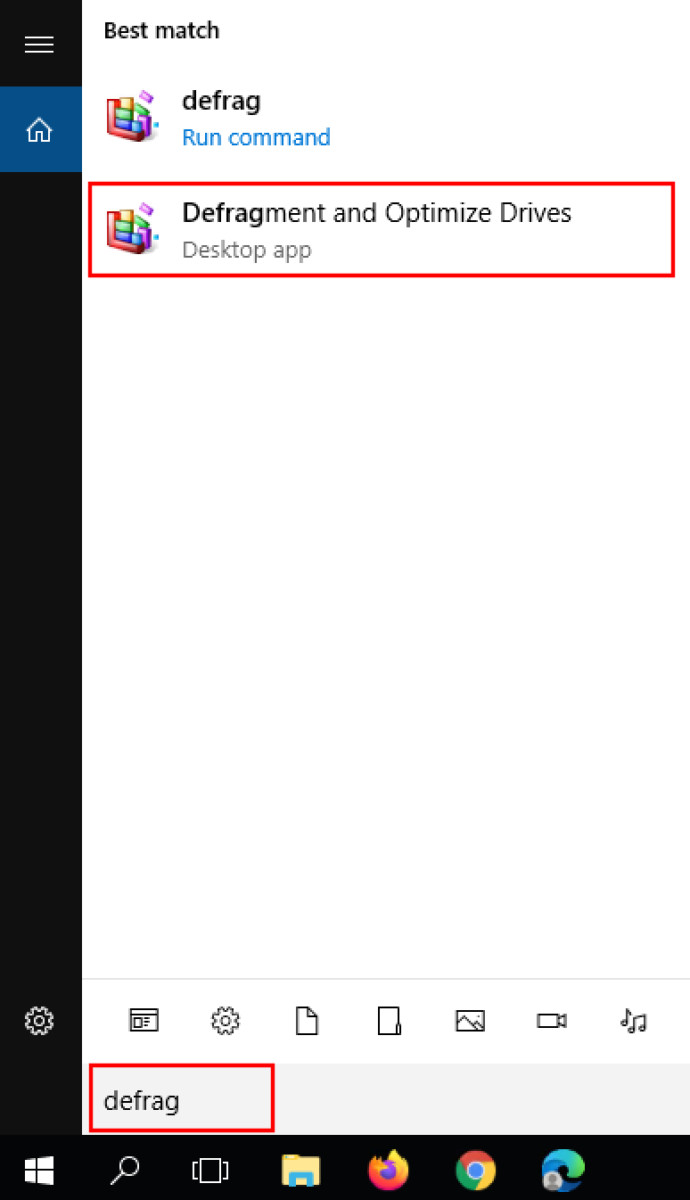
Step 1: First of all, open the “Disk Optimization Tool” on your computer. To do so, search for the term “optimize” or “defrag” in the Start Menu.

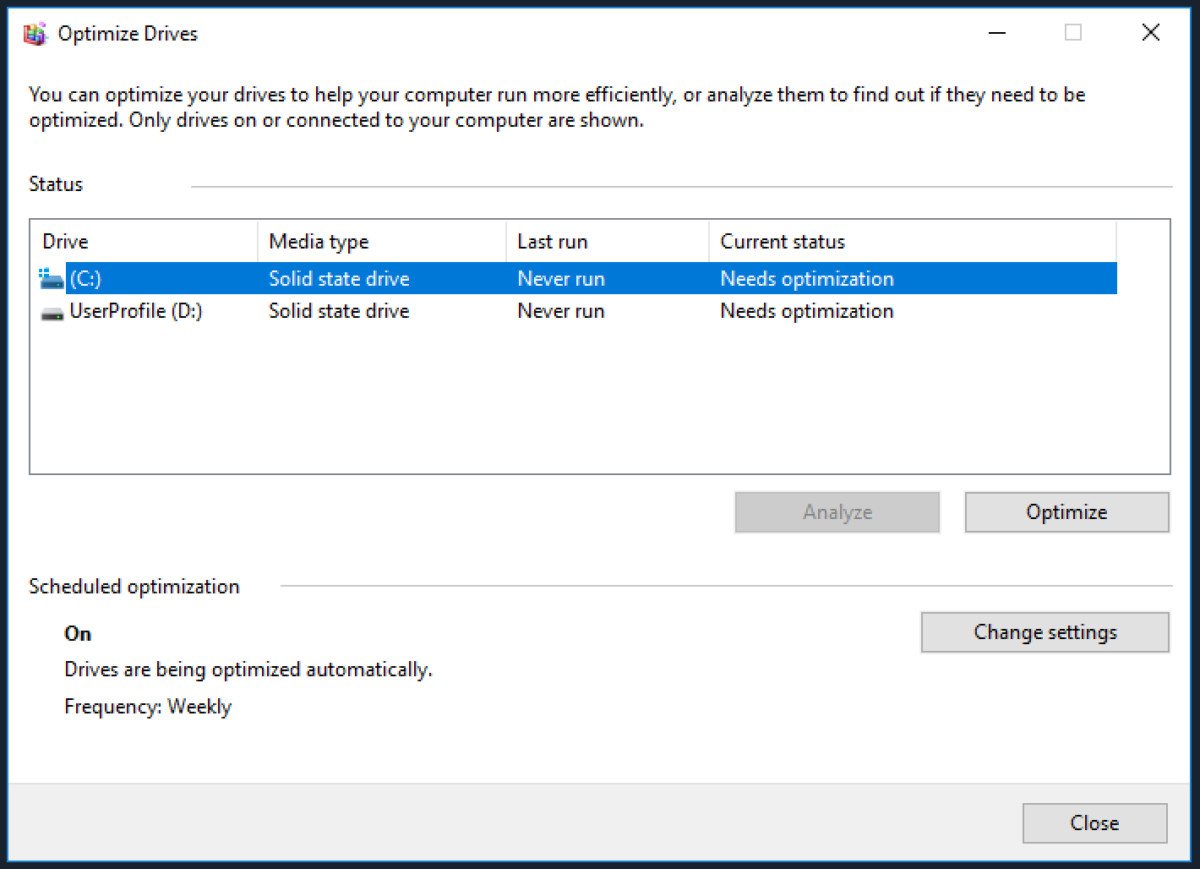
Step 2: When the Disk Optimization Tool opens, select the hard drive that you want to defrag. After you select the drive, click on “Analyze.”
The Analyze option will be greyed out for the Solid State Drive (SSD). There’s no need to perform defrag for SSDs.

Step 3: The drive will now be analyzed and show you the results. Although there’s no hard rule for this, it is a good idea to keep the percentage of fragments files on your drive under 5 percent.
Step 4: If you see the need to perform defragmentation on your hard drive, select the drive, and click on “Optimize.”
Step 5: The system will now perform the process and at the end of it, you should see 0 percent of fragments files.
Do note that depending on the size of your drive and the level of fragmentation, it may take a good amount of time for the process to complete.
How to schedule automatic drive optimization
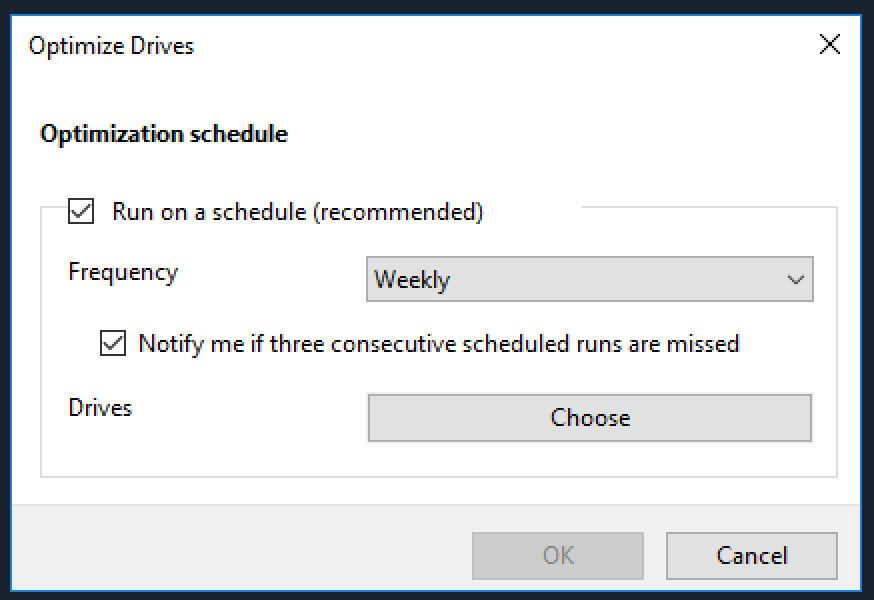
Step 1: In the Optimize Drives window, click on the “Change Settings” button.
Step 2: You will now get the option to change the frequency — Daily, Weekly, or Monthly. Select your choice from the drop-down menu.

Step 3: Now, in the Drives section, click on “Choose” and select the drives you want to apply this automatic schedule to.
Step 4: Click on the “OK” button to apply the changes and then close the tool.
You can also check out our other Windows guide to make your experience even better by customizing the operating system as per your needs. We have also covered quite a few guides related to macOS and Chromebook as well.

