Apple iPhone comes with a built-in Notes application in the iOS operating system, which as the name indicates, takes care of the simple yet important tasks of taking notes.
The Notes application on iPhone wasn’t feature-rich and the third-party apps were taking over the market. But then, Apple started introducing more features, most of which were introduced with the iOS 15 but some more are coming with iOS 16.
One of the features that the company introduced is support for Smart Folders in the Notes app. It offers a different and easier way of finding notes. The created Smart Folders can be filtered with several options.
In this step-by-step guide, we will show you how to create Smart Folders in the built-in Notes application on your Apple iPhone.

How to create a Smart Folder in Notes on Apple iPhone
Step 1: Open the Notes application on your Apple iPhone.
Step 2: When the app opens, tap on the “New Folder” button from the bottom-left corner.
Step 3: After that, choose an account such as Om My iPhone or iCloud.
If you select the iCloud option, then the folder will be synced over the iCloud and if you select On My iPhone, then the folder will be limited to your local device.
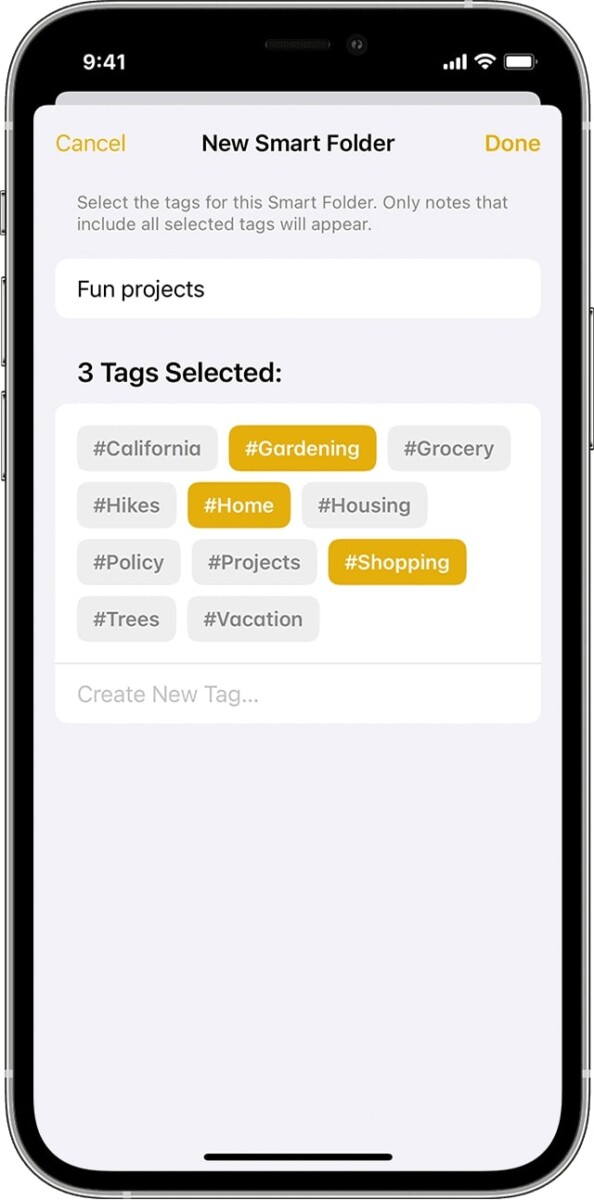
Step 4: Once done, tap on the “New Smart Folder” and then enter a name for the folder. You can then select the tags or create some new tags.

That’s it. After you have followed the above-mentioned step-by-step guide, you have successfully created a new Smart Folder in the Notes application on your Apple iPhone. You can also create a Smart Folder from the Tags browser by tapping on the tag and then selecting the More button, followed by Create Smart Folder, and then naming and saving the folder.
The Smart Folder can be accessed from the Folders section in the Notes app and it appears in the same list as the rest of the folders. To differentiate between the types of folders, the Smart Folders have a gear icon to the left.
