A couple of weeks ago, Microsoft announced the latest Windows 11 operating system and as the name itself indicates, the new software comes as a successor to the Windows 10 operating system.
While setting up the Windows 11 operating system on your computer, the setup will require you to enter the region and keyboard layout. If you don’t want to use a Microsoft account for this, then here is a step-by-step guide on how you can set up the Local Account on your computer.

How To Create Local User Account In Windows 11 During First Boot
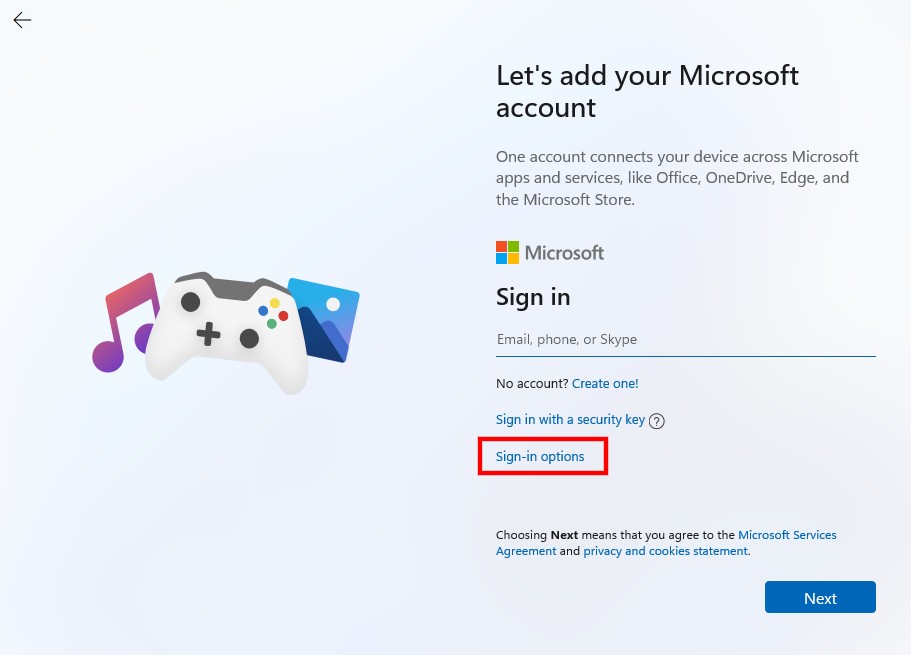
Step 1: When the system shows the Account Login Screen, click on the “Sign-In Options” link.

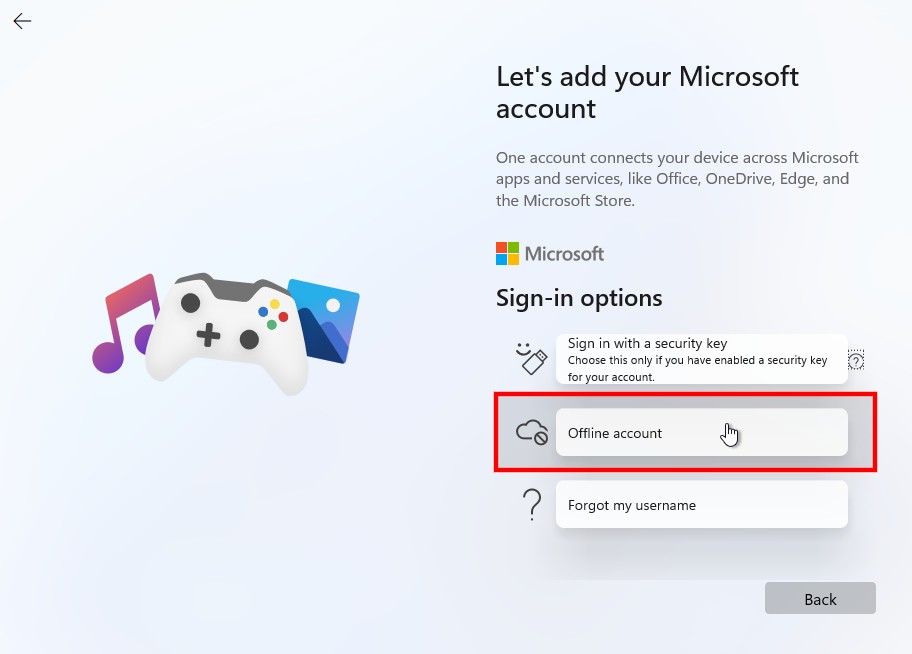
Step 2: Now, on the next screen, click on the “Offline account” option.

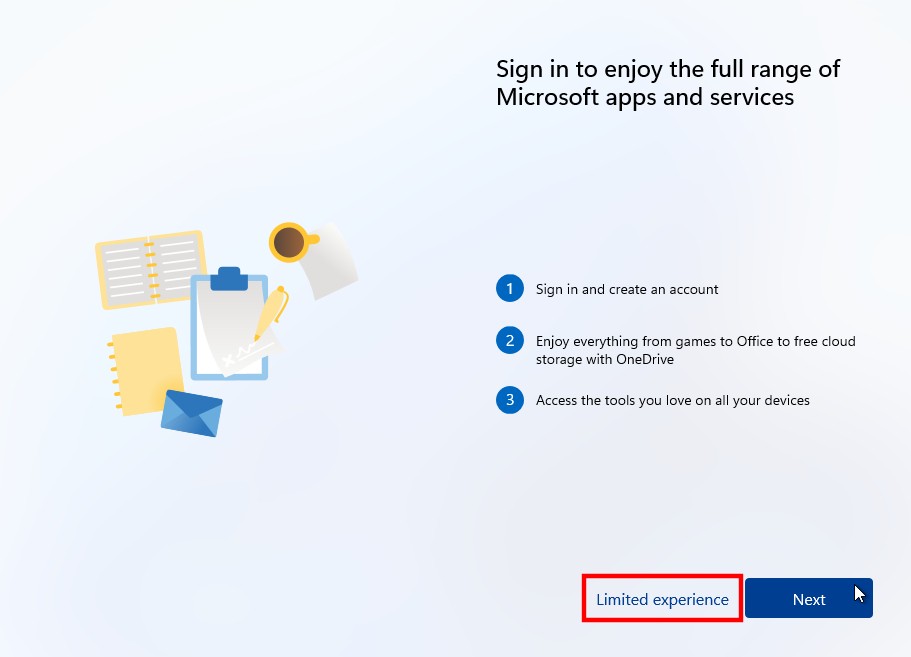
Step 3: You will now be prompted to go for a Microsoft account but you have to click on the “Limited Experience” option.

Step 4: To set up a Local Account, you will now be asked your name. Enter the details and then click the “Next” button.
Step 5: Now, you will be asked to “create a password” for logging into your PC and when you are done, click the “Next” button.
Step 6: Create answers for 3 Security Questions. After the account is set, Windows will finish the setup and the PC will boot.
The good thing about setting up a Local Account on your computer instead of using the Microsoft account that your device will store all the settings and data locally and you can still keep using Windows Store, Mail, etc. However, some of the features like Find My Device, Cloud Clipboard, and Windows TImeline, etc. won’t work.
