Microsoft regularly pushes new updates to the Windows operating system and the same is the case with the new Windows 11 OS. The history of the installed updates on the Windows-powered computer can be easily checked through the “Update history” option on the Settings page.
Apart from showing the list of installed updates, the update history page also presents some other information that can be useful to find details about fixes, improvements, and known issues for a recently installed quality update or find out the one causing issues to uninstall it.
There are a few different ways to check the update history on the Windows 11 operating system apart from the Settings app. In this step-by-step guide, we will show you how to check the Windows 11 update history using Command Prompt on your computer.
How to check Windows 11 update history with Command Prompt
Step 1: Open the Command Prompt on your Windows 11 computer. For this, you can click on the Start menu and search for the program and then click on the app to open it.
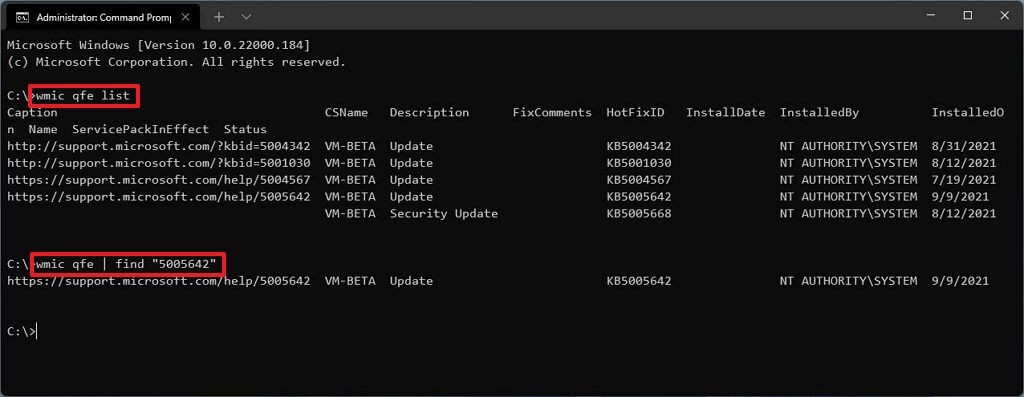
Step 2:When the Command Prompt window opens on your
wmic qfe list
If you want to find a specific update, you can use the KB number. Here’s the sample command for finding a specific update in the Windows OS:
wmic qfe | find "5008353"

That’s it. After completing the above-mentioned steps, you will get a list with links to the Microsoft support website with more details about what’s new with the update. Apart from that, you will also get details like when the update was installed, its description, hotfixid (KB number), and more.

