Microsoft usually releases two new versions every year that means that roughly every six months, it starts rolling out a newly updated version of the operating system. However, many don’t get them and are stuck with the older versions.
The company is also very cautious about how it rolls out updates and how the new update affects the user’s system. And thus, the update rollout is very slow and may take months or even a year for it to be available for everyone.

If you haven’t received the latest update, you can skip the compatibility hold and update to the newer version. But, if you are running an older version of the Windows OS and are not experiencing any issues or don’t want the newly introduced features by Microsoft, then it’s better to wait for the update to be available for your system.
But how can you determine which version of the Windows operating system you are running on your computer? Well, here is a step-by-step guide explaining to you how to check the Windows 10 version on your PC.
How to check Windows 10 version on your PC
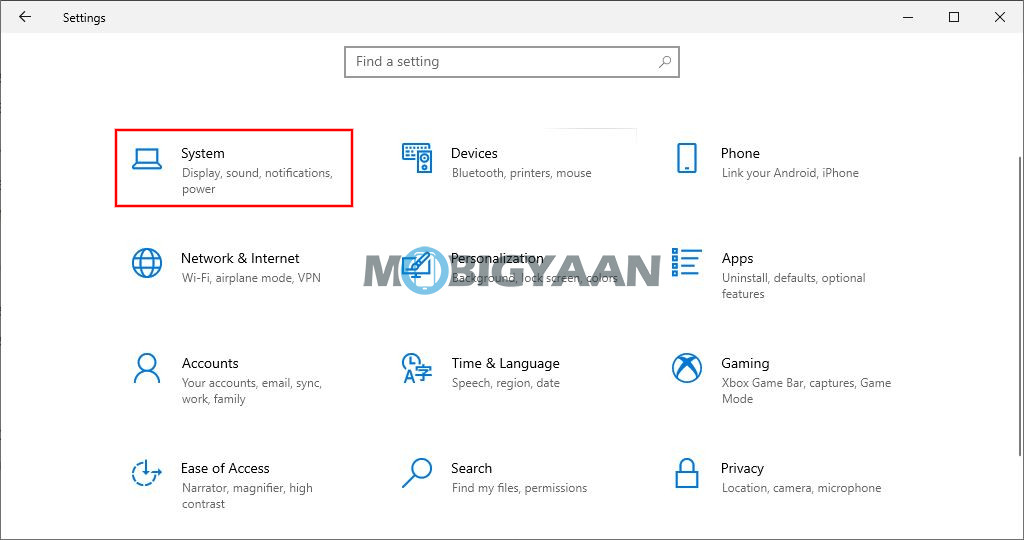
Step 1: First of all, open the Settings app on your Windows computer. The fastest and easiest way to do this is by pressing the Windows + I keys on the keyboard.

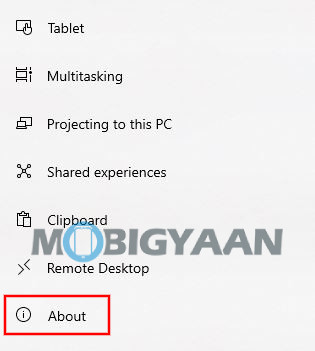
Step 2: In the Settings app, click on the System and then from the left-side menu, click on “About” which should be the last option in the list.

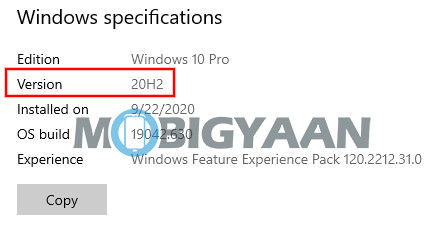
Step 3: Under the “Windows specifications” section, you will see the ” Version” label which shows what version of the Windows 10 operating system has been installed on your computer.

If you are not running the latest version of the Windows OS on your computer, it’s a good idea to update your system. For this, go to the Settings app, select Updates & Security, and in the Windows Update section, click on the “Check for updates” button.
