Similar to how RAM (Random Access Memory) is used to store temporary system files on your computer, VRAM (Video RAM) is used to store the image data. It is much faster than the RAM but the memory allocated to the VRAM is quite less compared to the RAM available on the system.
Unlike the regular RAM, it cannot be replaced on PCs with different GPUs in most cases. VRAM acts as a buffer between the CPU and video card processor to ensure the uninterrupted running of games or other graphics-intensive applications.
Here is a step-by-step guide to check how VRAM is available on your computer running the Windows 11 operating system.
How to check VRAM available in Windows 11
Step 1: Open the Settings app on your Windows 11 computer. For this, press the Windows + I keys on the keyboard.
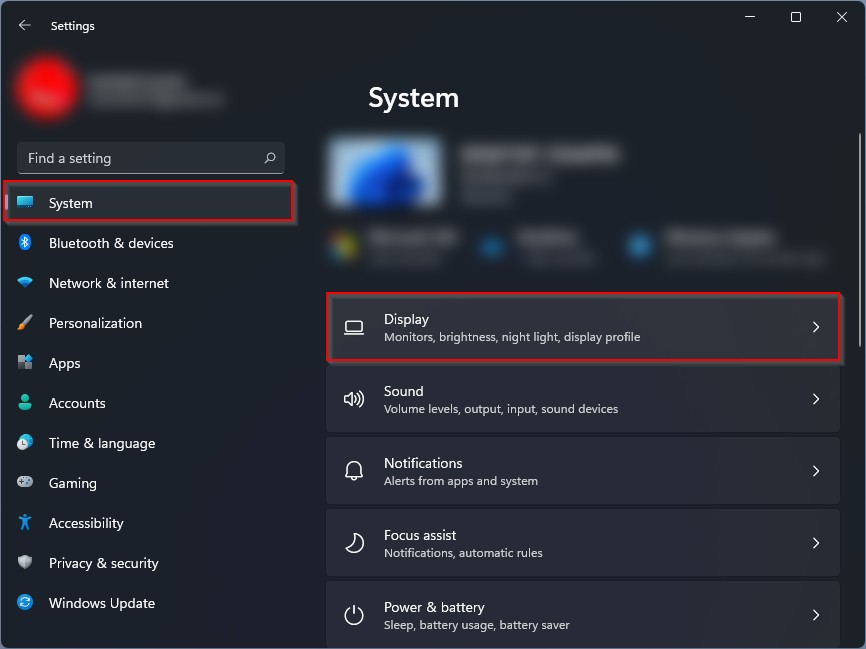
Step 2: When the Settings app opens, click on the “System” from the left side pane.
Step 3: In the System section, click on the “Display” tab on the right-side panel.

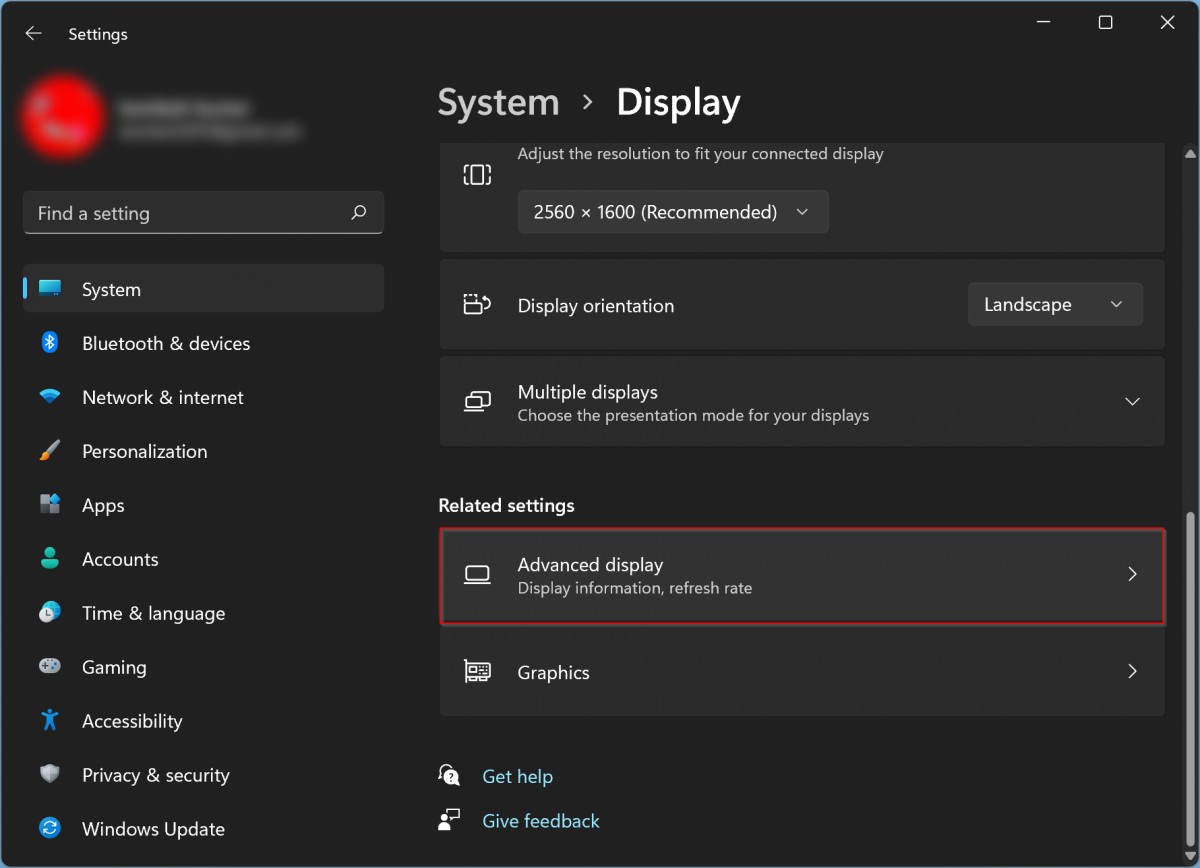
Step 4: Select the “Advanced display” option under the Related Settings section.

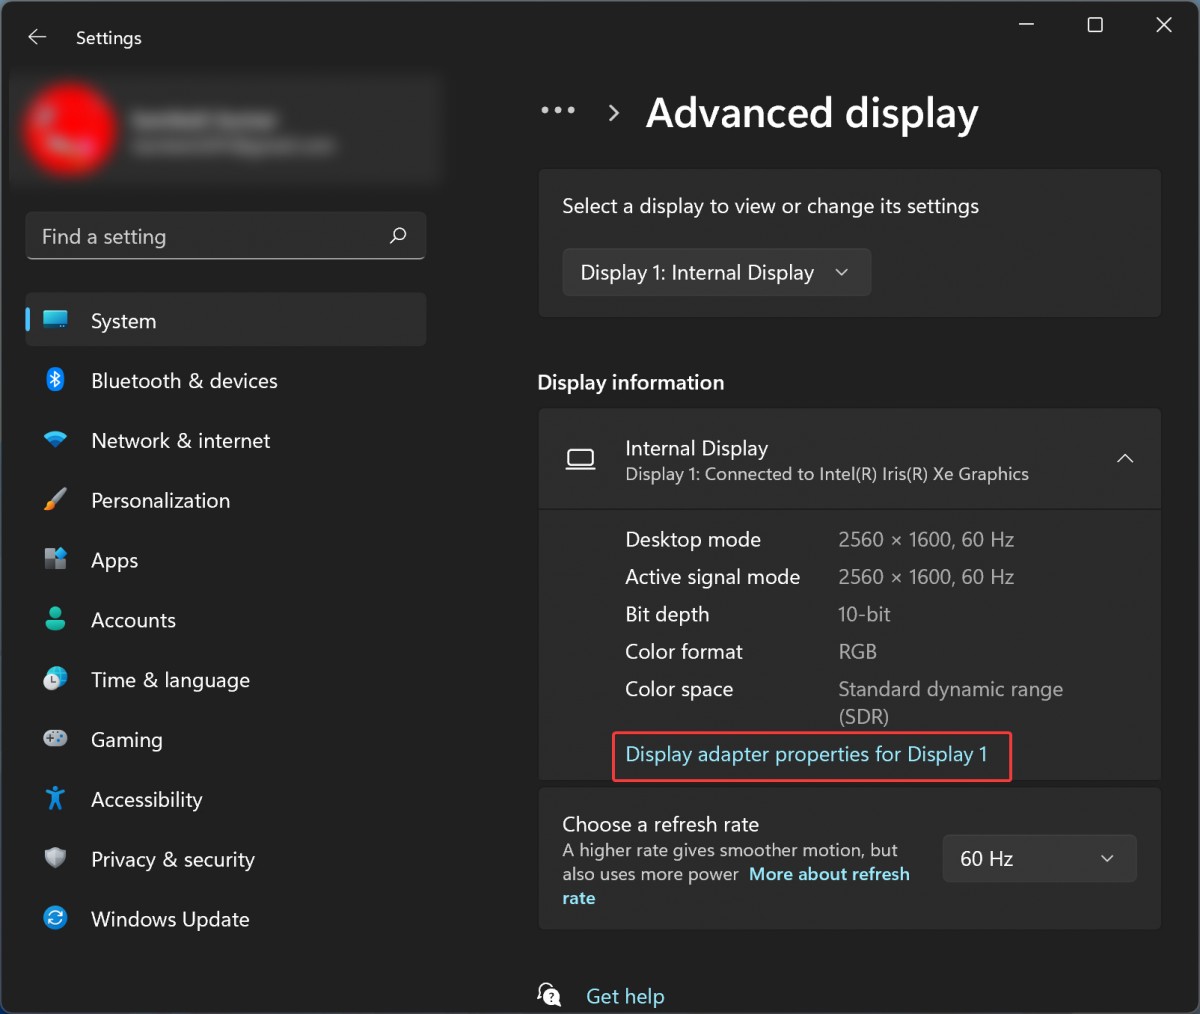
Step 5: On the Advanced Display page, go to the “Display information” section and click on the “Display adapter properties..” option.

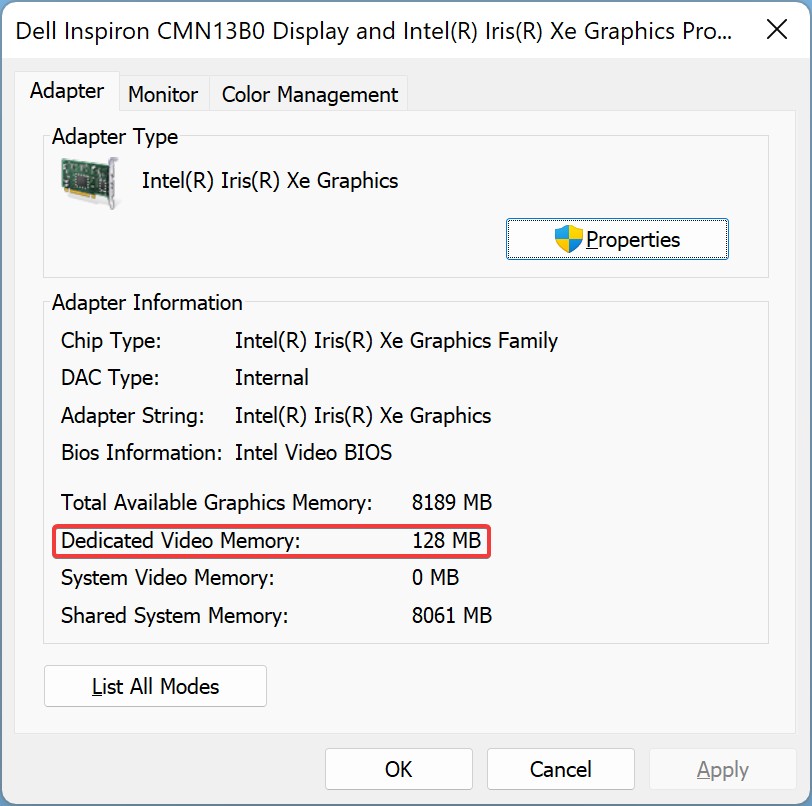
Step 6: In the Properties window that appears, check the video RAM value in the Dedicated Video Memory entry.

That’s it. Following the above-mentioned steps will show how much VRAM or Video Memory is available on your Windows 11 computer. If you are using a multi-monitor setup, then you can use the dropdown menu in the top bar in step 5 to pick the display for which you need to see the display properties.
