If you want to run a different operating system on your computer other than the main one, then you need to have Virtualization feature enabled on your system.
Microsoft recently released the first preview of the Windows 11 operating system and since the new OS is still in beta, it’s a good idea to not install it as a primary operating system on your computer.
To test it out as a secondary OS, you will need to have Virtualization feature enabled on your computer. If you are not sure if the feature is enabled or not, then here is a guide showing you how to check the status of Virtualization feature in Windows 10.
Check if Virtualization is enabled in Windows 10
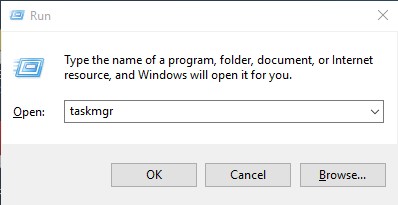
Step 1: Open the Run window on your Windows 10 computer by pressing the Windows key + R key on your keyboard.
Step 2: When the Run window opens, type “tskmgr” in the text field and then press the Enter key to open Task Manager.

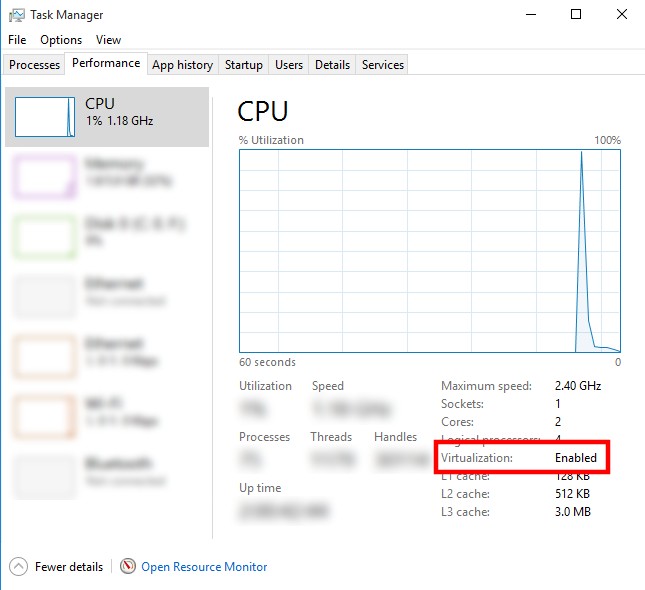
Step 3: In the Task Manager, go to the “Performance” tab and then check the “CPU” section. Just below the graph, you can locate “Virtualization” and its status besides it.
If the feature is enabled on your system, it will show as “Enabled” and if it is not enabled, the status will be displayed as “Disabled.”

If the Virtualization feature isn’t enabled on your computer, then you will have to update the BIOS settings. After restarting your system, enter the BIOS settings and go to the CPU section and locate the option for Virtualization and change its status from Disabled to Enabled and then save settings and restart your computer.

