Microsoft’s Windows 11 operating system comes with several features and functionalities and one of them offers the users an ability to check the download and upload statistics of the internet bandwidth usage of updates, Microsoft Store apps, and other products on your device.
If there are multiple devices in your local network and you have a limited bandwidth, then you can restrict how the Windows 11 downloads updates on the device as well as the uploads part of updates to other devices locally and over the internet through the Settings app and through the Group Policy Editor.
To limit or control the internet bandwidth for the Windows updates downloads and uploads on your computer, you will need to check how much data is being consumed, which is possible to do easily on your computer.
In this step-by-step guide, we will show you how you can easily check the statistics of downloads and uploads for the internet bandwidth on your Windows 11 computer through the Settings application.
How to view Download and Upload stats in Windows 11
Step 1: Open the Settings application on your Windows computer.
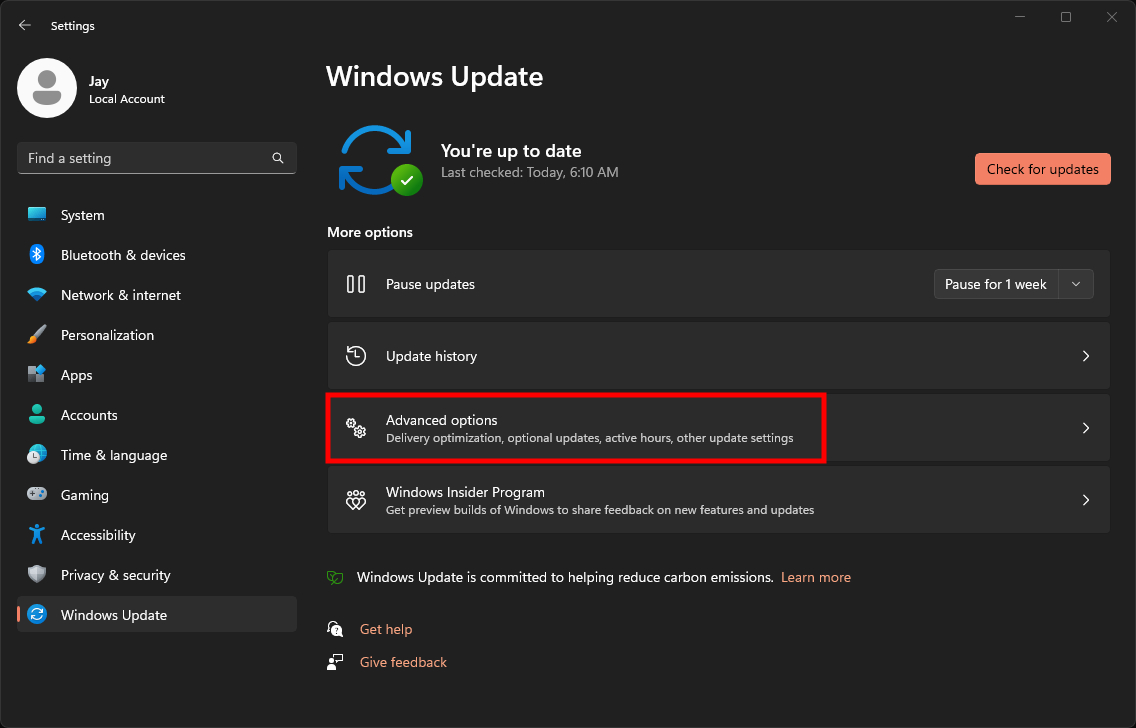
Step 2: When the app opens, click on the “Windows Update” option.

Step 3: In the Windows Update settings, click on the “Advanced options” on the right sidebar.

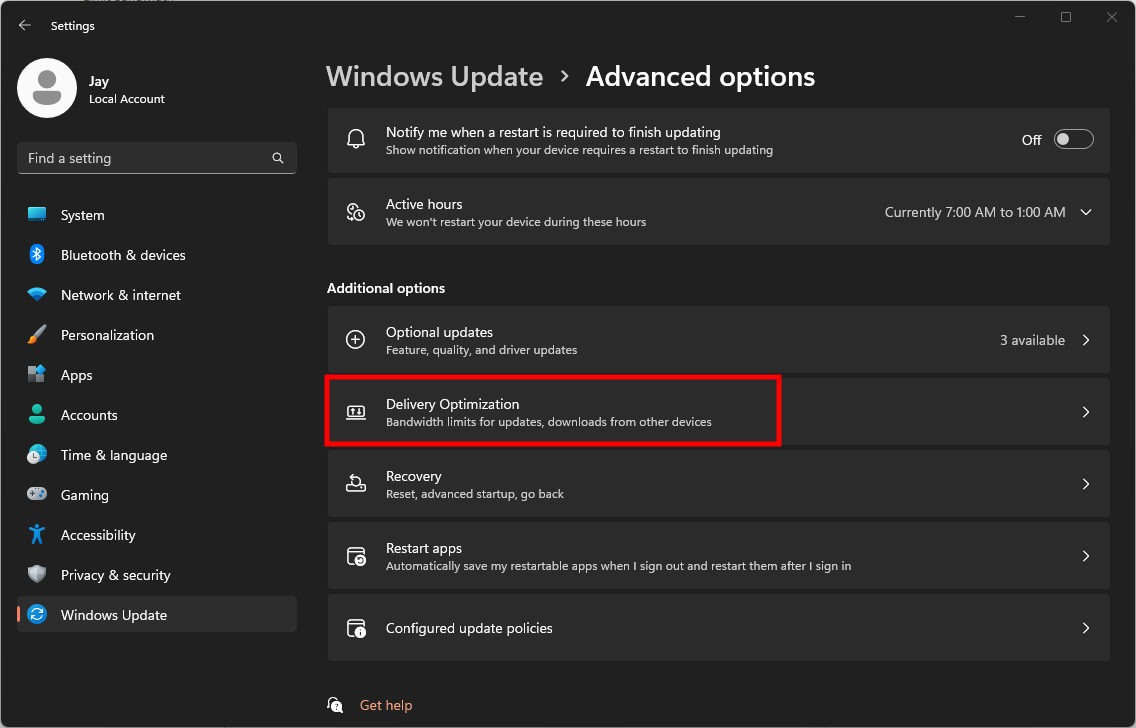
Step 4: Under the Additional Options section, click the “Deliver Optimization” settings.

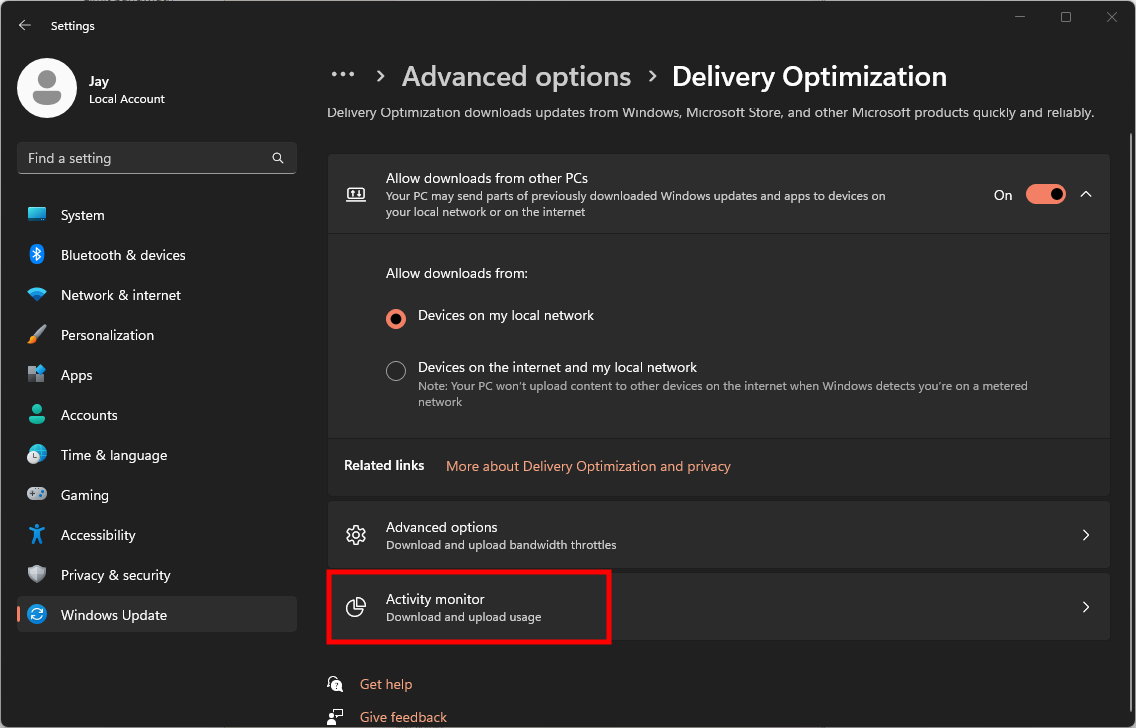
That’s it. Once you follow the above-mentioned steps on your Windows 11 computer, the screen that opens will show an overview of the uploads and downloads for updates, including the percentage coming from Microsoft, Microsoft cache servers, computers in the local network and the internet, and upload to the internet and local network for other devices.

![How to play sound from two different audio outputs [Windows 11] 4 Here Are Some Useful Windows 11 Tips and Tricks For You](https://www.mobigyaan.com/wp-content/uploads/2022/11/10-Useful-and-Handy-Windows-11-Tips-and-Tricks-For-You-75x75.jpg)