Refresh rate is an important parameter that impacts the viewing of the display. It is measured in Hertz (Hz) and it is basically the number of times an image appears on the screen per second. So, the faster the image changes or the screen refreshes, the better and smoother the viewing experience.
The lower refresh rate on the screen can cause some issues, including screen flickering, which can lead to headaches and eye strain. The default or the most common refresh rate is 60Hz but with more and more monitors with higher refresh rates going mainstream, you may want to change it on your device.
In this step-by-step guide, we will show you how you can quickly and easily adjust the refresh rate of your monitor or display when the system is running the Windows 11 operating system.
Do note that your PC’s monitor needs to have support for a higher refresh rate in order to make these changes.
How to adjust or change the display refresh rate in Windows 11
Step 1: Open the Settings application on your Windows 11 computer.
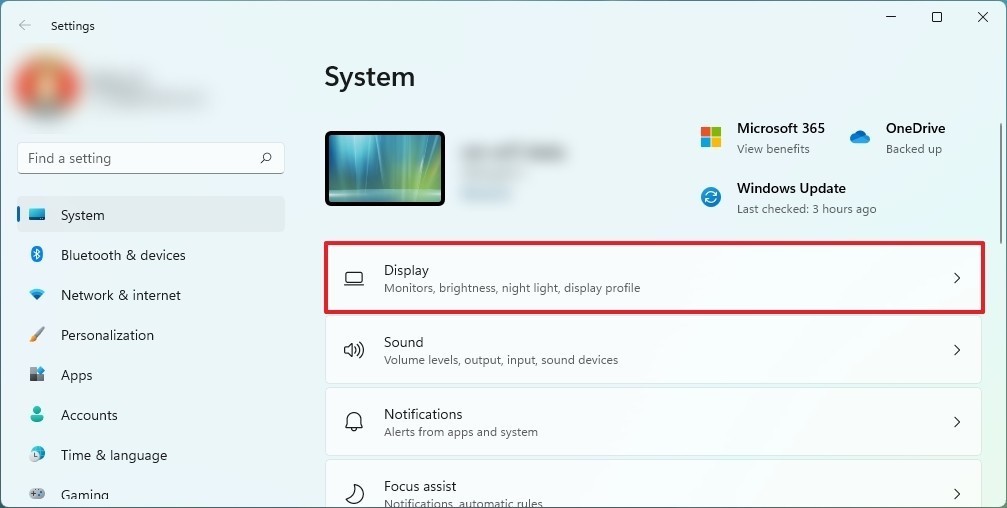
Step 2: When the Settings app opens, click on the “System” option.
Step 3: Now, select and then click on the “Display” option from the right pane.

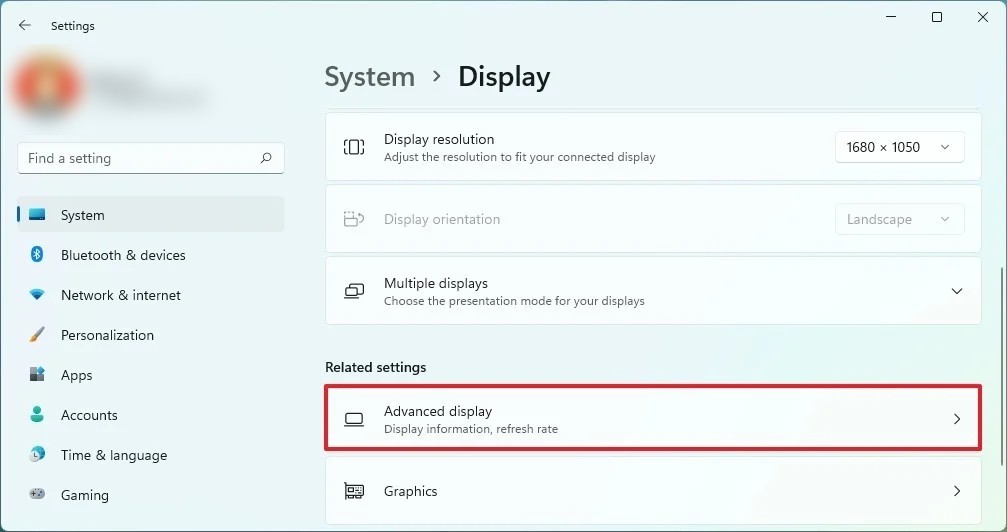
Step 4: Under the “Related settings” section, click on the “Advanced display” setting.

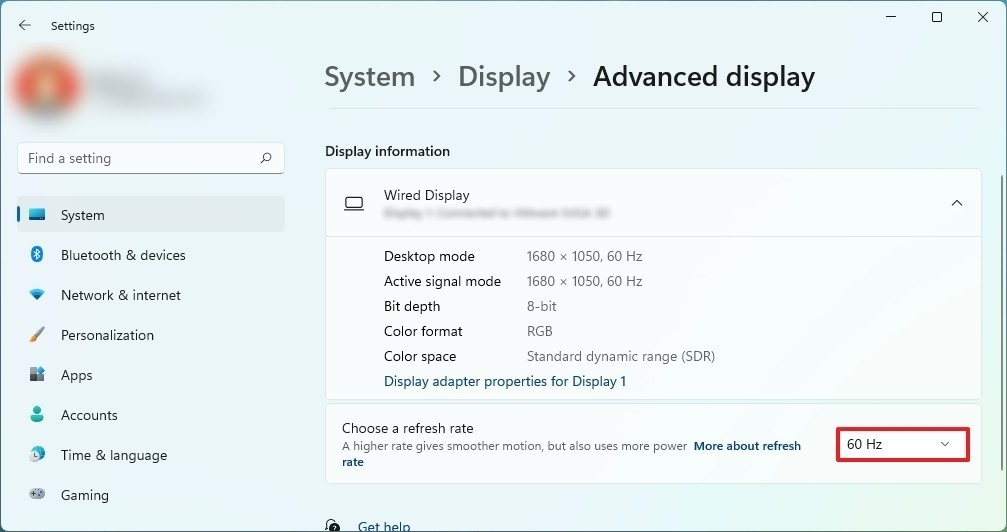
Step 5: Now, under the “Display information” section, select the refresh rate with the “Choose a refresh rate” dropdown.

That’s it. Once you have made the changes by following this guide, you will see that the system has applied the new setting, and the monitor will start using the new refresh rate. If you are not comfortable with the newly made changes, then you can always revert back to the preview settings.
