On computers running the Windows 11 operating system or any other system, the mouse is a critical component that allows users to quickly and easily navigate through various sections on the computer and complete actions.
As mouse plays a critical role in the operations of the computer, it is important to make sure that it is tuned properly as per the user’s liking and needs for a better user experience.
In the Windows 11 operating system, Microsoft allows users to quickly and easily update settings related to the mouse and pointer speed. There are multiple ways, through the Settings app, Control Panel, and Registry Editor.
In this step-by-step guide, we will show you how to change the mouse pointer speed on your Windows 11 computer using the Settings application.

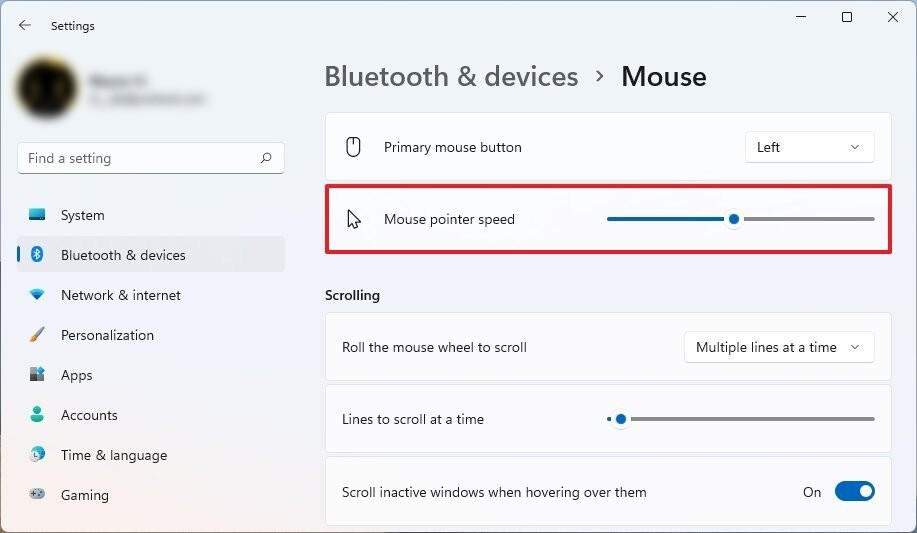
How to quickly and easily change mouse speed in Windows 11
Step 1: Open the Settings application on your Windows 11 computer. For this, click the Settings app icon from the Start Menu or search for the application and select it from the search results. Alternatively, you can also press the Windows + I keys on the keyboard.
Step 2: When the Settings app opens, click on the “Bluetooth & devices” option from the left sidebar.
Step 3: After that, click on the “Mouse” option from the right side of the window.
Step 4: On the Mouse settings page, use the slider fir the “Mouse pointer speed” to adjust the pointer speed.

That’s it. After you have successfully followed the above-mentioned steps, the speed of the mouse pointer on your Windows 11-powered computer will be changed to the one you just set. It will be reflected as soon as you adjust the slider.

