During the initial setup process of the Windows 10 operating system on the computer, it asks for a language to be set up as the default. But what if you made a mistake in the process or if you want to change it?
In this step-by-step process, we will show you how to change the default language on your Windows 10 computer through the Settings app and without having the need to reinstall the operating system.
Change default language in Windows 10
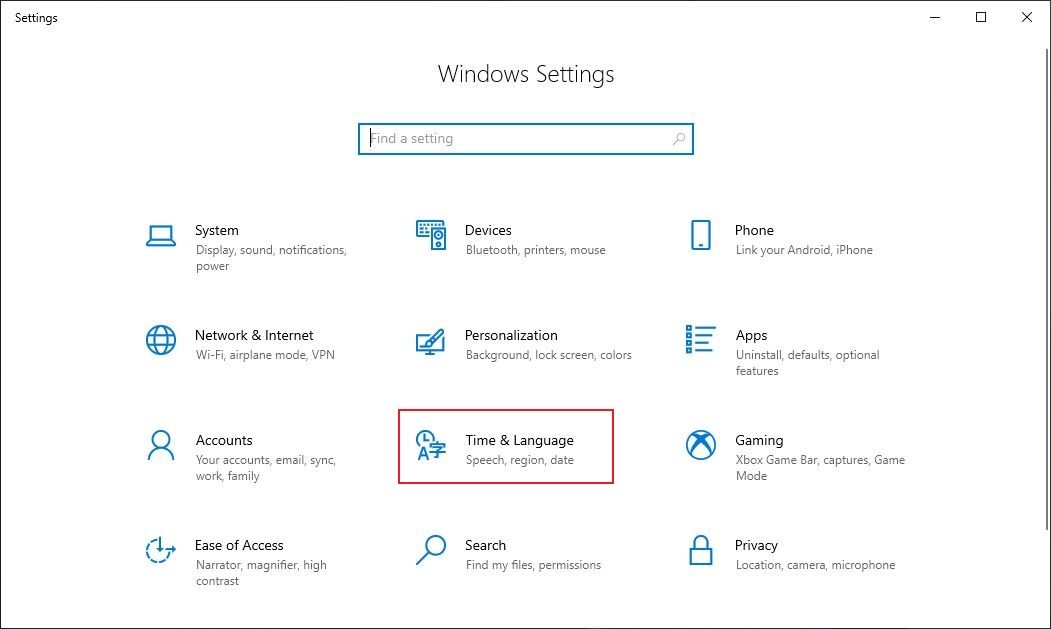
Step 1: First of all, open the “Settings” app on your computer and then click on the “Time & Language” option.

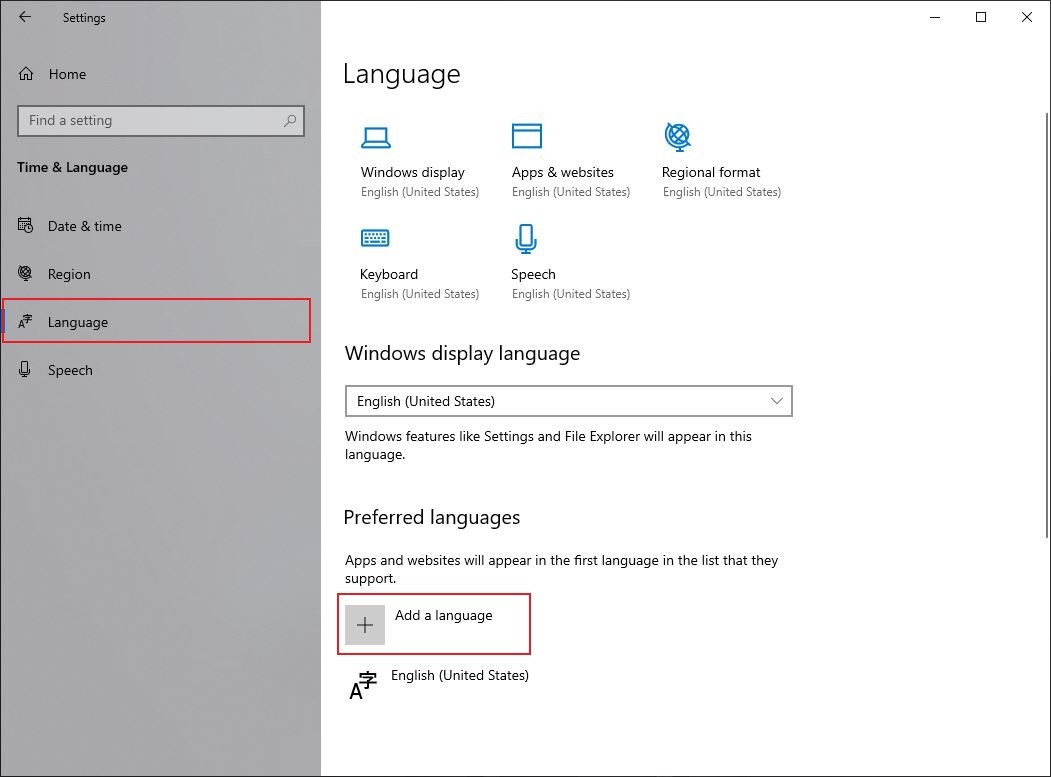
Step 2: Now, from the left-hand side, click on the “Language” option.
Step 3: In the Preferred Languages section, click on the “Add a language” button.

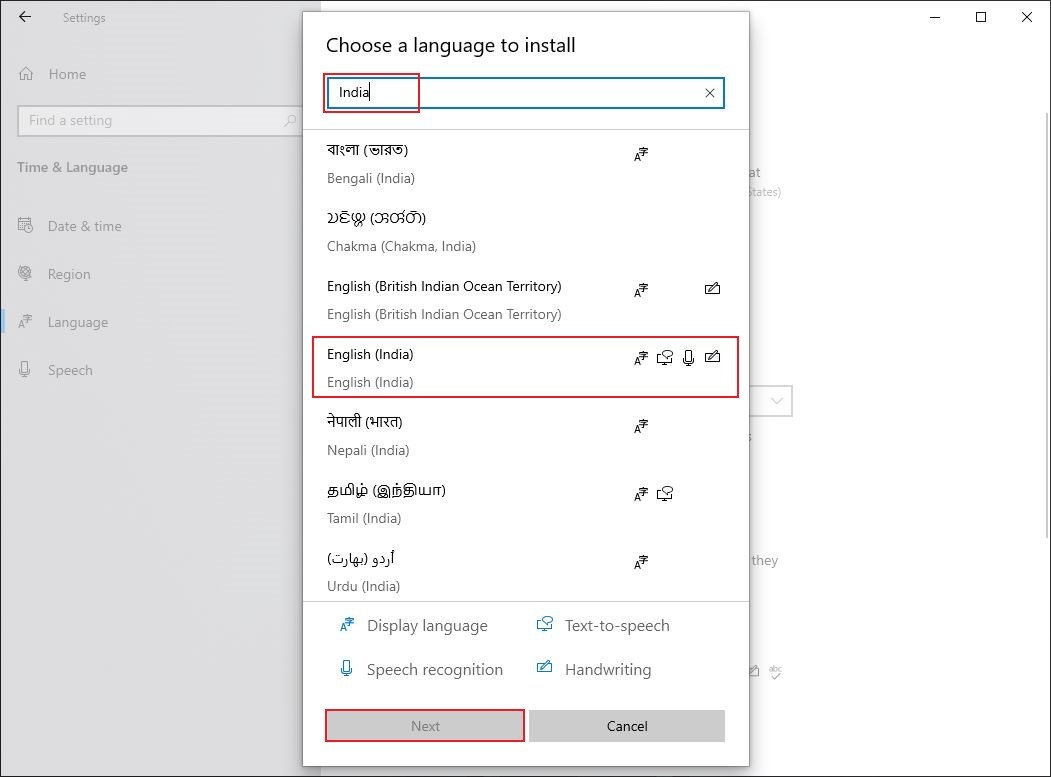
Step 4: Search for the language that you want to use. You can also enter the name of your country to find relevant languages. Now, select the language you want to use and then click the “Next” button.

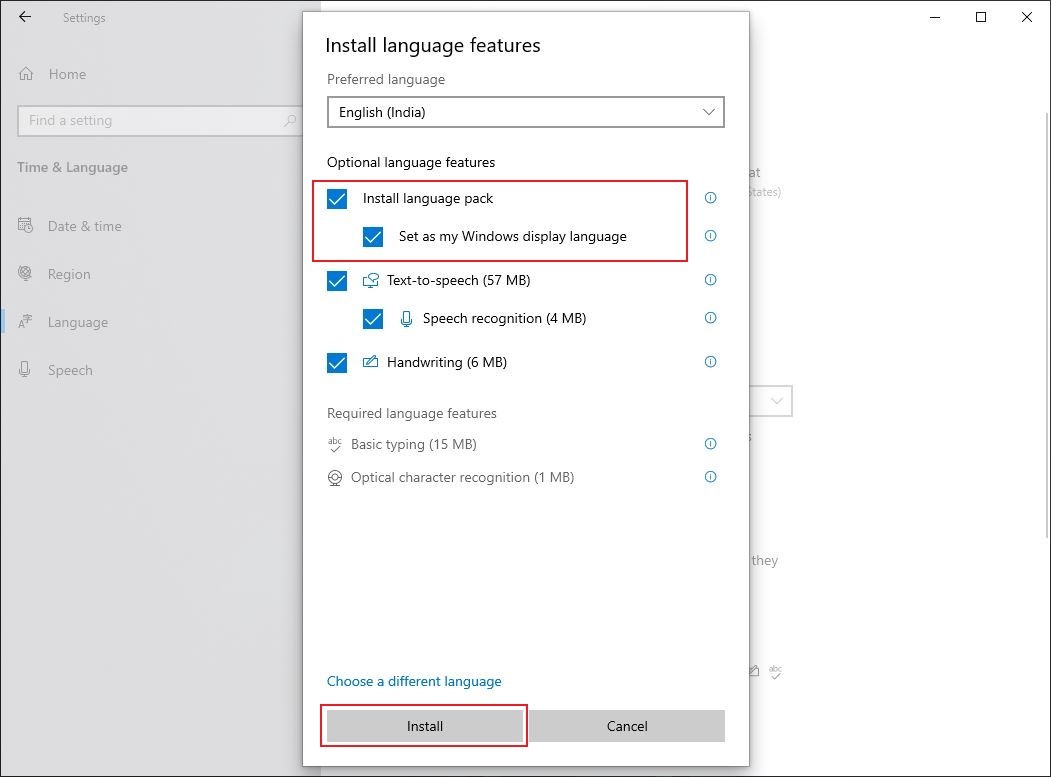
Step 5: Check the “Install language pack” option and also check the “Set as my display language” option. After that, click on the “Install” button.

The system will now ask you to sign out of the computer and then sign back in for the changes to apply. Do that and your system will be using the newly installed language as the default language, including the login screen, Settings, File Explorer, apps, browser, desktop, etc.

