In Windows 10 operating system, there are several visual customizations that can be easily done using the Settings app provided by Microsoft. However, there are some changes that aren’t straightforward.
For instance, you cannot change the default font or the system font through the Settings app. However, Windows 10 does allow users to change the fonts used by Windows throughout the system.
In this guide, we will show you a step-by-step process on how you can change the system font to your favorite one using the Registry Editor.
How to change default fonts in Windows 10
Step 1: First of all, open the Notepad on your computer. For this, open the Start menu and search for Notepad then click on the app.

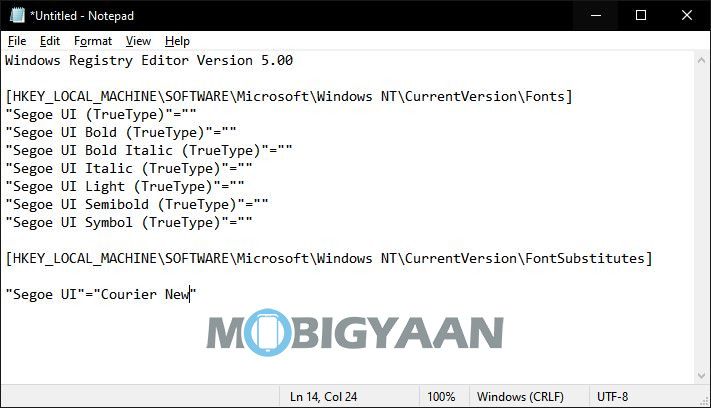
Step 2: In the Notepad, copy and paste the following:
Windows Registry Editor Version 5.00

[HKEY_LOCAL_MACHINE\SOFTWARE\Microsoft\Windows NT\CurrentVersion\Fonts]
"Segoe UI (TrueType)"=""
"Segoe UI Bold (TrueType)"=""
"Segoe UI Bold Italic (TrueType)"=""
"Segoe UI Italic (TrueType)"=""
"Segoe UI Light (TrueType)"=""
"Segoe UI Semibold (TrueType)"=""
"Segoe UI Symbol (TrueType)"=""

[HKEY_LOCAL_MACHINE\SOFTWARE\Microsoft\Windows NT\CurrentVersion\FontSubstitutes]

"Segoe UI"="NEW-FONT-NAME"
Step 3: In the code mentioned above, change the “NEW-FONT-NAME” to the actual name of the font that you want to use as the default font.

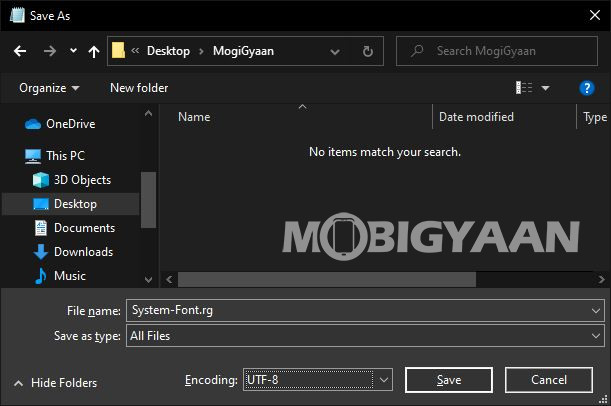
Step 4: Save the file with any name but make sure to keep the extension as “.reg”.

Step 5: Now, double-click on the newly created file, and in the prompt that appears, click “Yes” and then the “Ok” button.
Step 6: Once everything is done, restart your computer for the changes to take effect.
After the computer starts, the newly selected font should be available throughout the desktop visual elements, including File Explorer, message box, taskbar, and apps that use the system default font settings.

