On the Windows operating system, the regions settings are also applicable for the Microsoft Store which provides a more personalized experience. It is also useful for offering apps or payment methods that might only be available in a specific country. This makes it pretty vital to have proper region settings on your computer.
If you have set the region properly but notice that some of the apps or games aren’t available in your region and want to change the region or country for the Microsoft Store, then here is a step-by-step guide on how you can do that for your Windows 11 computer in a few quick steps.
How to change the country for Microsoft Store in Windows 11
Step 1: Open the Settings app on your computer. For this, search for “Settings” in the Start Menu or press the Windows+i keys on the keyboard.
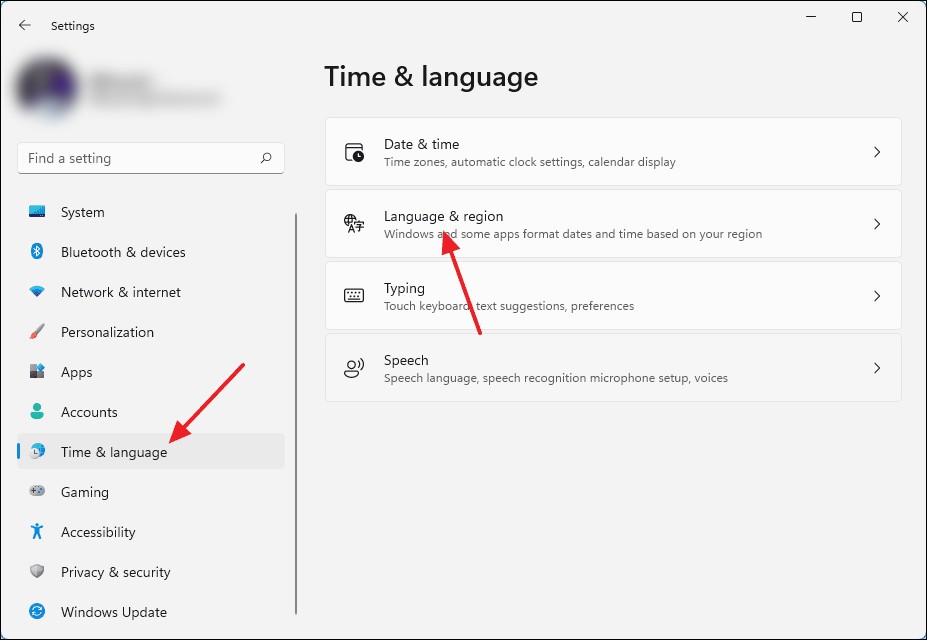
Step 2: Once the Settings app opens, select the “Time & Language” option from the left-side pane and then select the “Language and region” option that is available on the right-side pane.

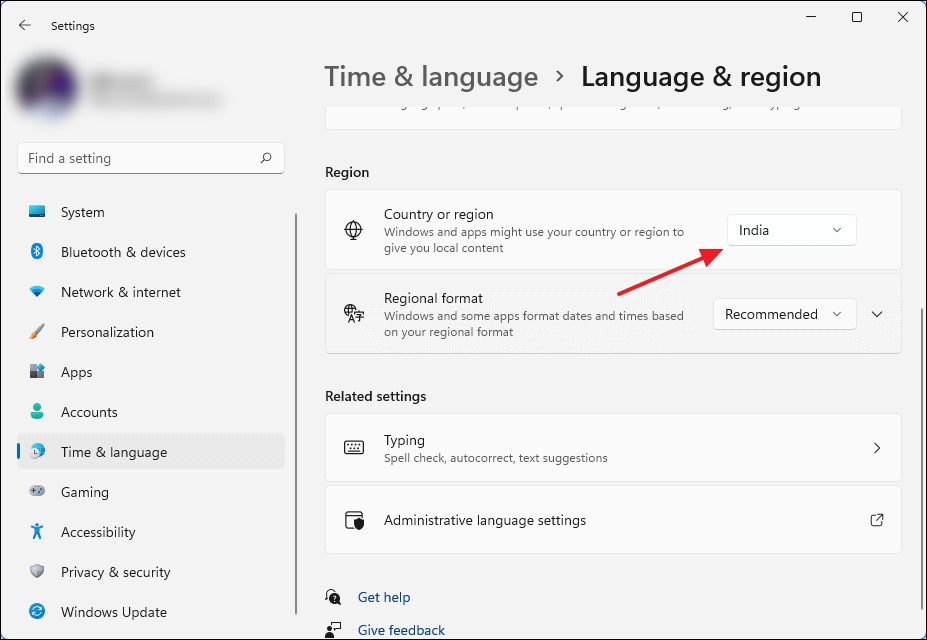
Step 3: Now, under the Region section, select the country or region from the drop-down list that you want to set for your system. The list contains names of all the countries or regions where the Microsoft Store is available.

That’s it. Once you have made the change, the Microsoft Store will refresh itself and you can confirm the region change by looking at the currency that is being shown for paid apps.
