With the macOS Catalina update, Apple introduced the support for changing the language for a specific application without the need to change the language for the entire system or affecting any other apps on the device.
If you want to change the language for a specific app, for instance, if you want the Google Chrome web browser to use the Hindi language instead of the system-default English, you can easily do so on your Mac device. In this step-by-step guide, we will show how that can be done in macOS.
How to change the language for an app in macOS
Before proceeding further, close the app for which you want to change the language if it is already open.
Step 1: Open “System Preferences” on your Mac device by clicking on the Apple icon in the top-left corner and then selecting the option from the menu.
Step 2: When the System Preferences app opens on the device, click on the “Language & Region” option.

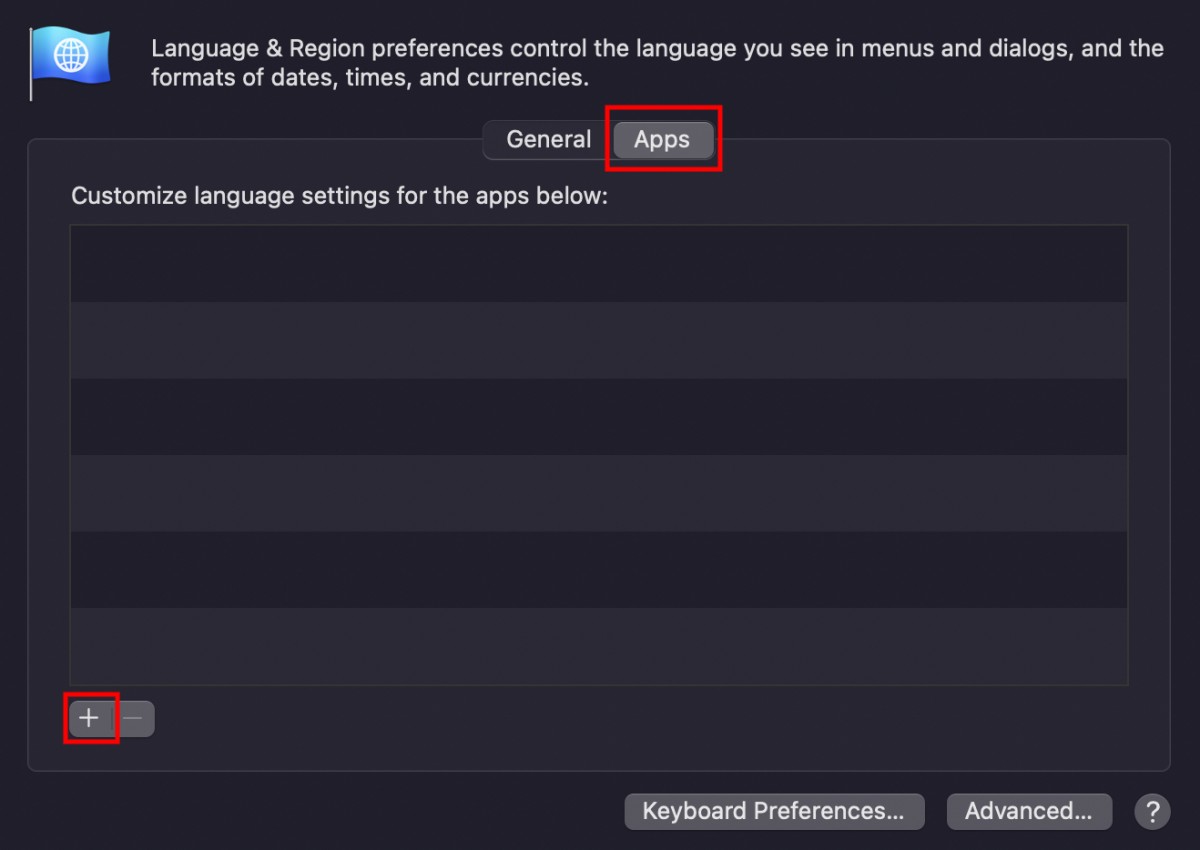
Step 3: In the “Languages & Region” window that opens, click on the “Apps” tab.
Step 4: Now, in the Apps tab, in the bottom-left corner, click on the “+” button to add an application to the list.

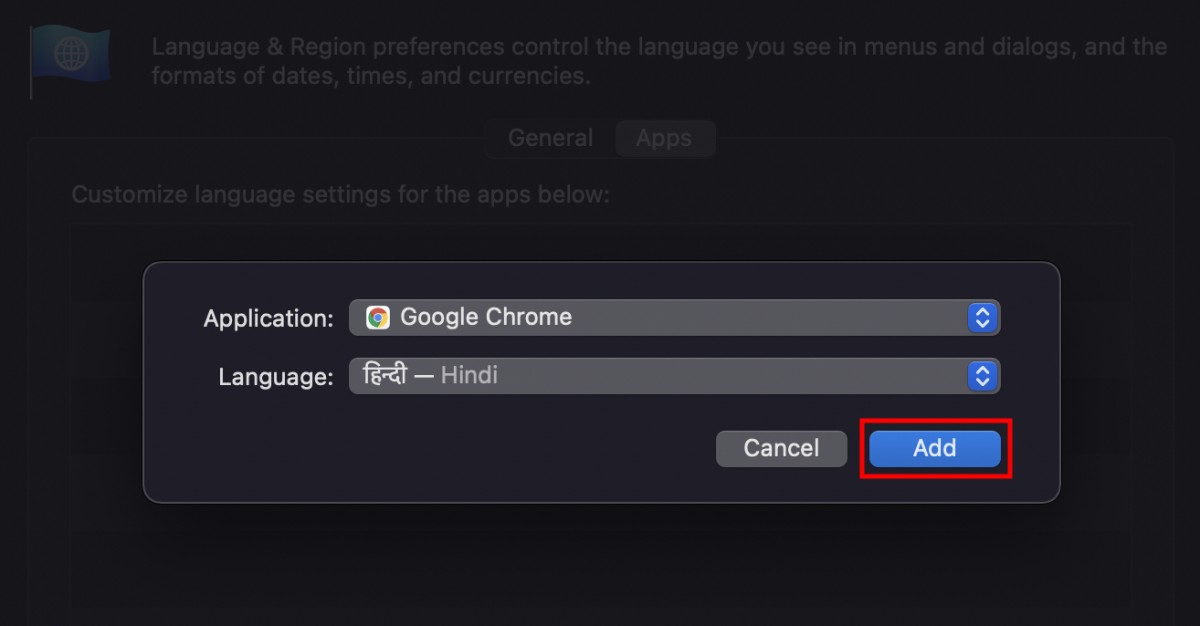
Step 5: In the pop-up that appears on the screen, select the app you want to change the language for and then select the language that you want to apply to the application.
Step 6: Once all that is done, click the “Add” button to save the changes.

Do note that the drop-down for languages only shows the languages that your selected application supports. If you don’t see a specific language in that menu, it means that your selected app doesn’t support that language.

