If you are someone who prefers the full-screen look on your computer when using any of the application or software, then you might want to hide the taskbar to get some extra space on your system. Or simply you just find the taskbar distracting or annoying and want to hide it when working.
In this guide, we will show you a step-by-step process using which you can make the Taskbar on your Windows computer hide automatically when not needed.
How to auto-hide taskbar in Windows
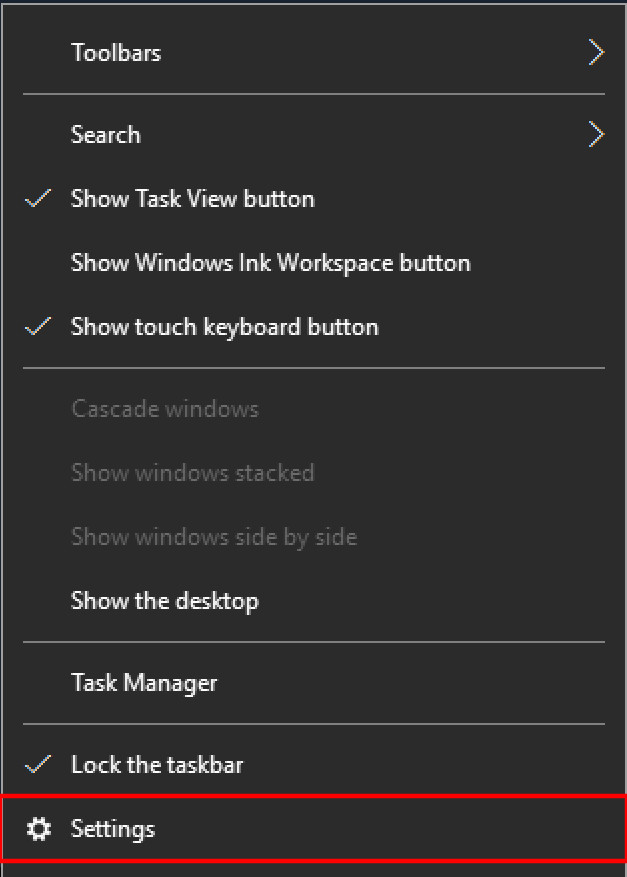
Step 1: Right-click on the empty area of the taskbar on your computer. If you are using Windows in tablet mode, then tap and hold the finger on the taskbar.

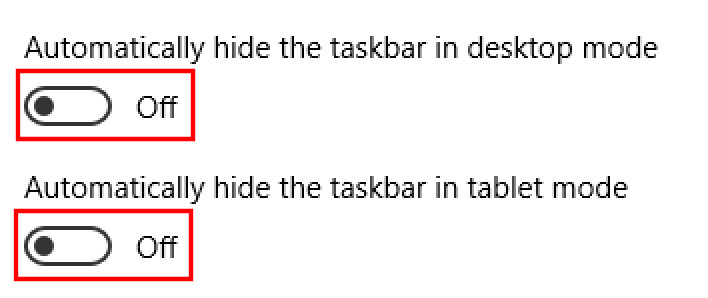
Step 2: From the context menu that appears, toggle on the option that says “Automatically hide the taskbar in desktop mode.” You can also toggle on the option that reads “Automatically hide the taskbar in tablet mode.”

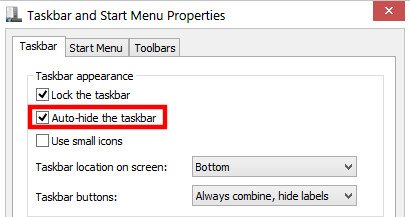
If you are using Windows 8 or Windows 7, then clicking on the Settings will open Taskbar Settings window. In there, tick the checkbox with the option “Auto-hide the taskbar.”

Now, whenever the taskbar is not needed, it won’t appear on the screen. When needed, you can just move the move to the taskbar area on the screen and it will pop back up from the bottom of the screen for a few seconds.
There are some other Taskbar related tweaks that you might be interested in, such as moving the position of the taskbar. By default, the taskbar is at the bottom of the screen but you can move it to the left, right or even top of the screen, based on your liking.
You can also check out our other Windows guide to make your experience even better by customizing the operating system as per your needs. We have also covered quite a few guides related to macOS and Chromebook as well.

